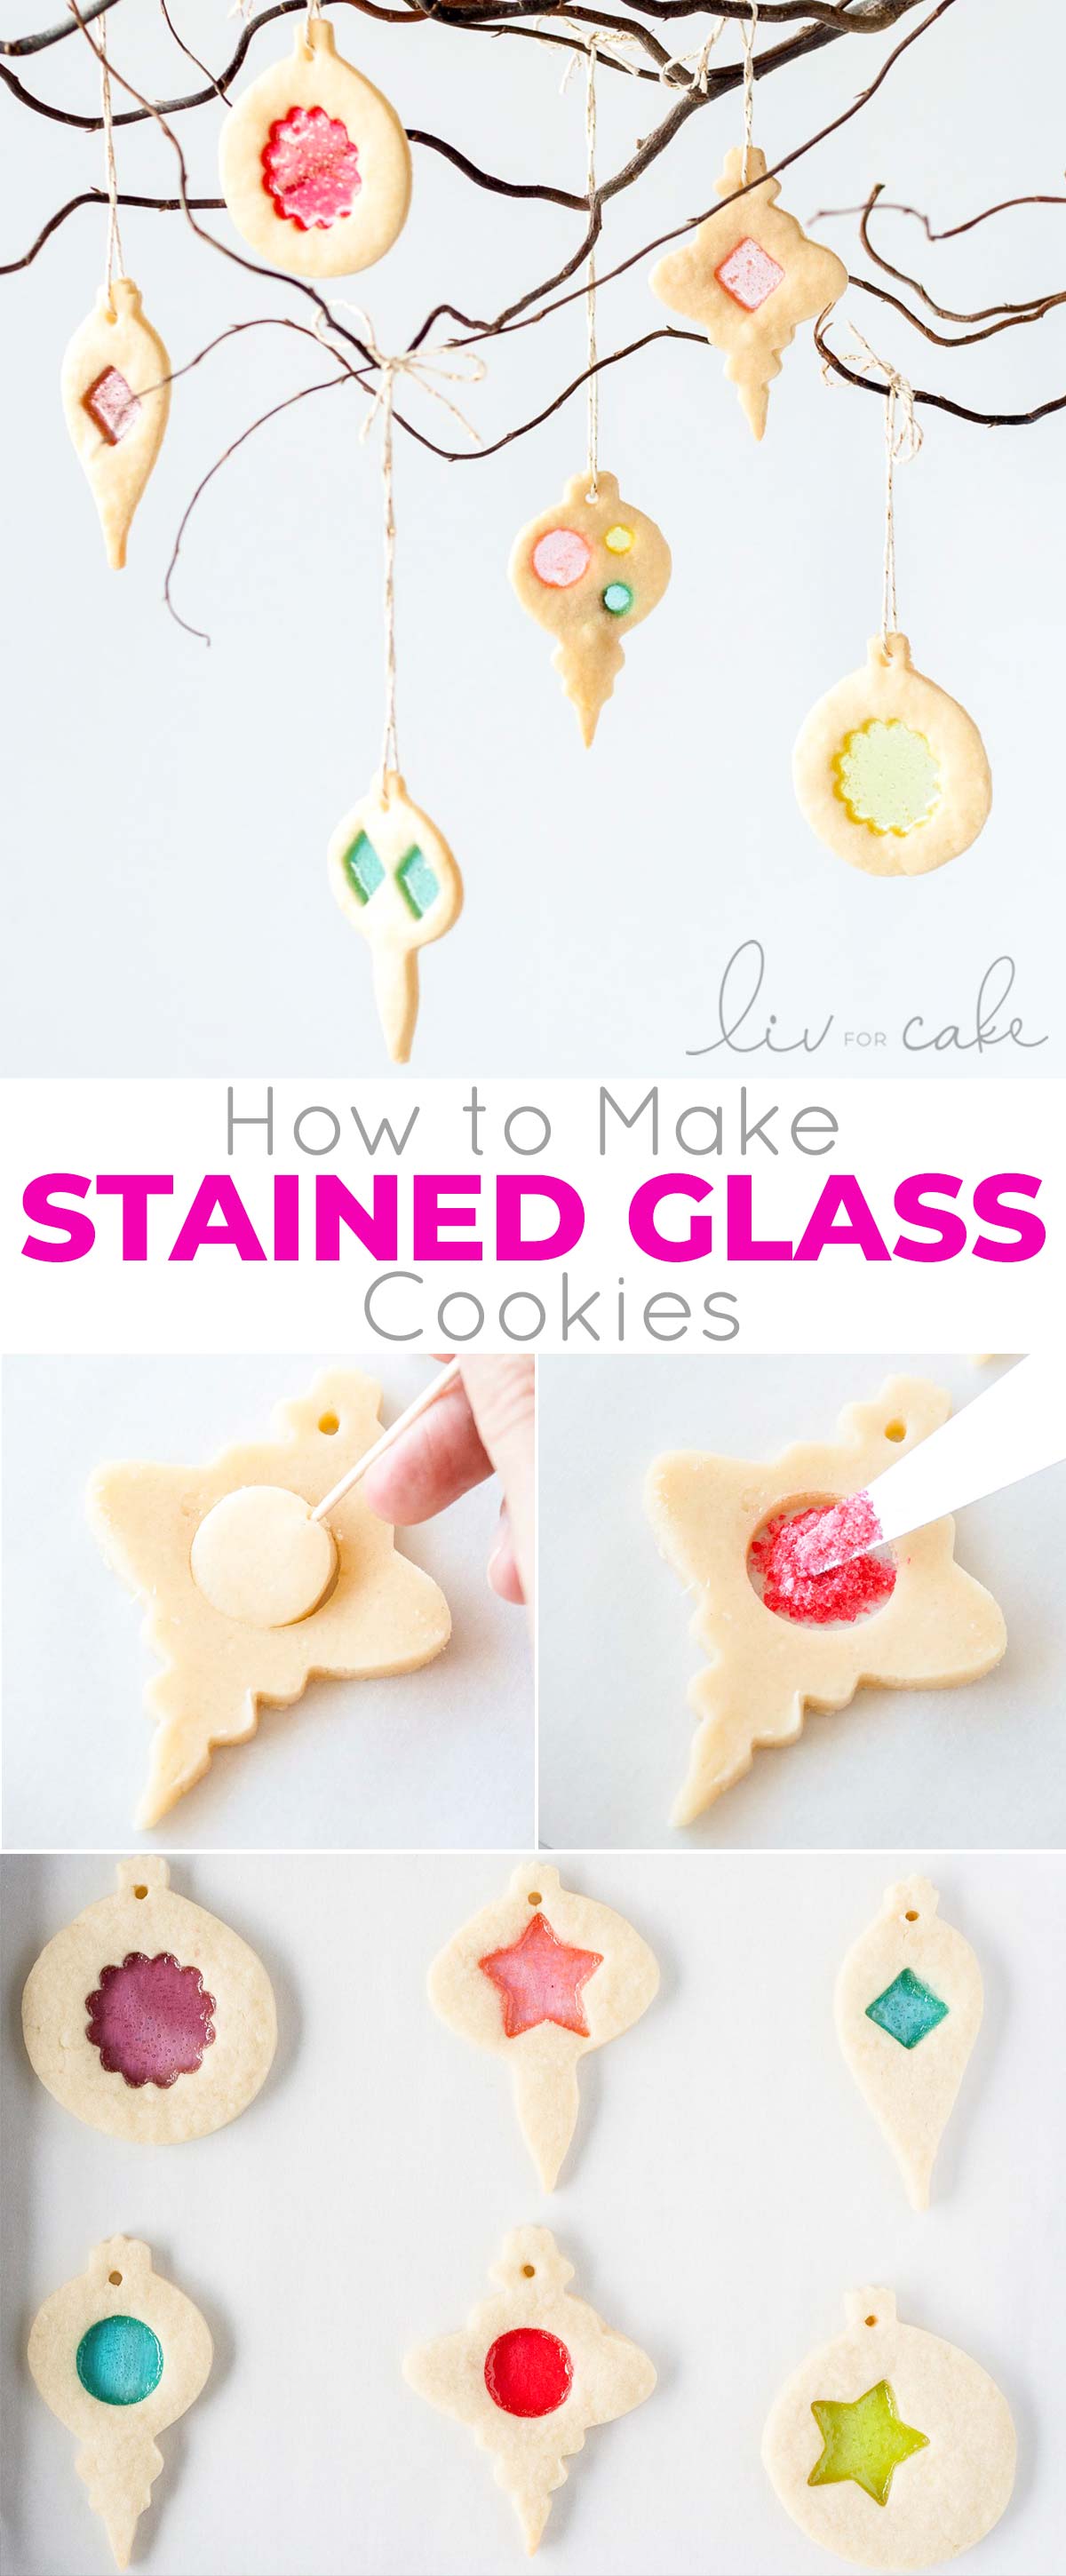
Learn how to make stunning stained glass cookies with this detailed tutorial! Perfect for holiday cookie exchanges or hanging on your tree.
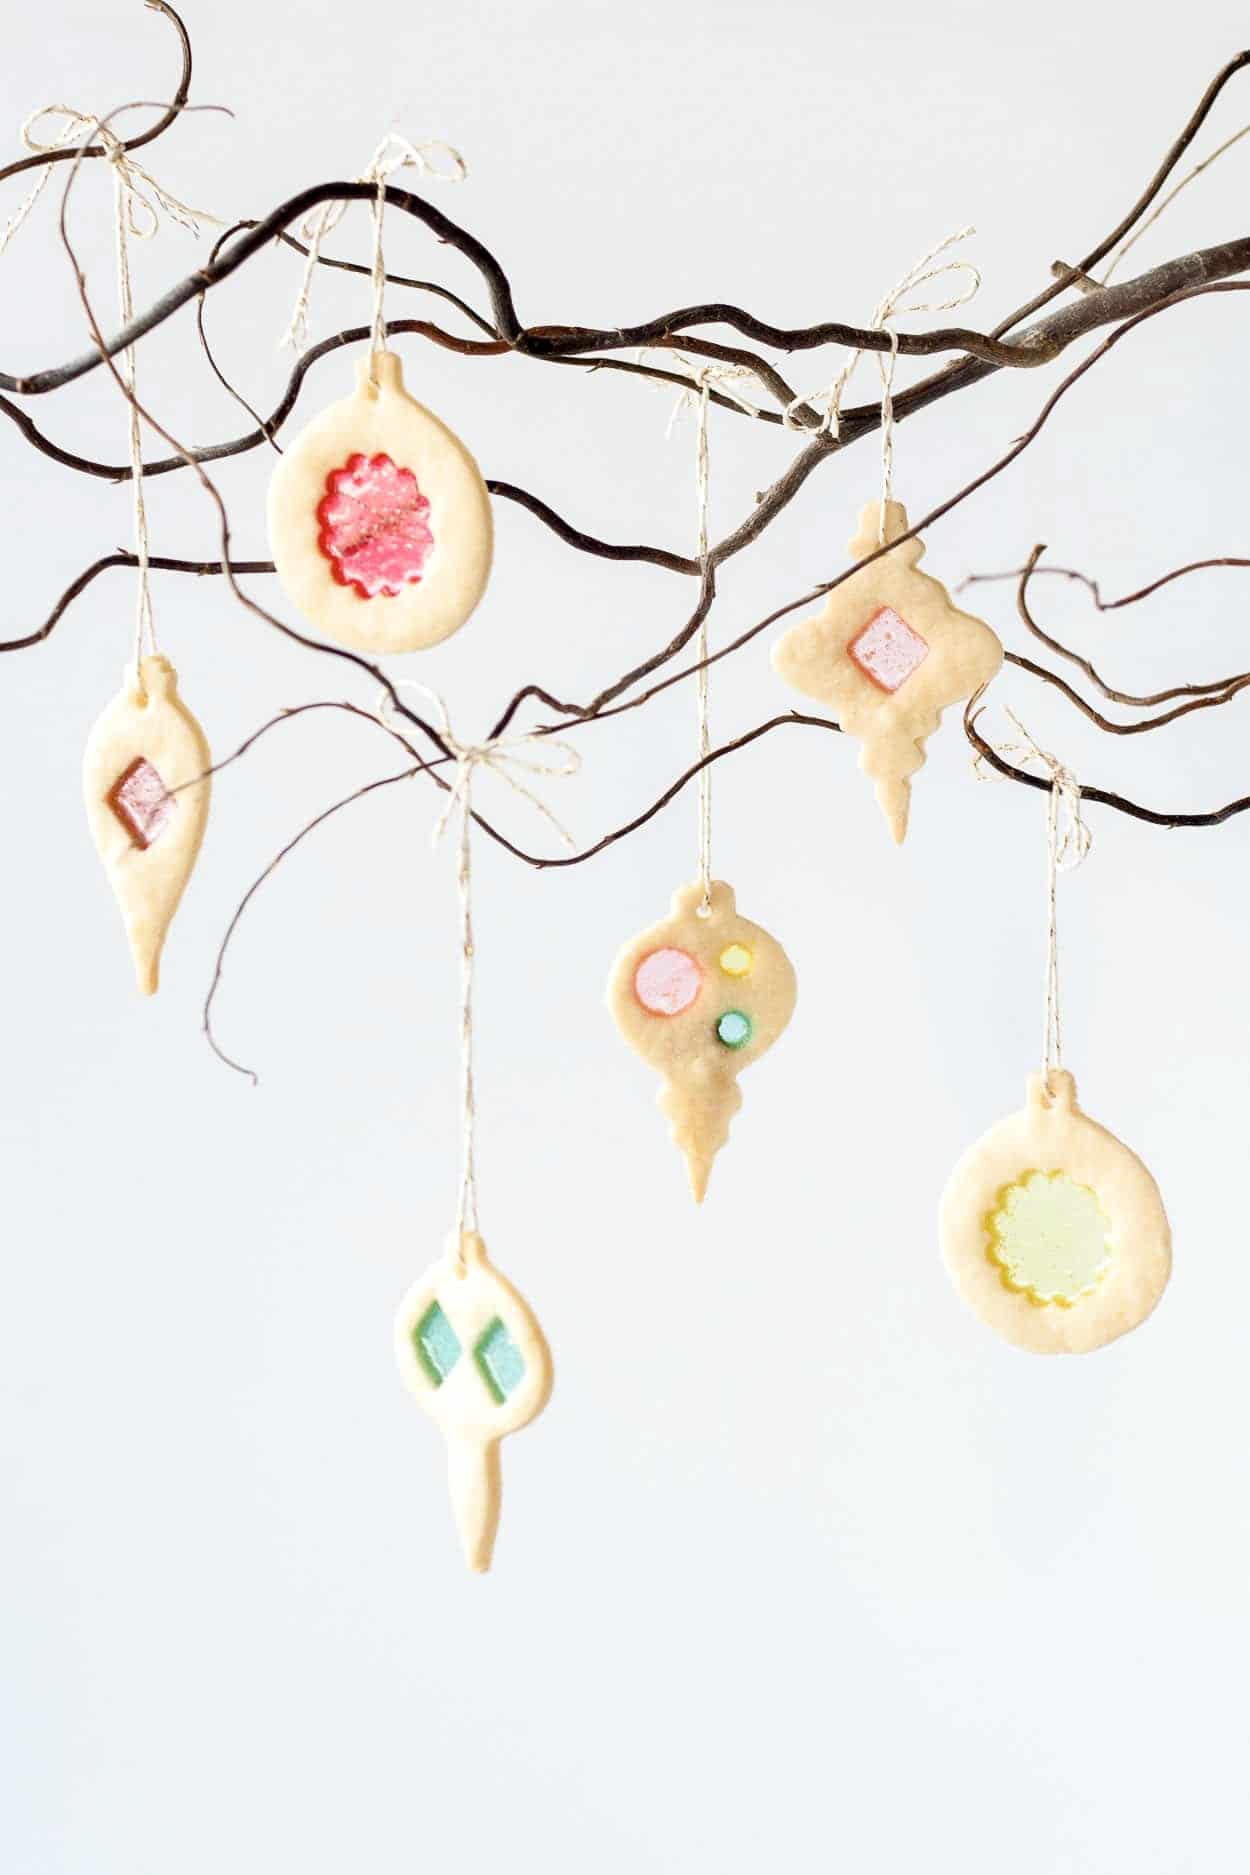
I would be lying if I told you these Stained Glass Cookies were easy to make. They aren’t exactly difficult per se, they just take a crapload of time. Especially if you’re a bit of a perfectionist… ahem.
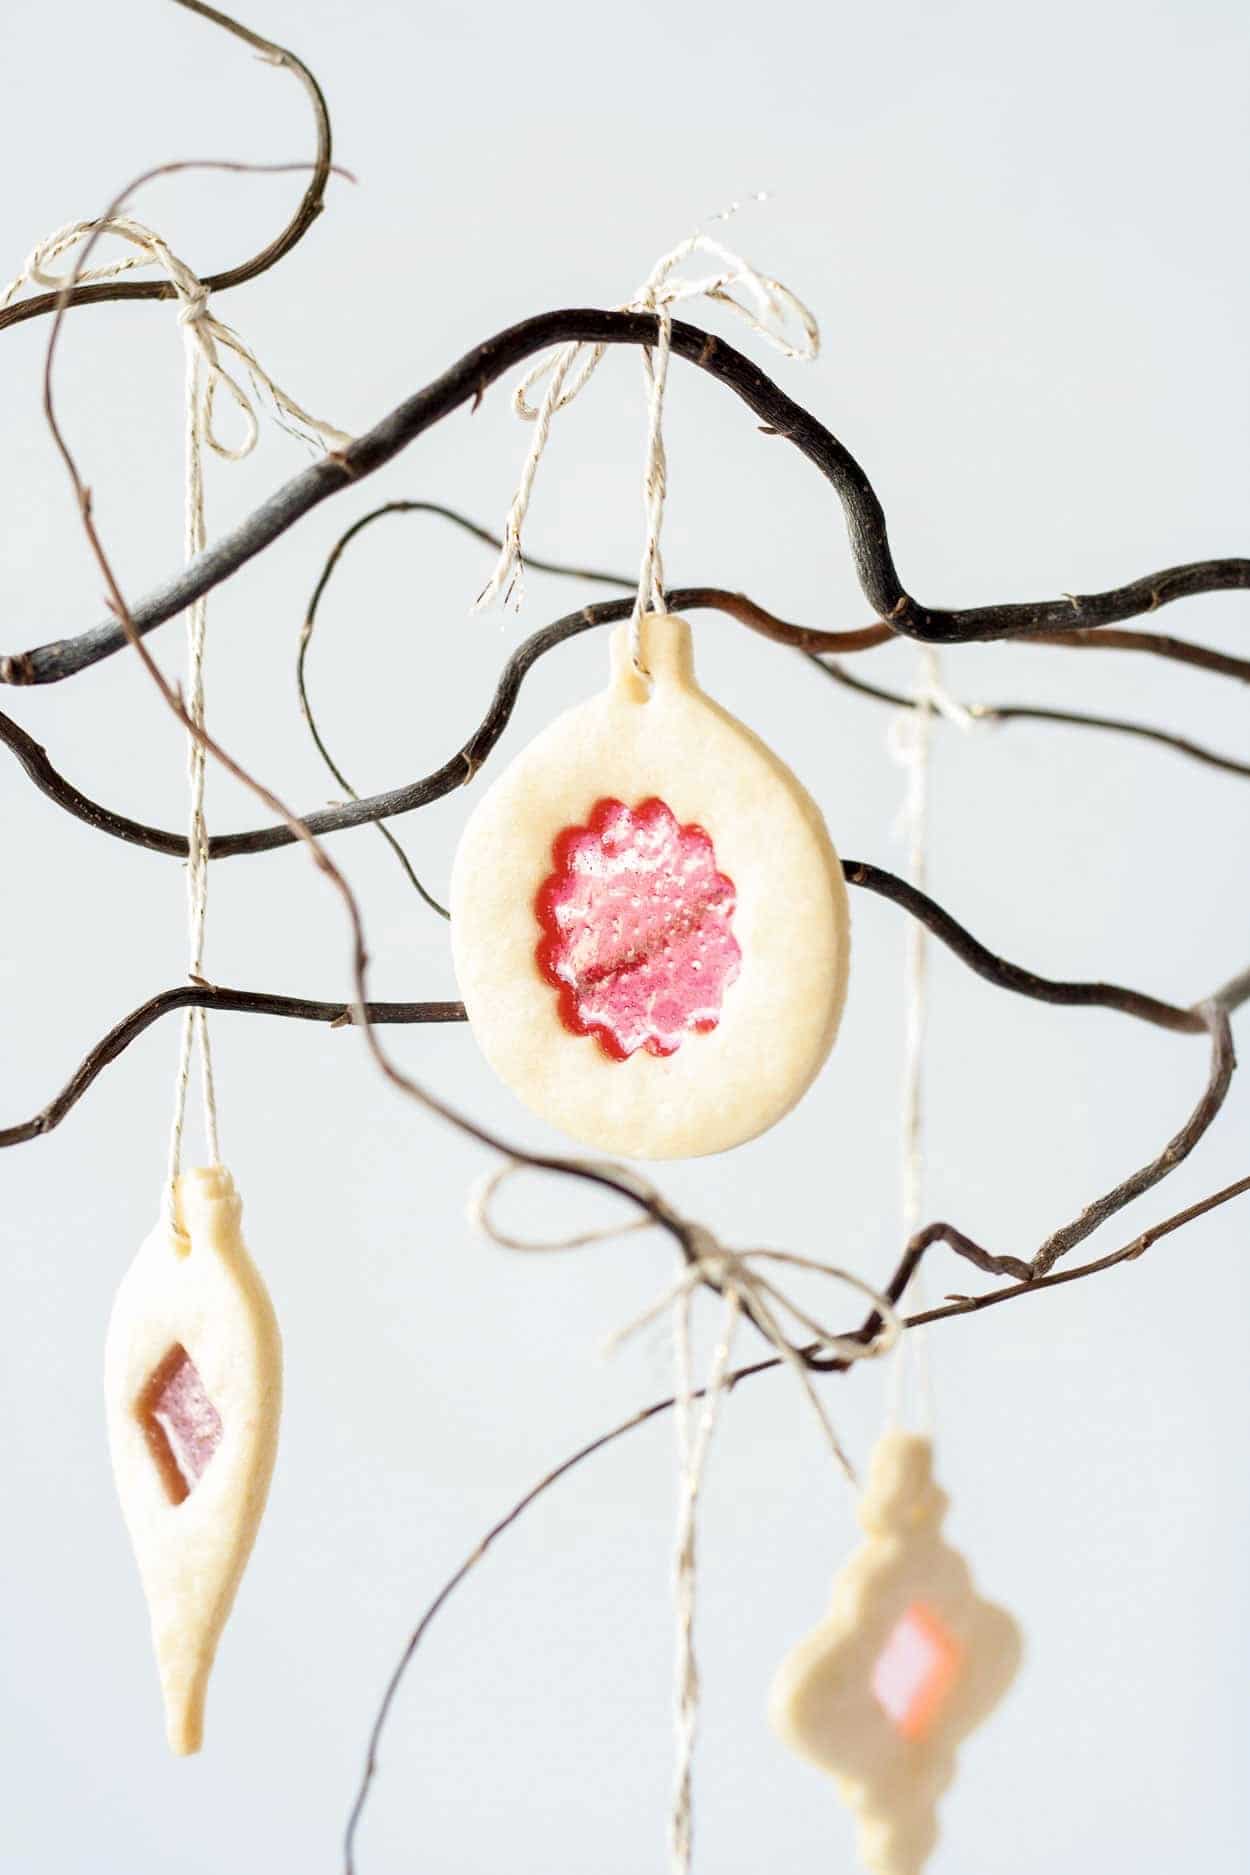
But seriously, how pretty are these cookies?? Totally worth the effort.
I created a tutorial so that you can wow your friends and family and adorn your tree with these pretty Christmas cookies!
Oh yeah, they’re also 100% edible. Cookie + candy makes for a yummy combo if you can allow yourself to eat any of them. I snacked on some duds, but the best ones are staying right on the tree for the holiday season!
How to Make Stained Glass Cookies
The stained glass in these cookies is made of crushed up hard candies. They can be any candy you like as long as they are hard. I used Jolly Ranchers because I liked the range of colors, but you could use Lifesavers or something similar.
You’re going to need a food processor or a kitchen mallet or something similar to crush the candies up.
You want to get them to the consistency of sand, not powder. In hindsight, store-bought sanding sugar would probably do the trick — I haven’t tested it though! (UPDATE 2020: Sanding sugar does not work)
I used a food processor to pulverize one color at a time. It took about 15 seconds or so for each color. If you live in a house, a kitchen mallet would be an easy option, but if you’re in an apartment with neighbors, I’d advise against it. Even the food processor was super loud!
Though I suppose you could always console your neighbors afterward with cookies.
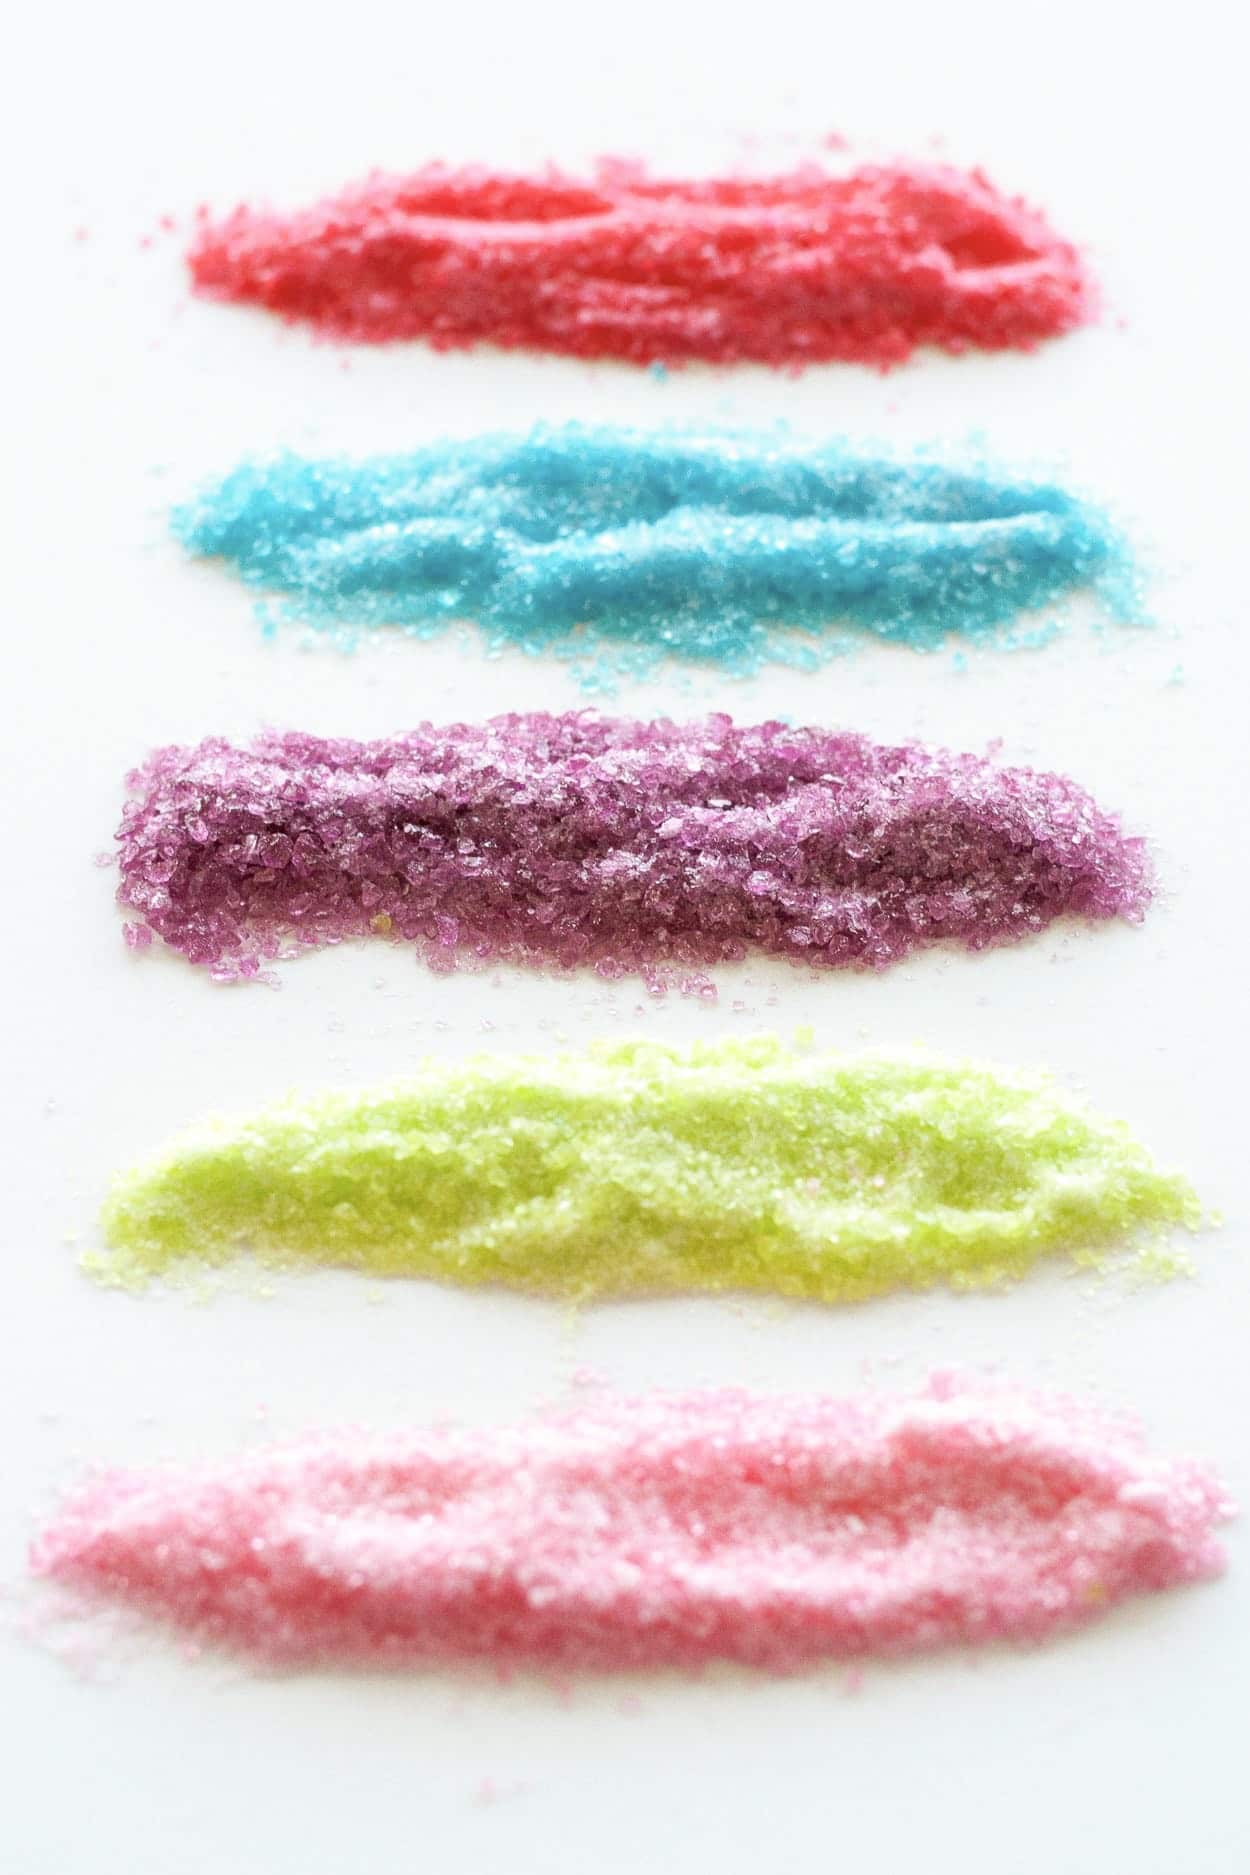
You can make the crushed candy in advance, but I did it while my sugar cookie dough was chilling.
I’m going to skip over the rolling and cutting out the dough process because it’s pretty straight forward (aka I didn’t take any pictures of it – sorry!). Important to note is to chill your dough.
After you’ve made the dough (according to the recipe below, or using your favorite sugar cookie recipe), wrap it in plastic wrap, shape it into a flat disc, and stick it into the fridge for about an hour.
Once chilled, take 1/4 of that dough and roll it out to 1/8″ thickness. Use your favorite cookie cutters to cut shapes out and place them onto a lined baking sheet. Here are the ornament cookie cutters I used. So perfect for the holiday season!
After you’re done cutting out the shapes, the dough will have softened a bit. If you plan to use these stained glass cookies as ornaments, use the blunt end of a kitchen skewer to poke a hole into the top of the cookie.
Do this when the cookie dough is soft — if it’s straight out of the fridge, it will be too hard and the dough will crack when you try to poke the hole. I know from experience! That poor first batch…
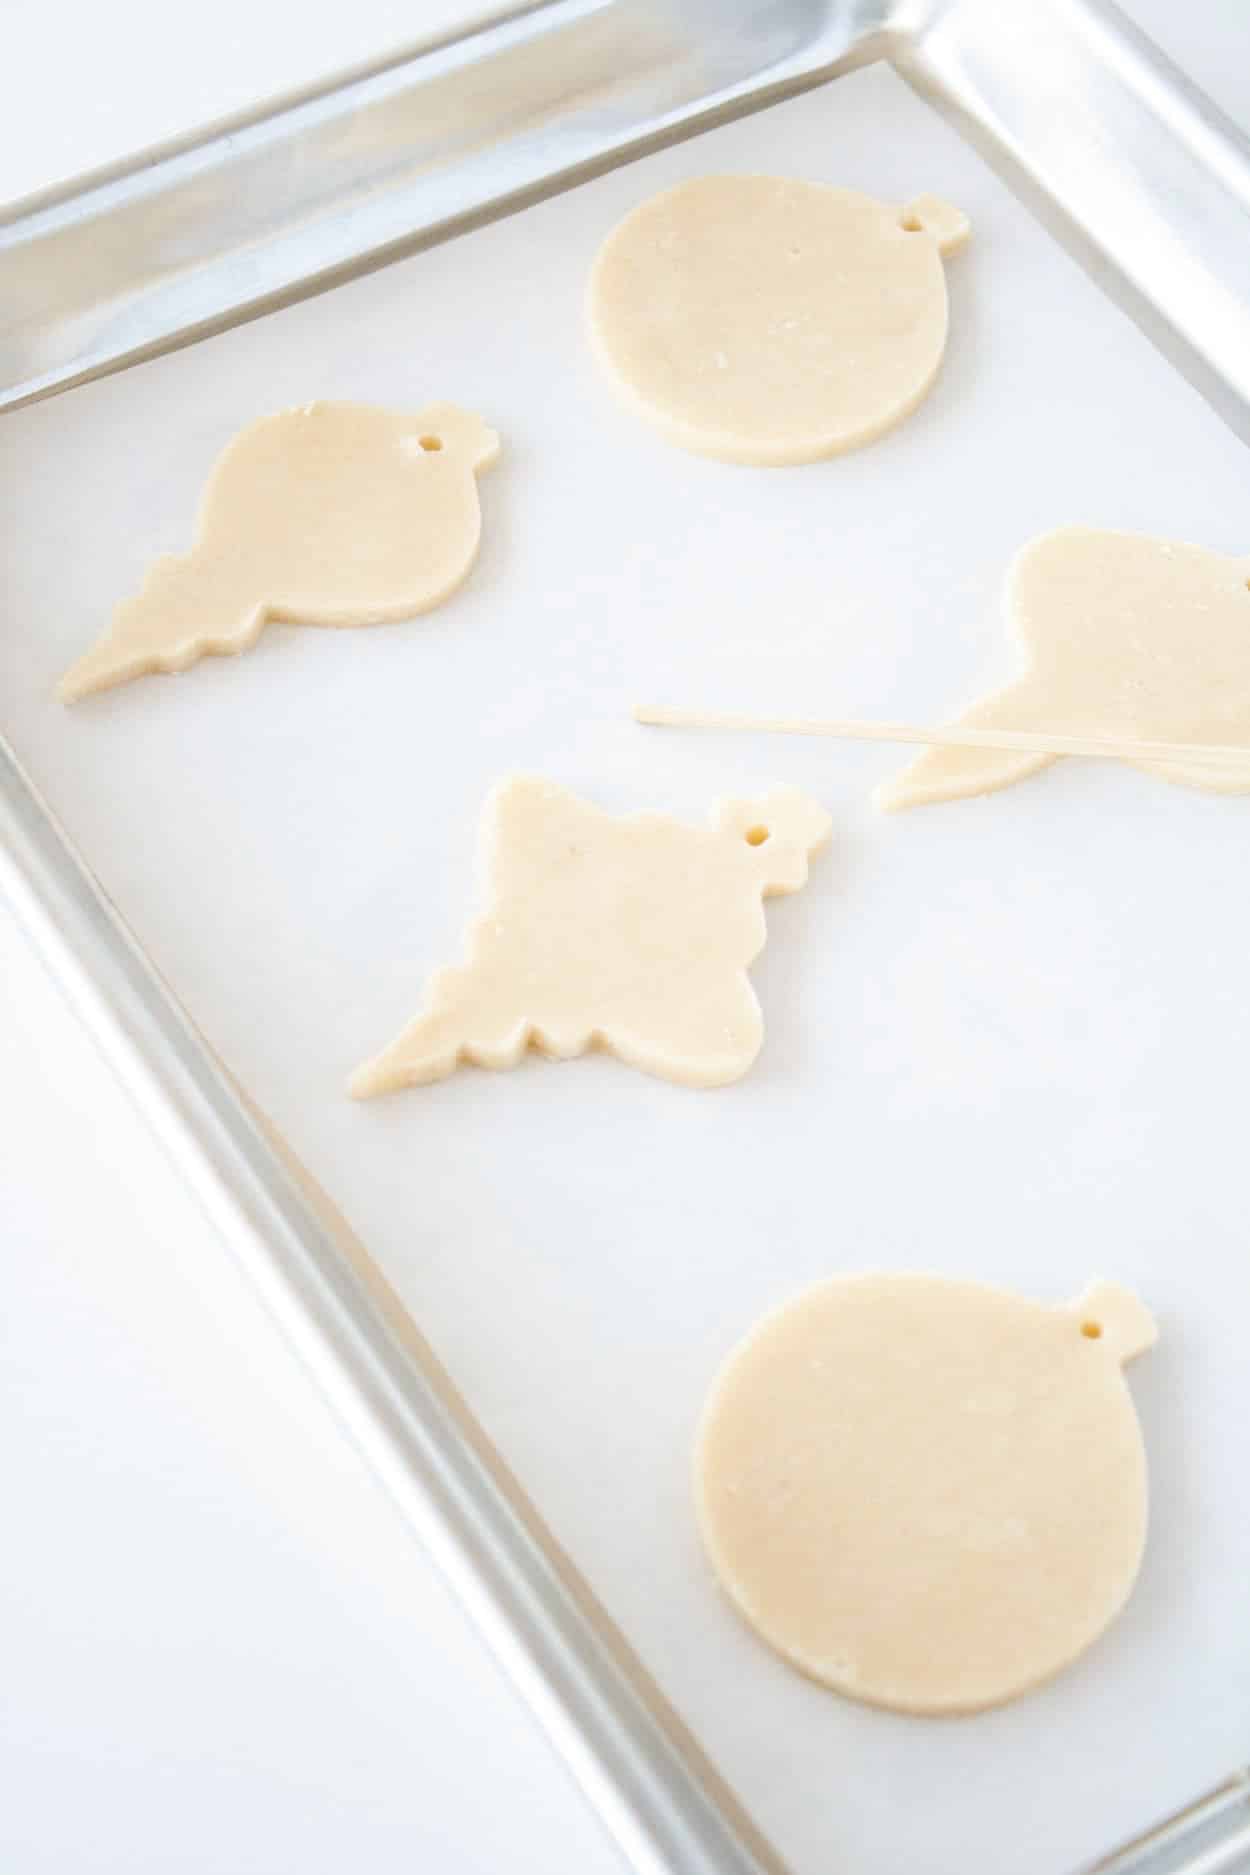
Once that’s done, place the cookies into the fridge to set again while you work on another 1/4 of the dough.
Remove the chilled cookies from the fridge and use smaller cookie cutters or a sharp knife to cut shapes for the stained glass. Use a toothpick to nudge out any stubborn cutouts left behind.
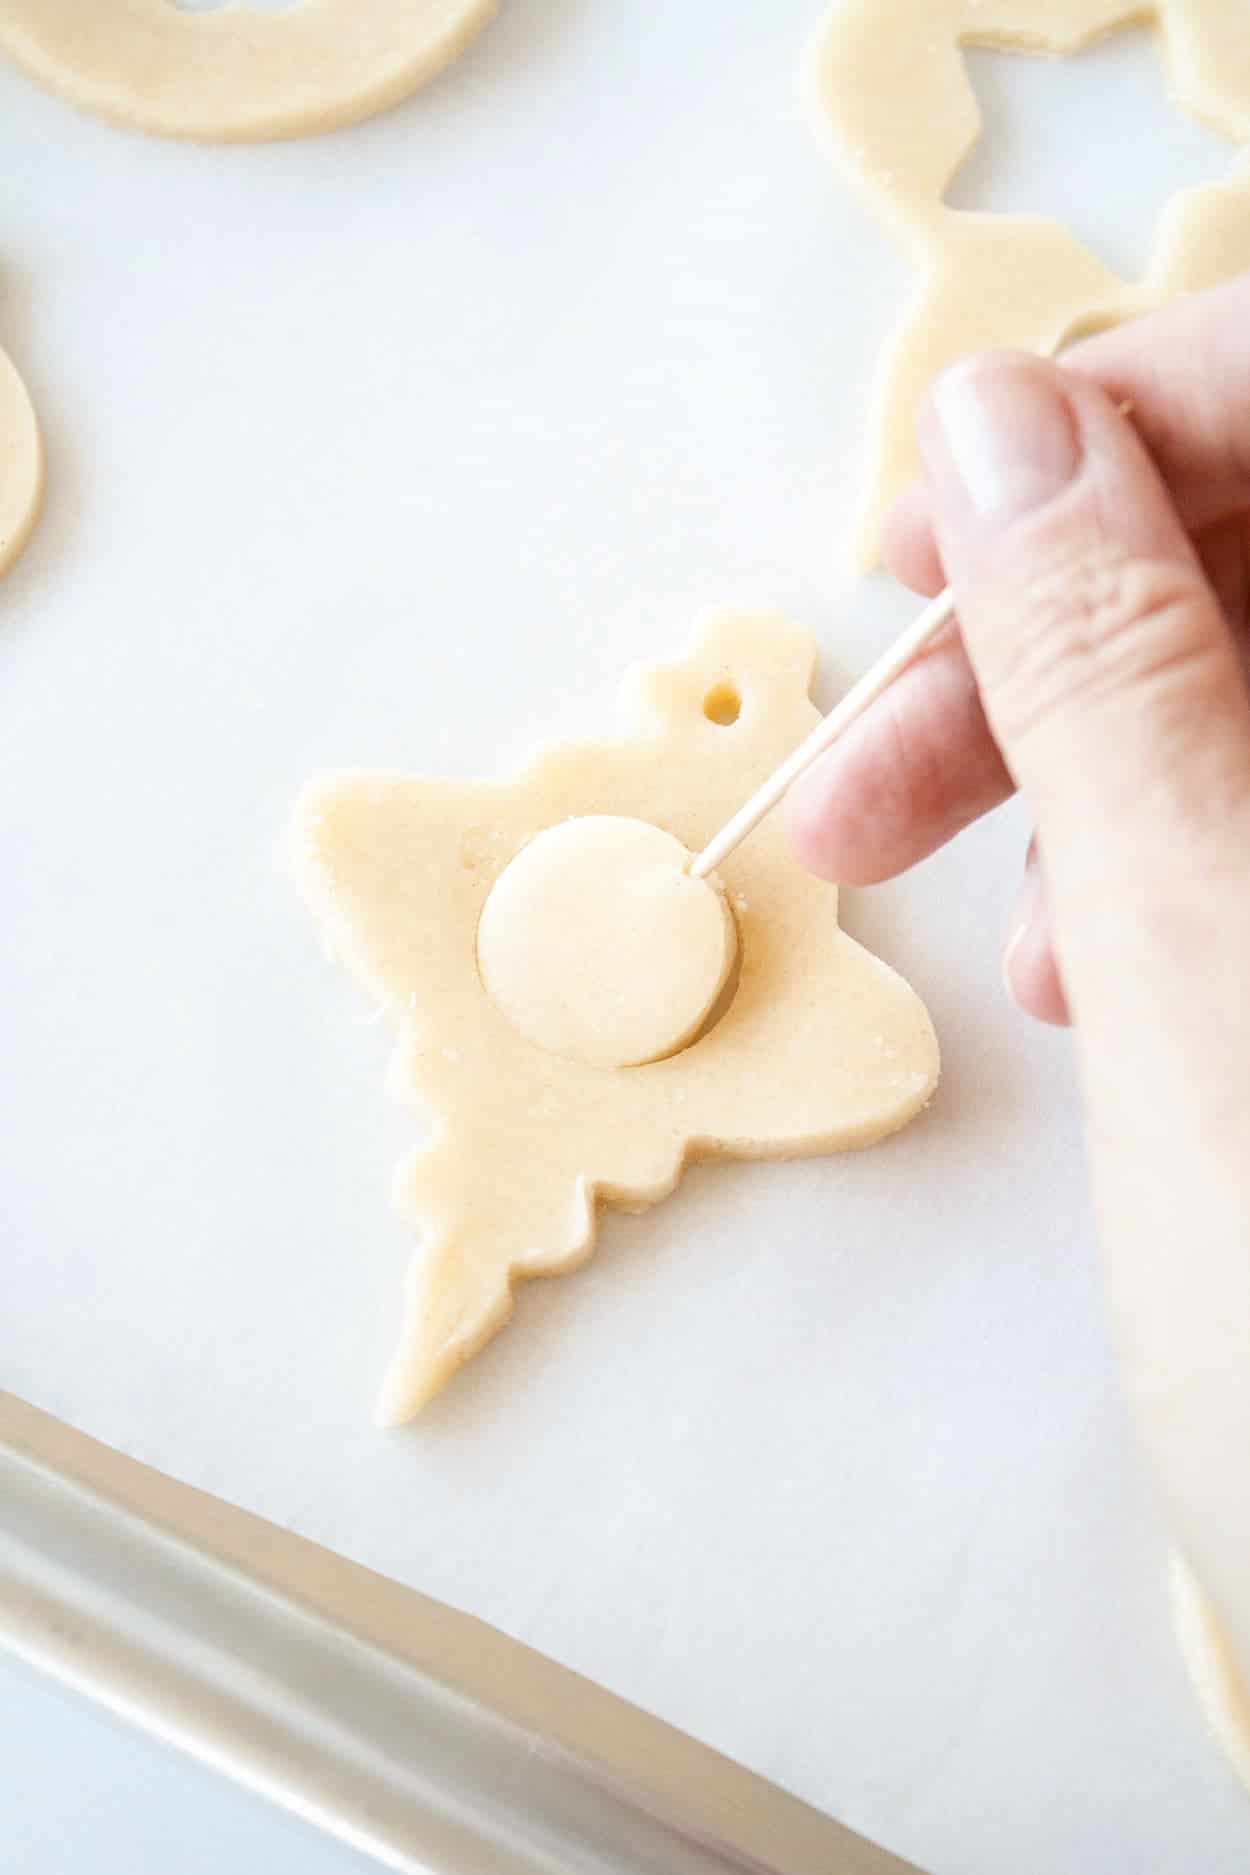
Next, use a tapered offset spatula or the tip of a small knife to fill in the cutouts with your crushed candy.
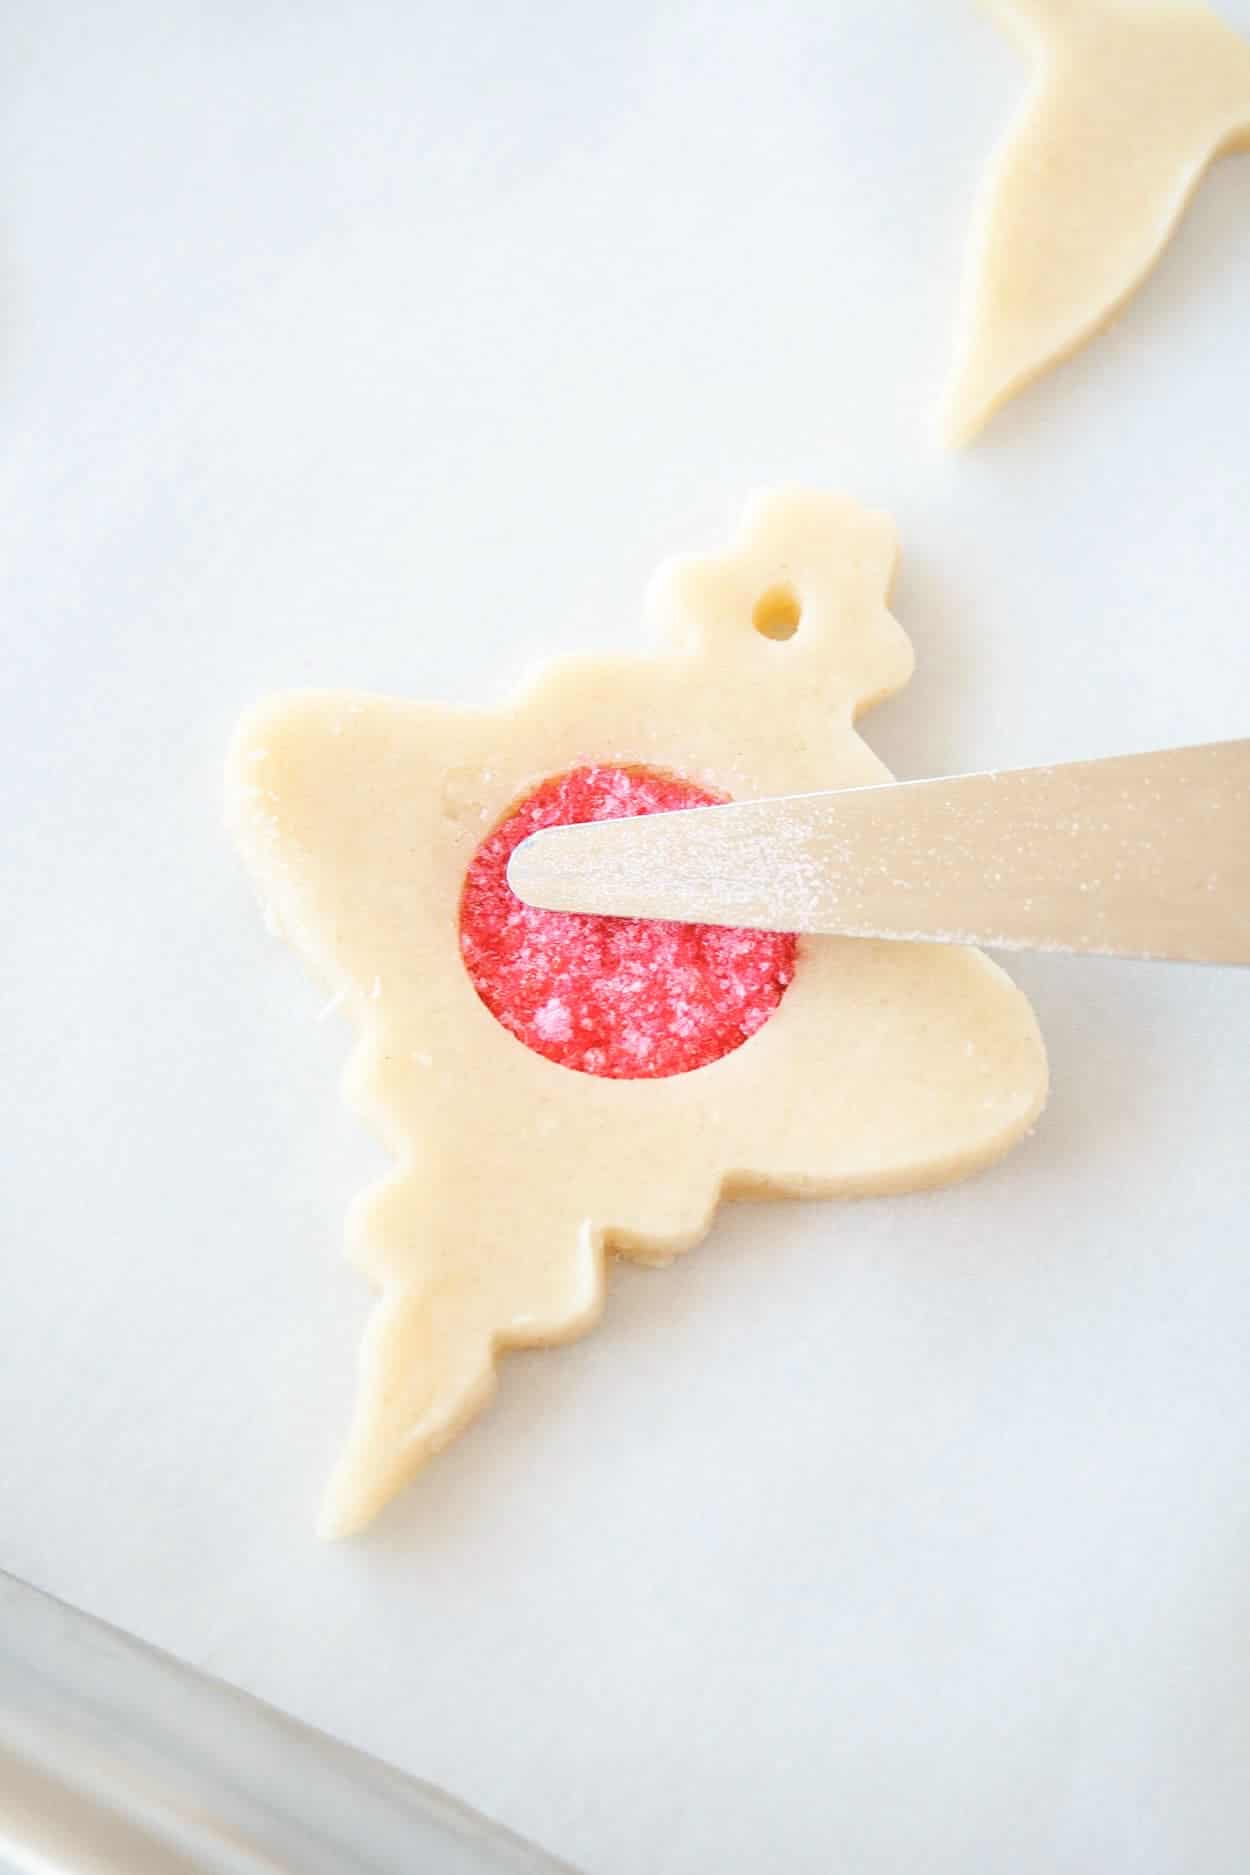
Be careful not to get any on the cookie itself — use a pastry brush to brush off the excess.
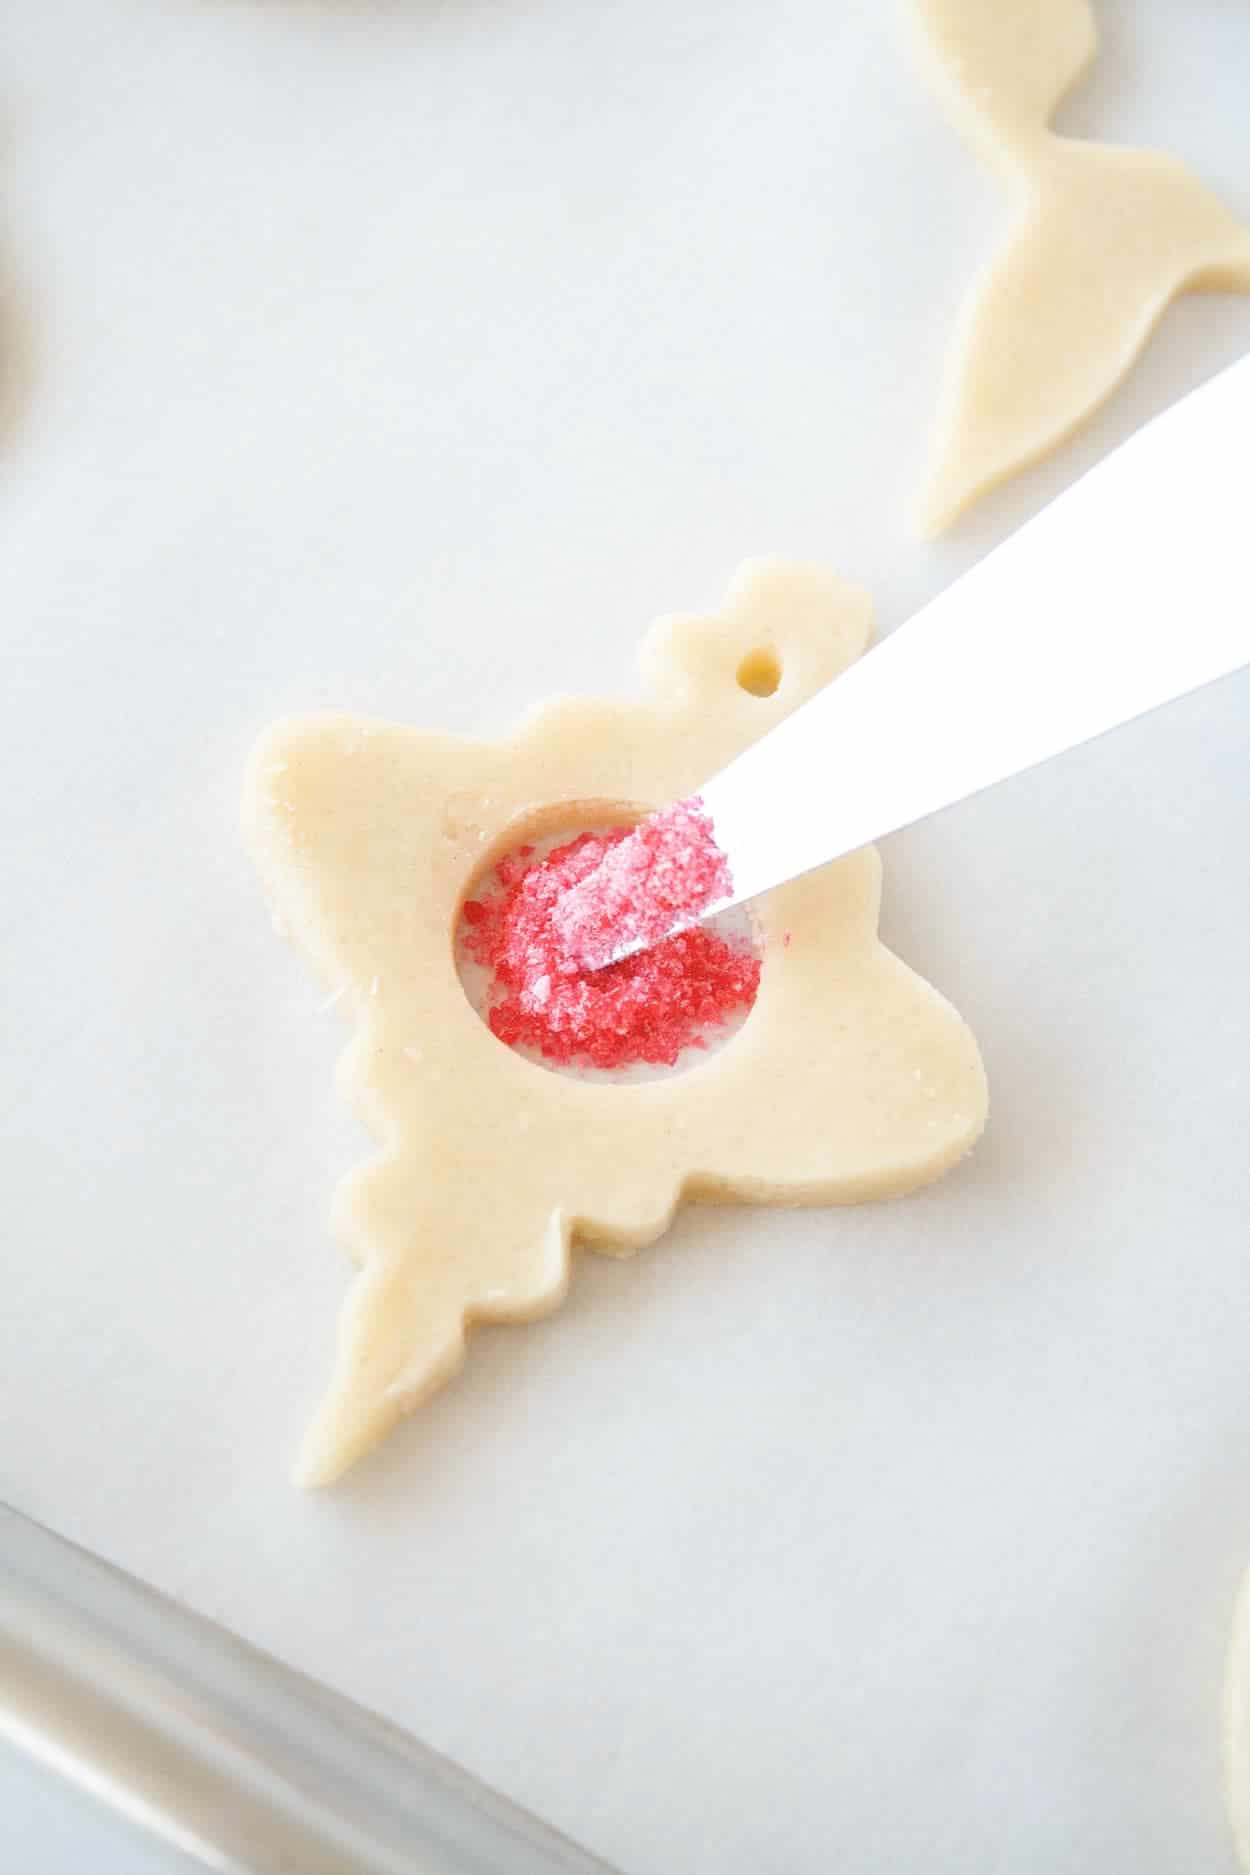
Fill with crushed candy just to the top of the dough. Spread evenly, and nudge into any nooks and crannies.
Once all cookies are filled, you may want to pop them back into the fridge for 15mins to set up a bit. You know, if the cookie dough has softened too much because you spent WAY too much time making sure each cookie was perfect.
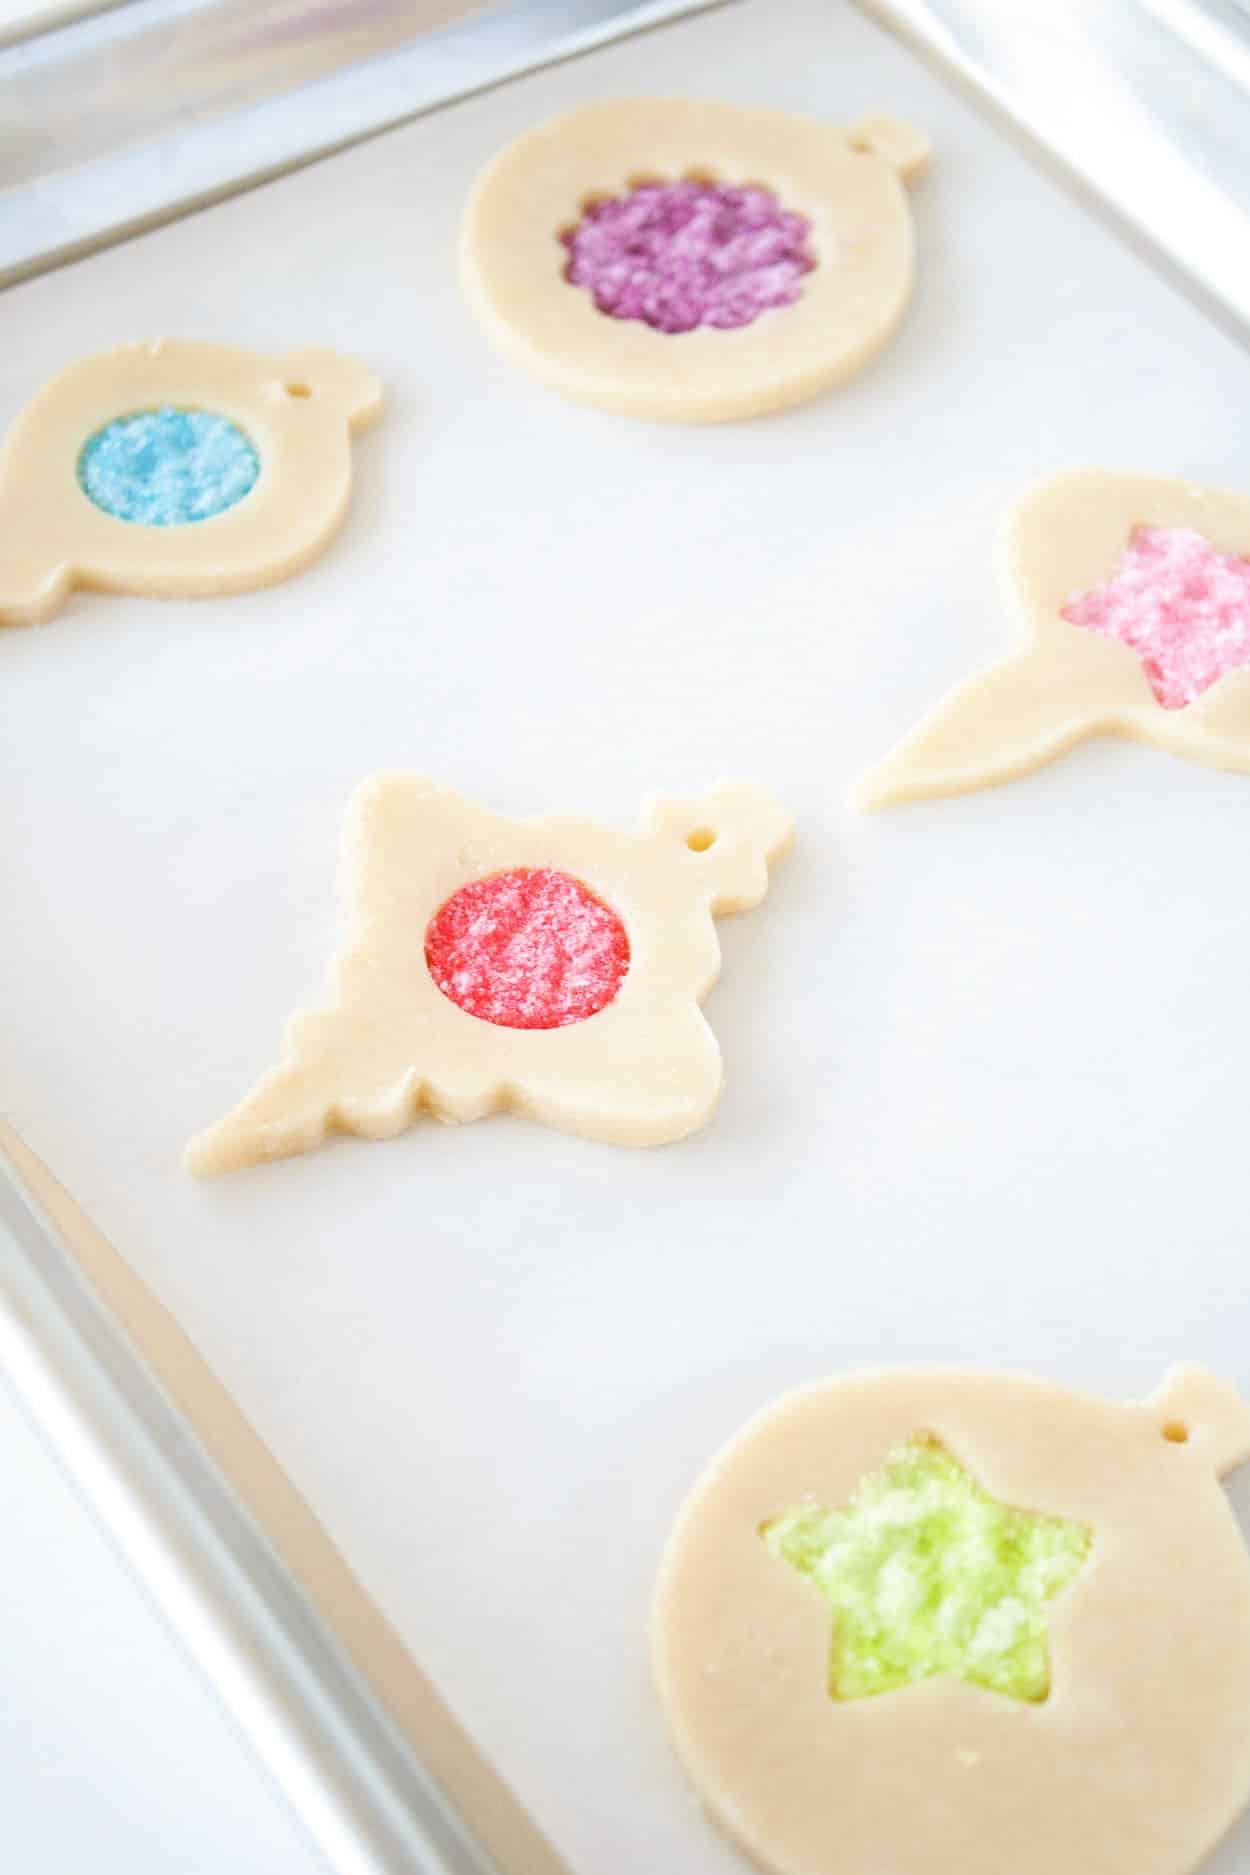
Once ready, pop them into a preheated oven for about 8 minutes — depending on the size and thickness of your cookies.
Start checking the cookies at about 7 minutes, and watch them like a hawk.
Like. A. Hawk.
You want to cook them just until the edges start to lightly brown and the candy has melted — NOT until the cookies are brown and the candy has caramelized.
Hello, ruined first batch!
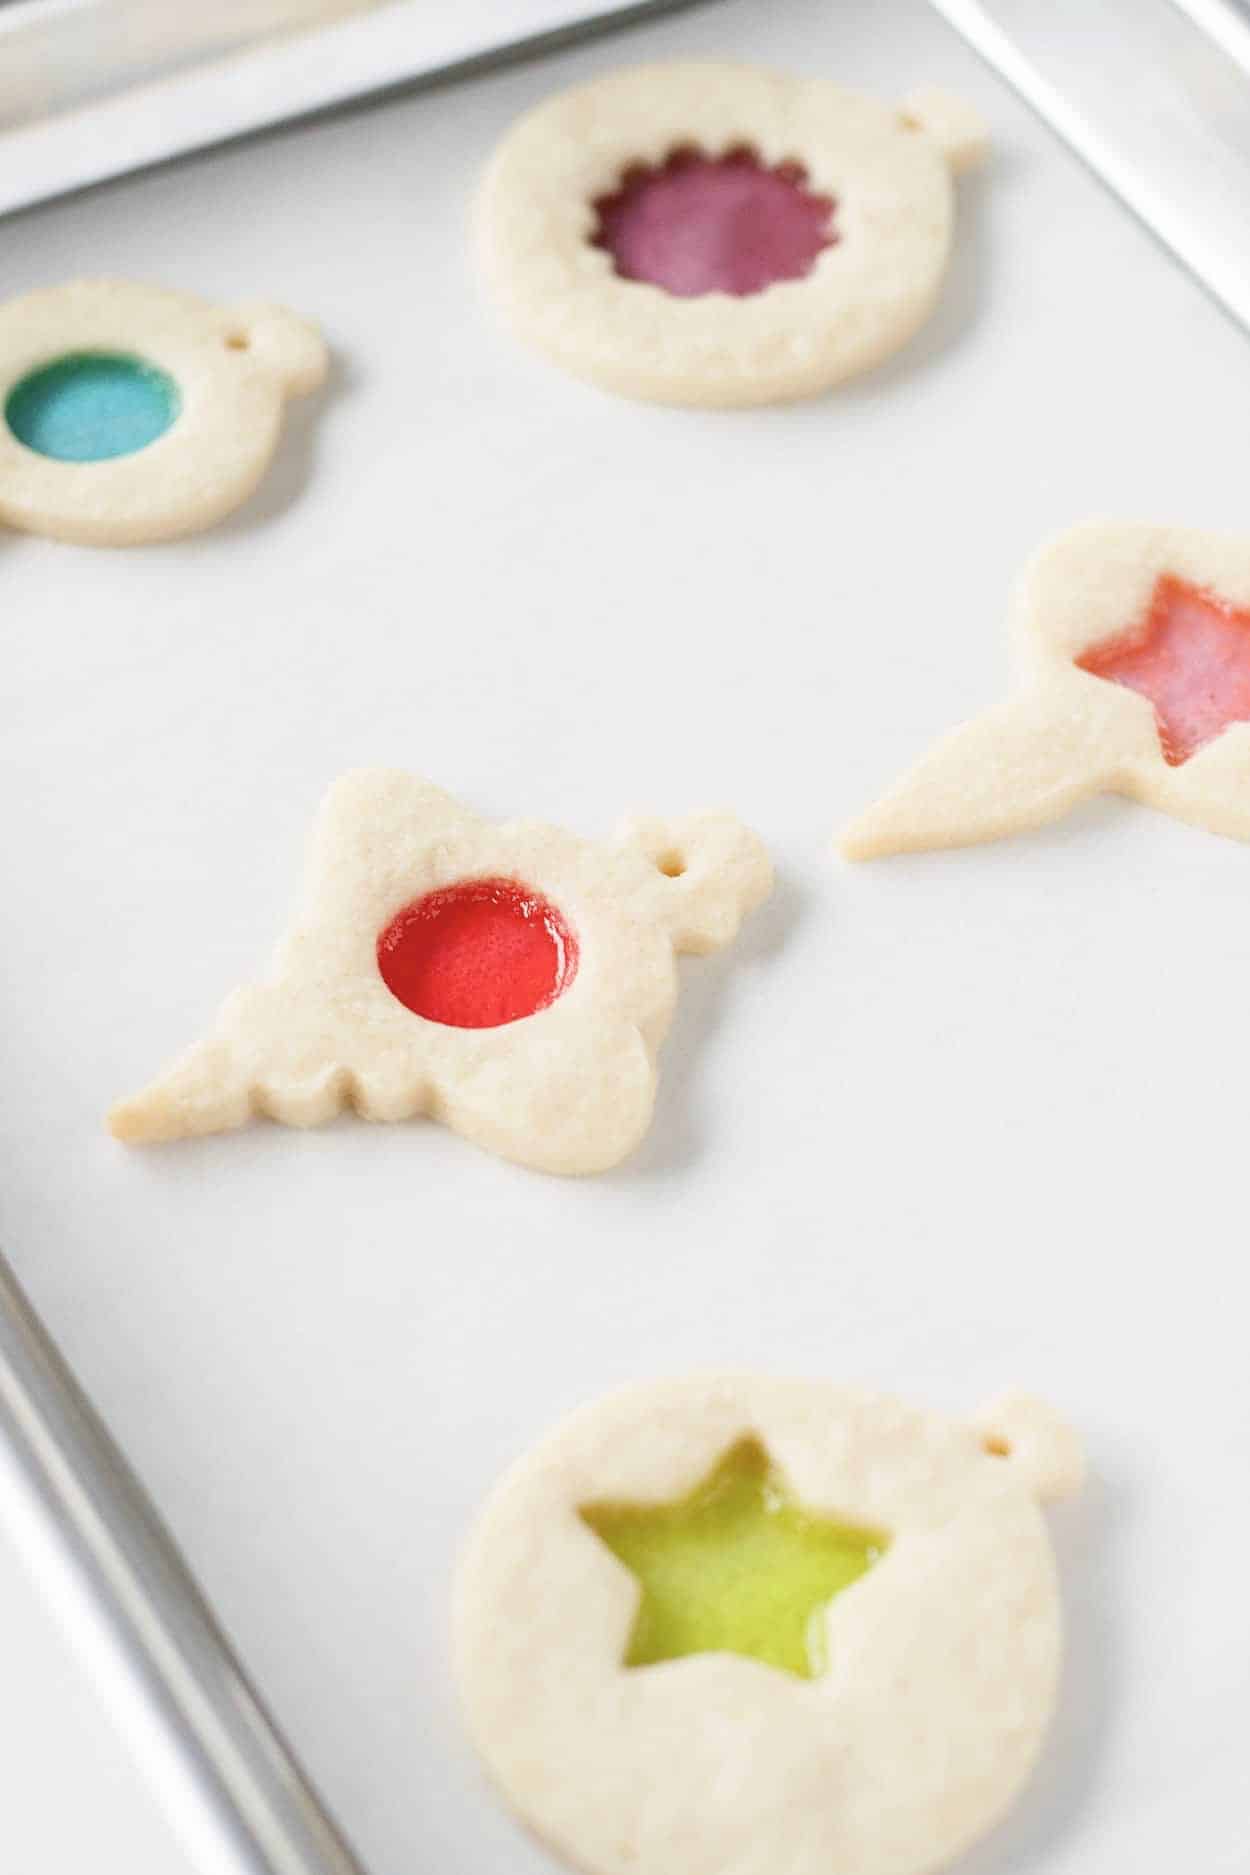
Let these guys cool completely on the sheet pans to let the candy harden. Don’t try to move them or you’ll ruin all your hard work.
Once the stained glass cookies are cool, carefully peel them off the parchment or silicone mats. Thread with some string and hang on your tree!
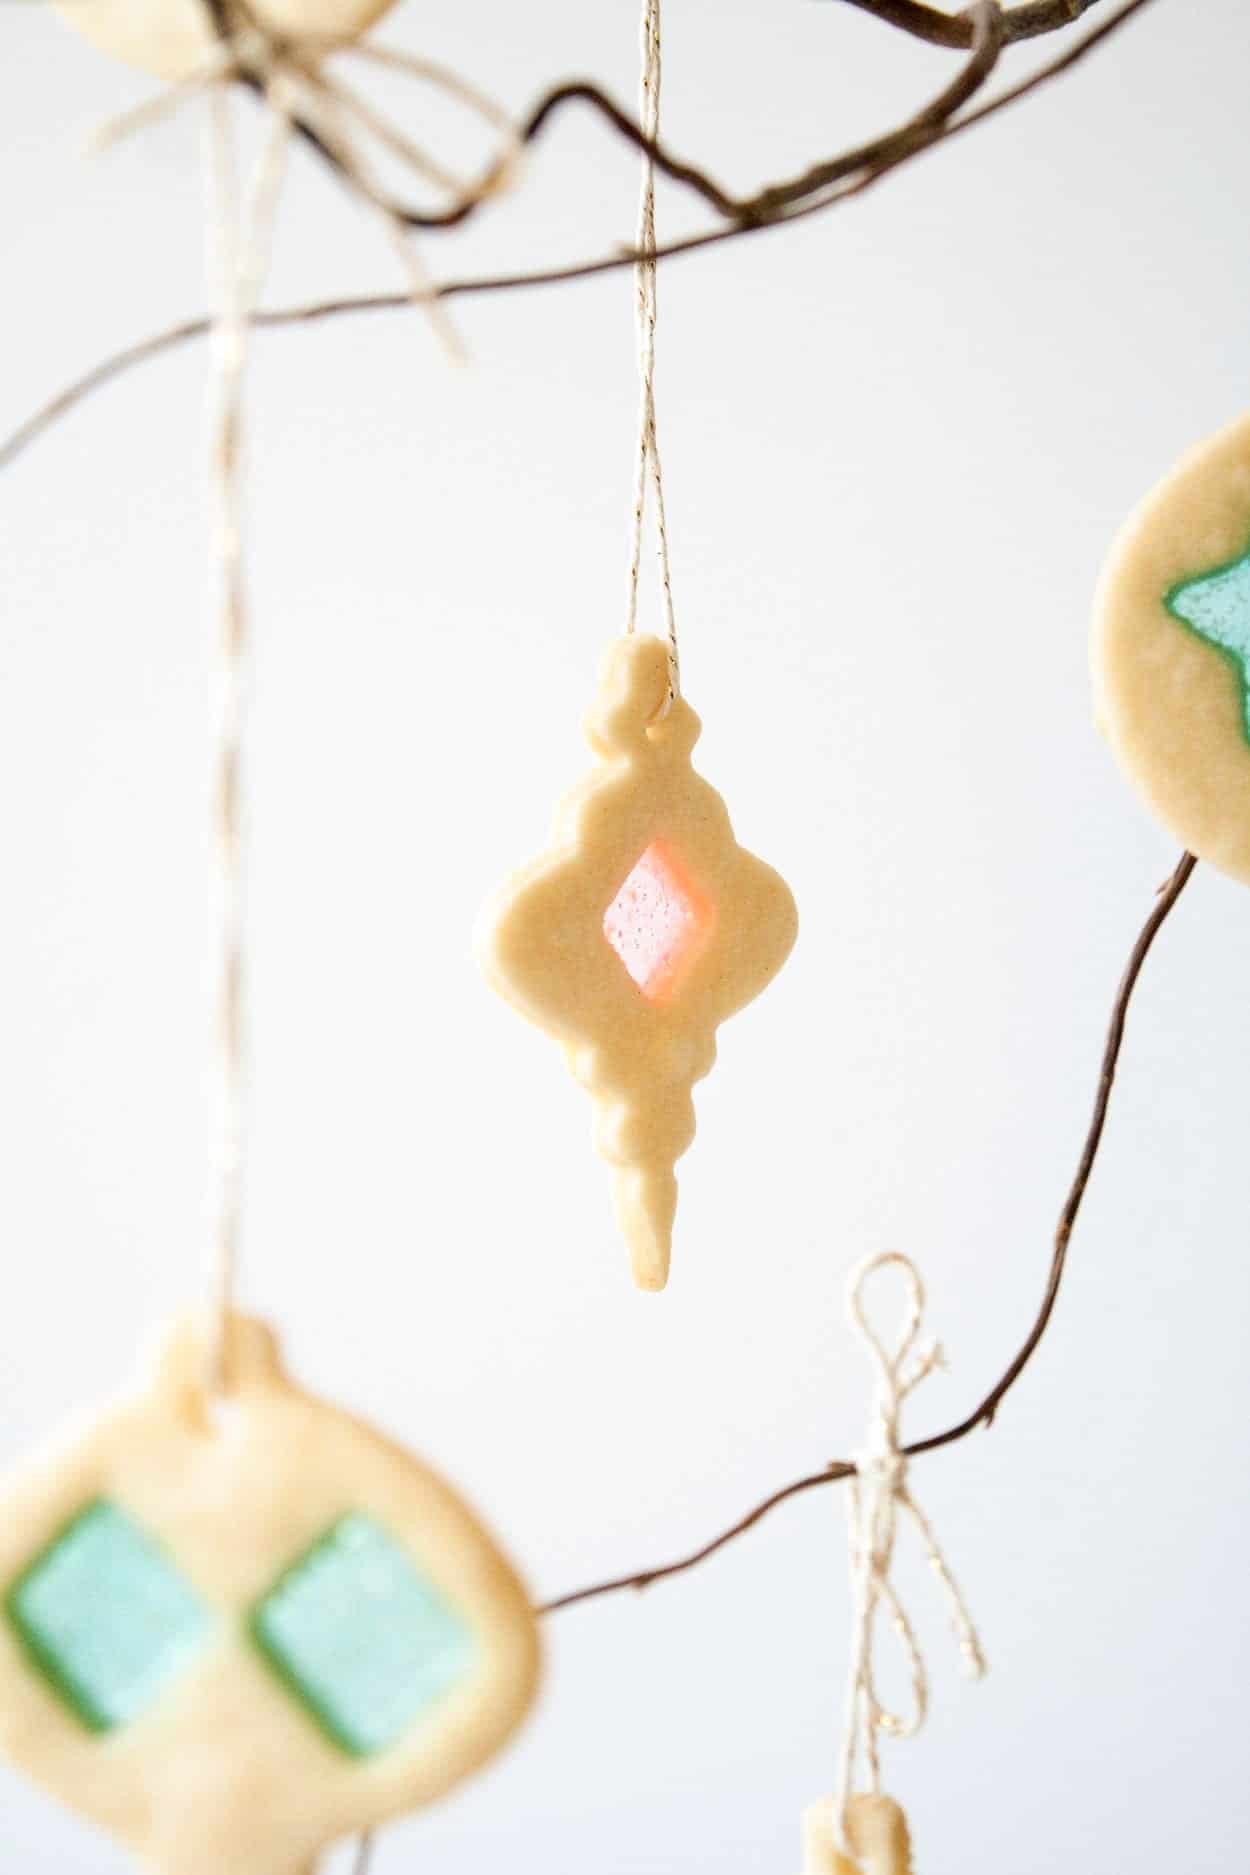
One thing to note: this recipe makes a LOT of cookies (depending on the size and thickness of course).
I ended up using half the dough and had about 36 cookies. I did NOT want to make 72 stained glass cookies, so I popped the rest of the sugar cookie dough into the freezer to be used at a later date.
So you may want to cut the recipe in half unless you’re making larger cookies.
Looking for More Christmas Cookies?
- Dark Chocolate Candy Cane Cookies
- Chocolate Dipped Ginger Cookies
- White Chocolate Candy Cane Cookies
- Eggnog Cookies With Rum Sugar Glaze
- Maple Sugar Cookies
Tips for these Stained Glass Cookies
- I used Jolly Ranchers because I liked the range of colors, but you could use Lifesavers or something similar or try sanding sugar. (UPDATE 2020: Sanding sugar does not work)
- You can freeze any extra cookie dough for up to 3 months.
- Here are the cookie cutters I used. Any will work but the amount of cookies the recipe makes depends on the size of cutters you use.
- Chill the cookies before baking so that they maintain their shape.
- Let cookies cool completely on the baking sheet. You want to make sure the sugar has hardened and set.
Stained Glass Cookies
Ingredients
- 2 3/4 cups all-purpose flour 390g
- 1/2 tsp baking powder
- 1/2 tsp salt
- 2/3 cup granulated sugar 132g
- 1 cup unsalted butter 227g, room temperature
- 1/2 large egg 2 tsps, lightly beaten
- 1 1/2 tsp vanilla extract
- 1 package assorted hard candies 198g, eg. jolly ranchers
Instructions
Dough:
- In a medium bowl, whisk together the flour, salt, and baking powder. Set aside.
- Beat butter and sugar with an electric mixer until pale and fluffy. Add egg and vanilla and mix until combined.
- Reduce speed to low and gradually add in flour mixture. Mix until dough starts to clump and hold together.
- Scrape dough onto a sheet of plastic wrap and use the plastic wrap to form it into a thick, flat disc (avoid touching dough with your hands). Chill for 1 hour.
Candies:
- Separate candy by color and pulverize them separately in a food processor until they reach a sand-like consistency. Place each color into a small bowl.
Cookies:
- Preheat oven to 350F and line baking sheets with parchment or silicone mats.
- Take 1/4 of the dough and roll it out to 1/8″ thickness between 2 pieces of parchment or on a floured surface.
- Cut cookies out and place them on your prepared baking sheet using a small spatula. Make a small hole in the top with the blunt end of a wooden skewer. Chill in the fridge while you do the same with the next 1/4 of dough.
- Remove cookies from fridge and cut out shapes for the stained glass with a small cutter or a knife. Use a toothpick to pry out any pieces that don’t come out.
- Using the tip of a small knife or tapered offset spatula, fill each hole with the crushed candy pieces, filling just to the top of the dough. Nudge into corners as needed and be careful not to get any on top of the cookie dough (brush off any excess). Chill for 15mins if cookies have softened.
- Bake for 7-10mins (depending on size and thickness of cookies) just until the candy has melted and the edges start to brown. Rotate cookies at 4mins for even baking. Start watching at the 7min mark to make sure the candy doesn’t start to caramelize.
- Cool completely on baking sheets.
- Repeat with the remainder of the dough.
Notes
Originally published on Dec 2, 2015



Shana says
I used this, along with several other recipes for advice on how to get the stained glass effect. I ran some tests, and just wanted to let you know that sanding sugar on its own did not melt in the oven to creating a glass effect. It just kind stuck together in a glob. I didn’t want the flavor of jolly ranchers, so I made my own clear vanilla hard candy from sugar and corn syrup and then crushed that up and it worked great! You can do a swirl effect in it with a toothpick that’s been dipped in food coloring right when they come out of the oven for some color, or sprinkle some sprinkles on the candy for a snowglobe look. Just more ideas! Thanks for the resource!
Olivia says
Thanks so much for the tips Shana! I will remove the sanding sugar suggestion from my post. Surprised it didn’t melt! Love the idea of the swirl effect. That would look so pretty!
Keishia says
Good thing I came back before attempting because I was thinking to use the sanding sugar. I did also crush the jolly ranchers so I have those on hand. Speaking of which, I thought I’d have 5solid flavors/colors…hmmm…there were more cherry and blue raspberry in each bag than any other. I had two grapes in one and one in another and the watermelon I had ONE in between the two bags! Good thing the color was similar to the cherry and I wasn’t in it for flavor or I would have been mad as a hornet. My hard candy eating friends had a good laugh at my expense- I’d never purchased jolly ranchers before so I was none the wiser that this is the norm in these packs.
Olivia says
I know right?? What is up with the unequal color/flavour amounts?? Glad you have the candies to use them though 🙂
Liz says
We went through a year that had lots of crazy life changes in it (not even counting COVID and 2020 madness), and last year at Christmas we were packing boxes and living with a friend, and saying goodbye to lots of people we loved. So we hardly celebrated any holiday at all. It was sad. This year, I’m making these, and it always feels like a special holiday/birthday/celebration any time I use one of your recipes! I finally feel like life is a little more normal again thanks to you. 🙂
Olivia says
Hi Liz! Thank you for your sweet comment! It has been a crazy year for sure. I hope things start to settle down for you guys and that you’re all staying healthy. Not celebrating Christmas last year is a bummer! This year will be better and I hope you love these cookies. xo 🙂
Liz says
They turned out great! I ended up using a little 1/8th teaspoon to fill the spaces, and then a small paint brush to clean the cookies up. Apparently I am not steady enough to use the knife and pastry brush suggested. Just for those who were wondering about how many cookies this made, I got more than the recipe says but rolled them very thin. Also the cookie cutters I used were not very big.
Olivia says
Hi Liz! Thanks so much for the update. A 1/8th tsp is actually a much better idea. I don’t think I had one at the time! I would use that going forward too I think. So glad you liked them 🙂
Keishia says
Hi Liv
I found these right after Christmas but keep looking at them at least once a month since…🥰
I have some time- thanks to Covid19 and I also have some almond flour that’ll be past its shelf advice date (best if used by) before December. I was wondering if I could use instead of regular flour. Maybe with some almond extract to boot.
No rules about when christmas should come, right??? Let me know and if I need to make any adjustments in order to use the almond flour.
Oh and the 1/2egg…hmmmm🤔 including the yolk???
The logical part of my brain thinks just double and use an entire egg but the reasonable part is saying, “dude you’ve never made cookies, period! What if they’re too hard? And, 1/2 the recipe as is, could land you with 72 cookies. Imagine having to decorate 24 dozen of these bad boys! Chill while you’re ahead.”
Olivia says
Hi Keishia! Your comments always make me laugh/smile! 🙂 I’m not sure if almond flour would work as well… it’s not as fine and smooth as flour. I don’t think you could straight up replace the flour anyhow, the dough might not come together or roll out properly. Let me know if you give it a try! The egg — whisk one whole egg and measure out about 2 tsps of it. Do not use a whole egg for sure! It will be too much for the dough.
Keishia says
Well here we are some 10monkey years into the COVID-19 and the holiday season. Let it be known that I never did try the cookies but am determined to now that it’s really Christmas.
Last year I had about 14 trees in my house and told my family that this year I would only put one in the house and we’d go away…then Covid!
These folks are holding me to the one tree which I just got done putting up and I’m feeling cheated. So here I am, the glutton for punishment, thinking let me work on my cookies.
I just ordered my cookie cutters… and the saga continues…
Olivia says
14 trees!? Your place must be a winter wonderland. I bet it feels quite different with just the one tree this year! Let me know how the cookies turn out 🙂
Keishia says
I’ll update you on the cookies. We’re on our way to the vacation home now. I failed miserably with the one tree plan. I blame these cookies and Amazon though. I ordered those cookie cutters like Nov28/29. They just showed up on Monday (Dec14). That left me with a solid two weeks and I put up another tree, albeit small one- it fit inside of a sleigh and added it to my foyer area. I had two others flanking my front door but removed after one kept falling over. Looking forward to decorating when I get to the vacation home and super excited to decorate the cookies and hang them on the trees I bought to use as centerpiece
Too bad I can’t post pics here.
Olivia says
I would LOVE to see pictures! Of the cookies, and your decorations 🙂 Send them to me at livforcakeblog@gmail.com. Safe travels and happy holidays to you and your family!
Nancy says
Hi Olivia. I was wondering if you have ever made these with “glass” interiors that’s made at home, not purchased like Jolly Ranchers? The reason I ask is that I want to make stained glass cookies that are all the same 2 colors (yellow and blue) instead of the full range of colored candy that comes in the packages. Thank you!
Olivia says
Hi Nancy! What would you use to make the glass at home? If you make your own colored sugar, be sure to let it harden then grind it up before using in the cookies. That should work totally fine 🙂
Gail. says
Is it a 1/2 plus 2tsp or do the tsp come from the half 1/2 of egg and how can I make them so I can use them every year
Olivia says
Hi Gail! It’s half of one large egg which equals to be about 2 tsps total. I’m not sure how well they’d last, but you’d need to store them in something airtight with layers of parchment between the cookies.
Cindy Rodriguez says
These are gorgeous and so right up my alley. Love them!
Olivia says
Thanks so much Cindy, I love how they turned out!
Claudine says
Hello, est-ce que je peux congeler les biscuits? Ils sont très beaux, j’aimerais les préparer d’avance pour les Fêtes.
Merci beaucoup
Olivia says
Hi Claudine! I worry about the candy cracking or changing in texture once thawed. You can make them in advance though! Keep them in an airtight container separated by parchment paper. They should last for a few weeks.
Tricia says
Did anyone have luck using the sanding sugar?
Kim says
Love the idea! Can I just use candy sprinkles that come in a decorator jar? Teeny tiny tubes of crystal sugar often used on cupcakes by my kids?
Olivia says
Hi Kim! I’ve never done this myself but it can’t hurt to try! Maybe do one test cookie and see if it works? 🙂
Jill says
I’m in the process of making these with my kids. Unfortunately we over ground the candy and it is candy powder. Do we keep going? Or must we run to the store to try again?
Olivia says
Hi Jill! I imagine the candy powder would melt a lot faster and start to caramelize (change color) before the cookies are done. Let me know if you tried it and how it turned out!