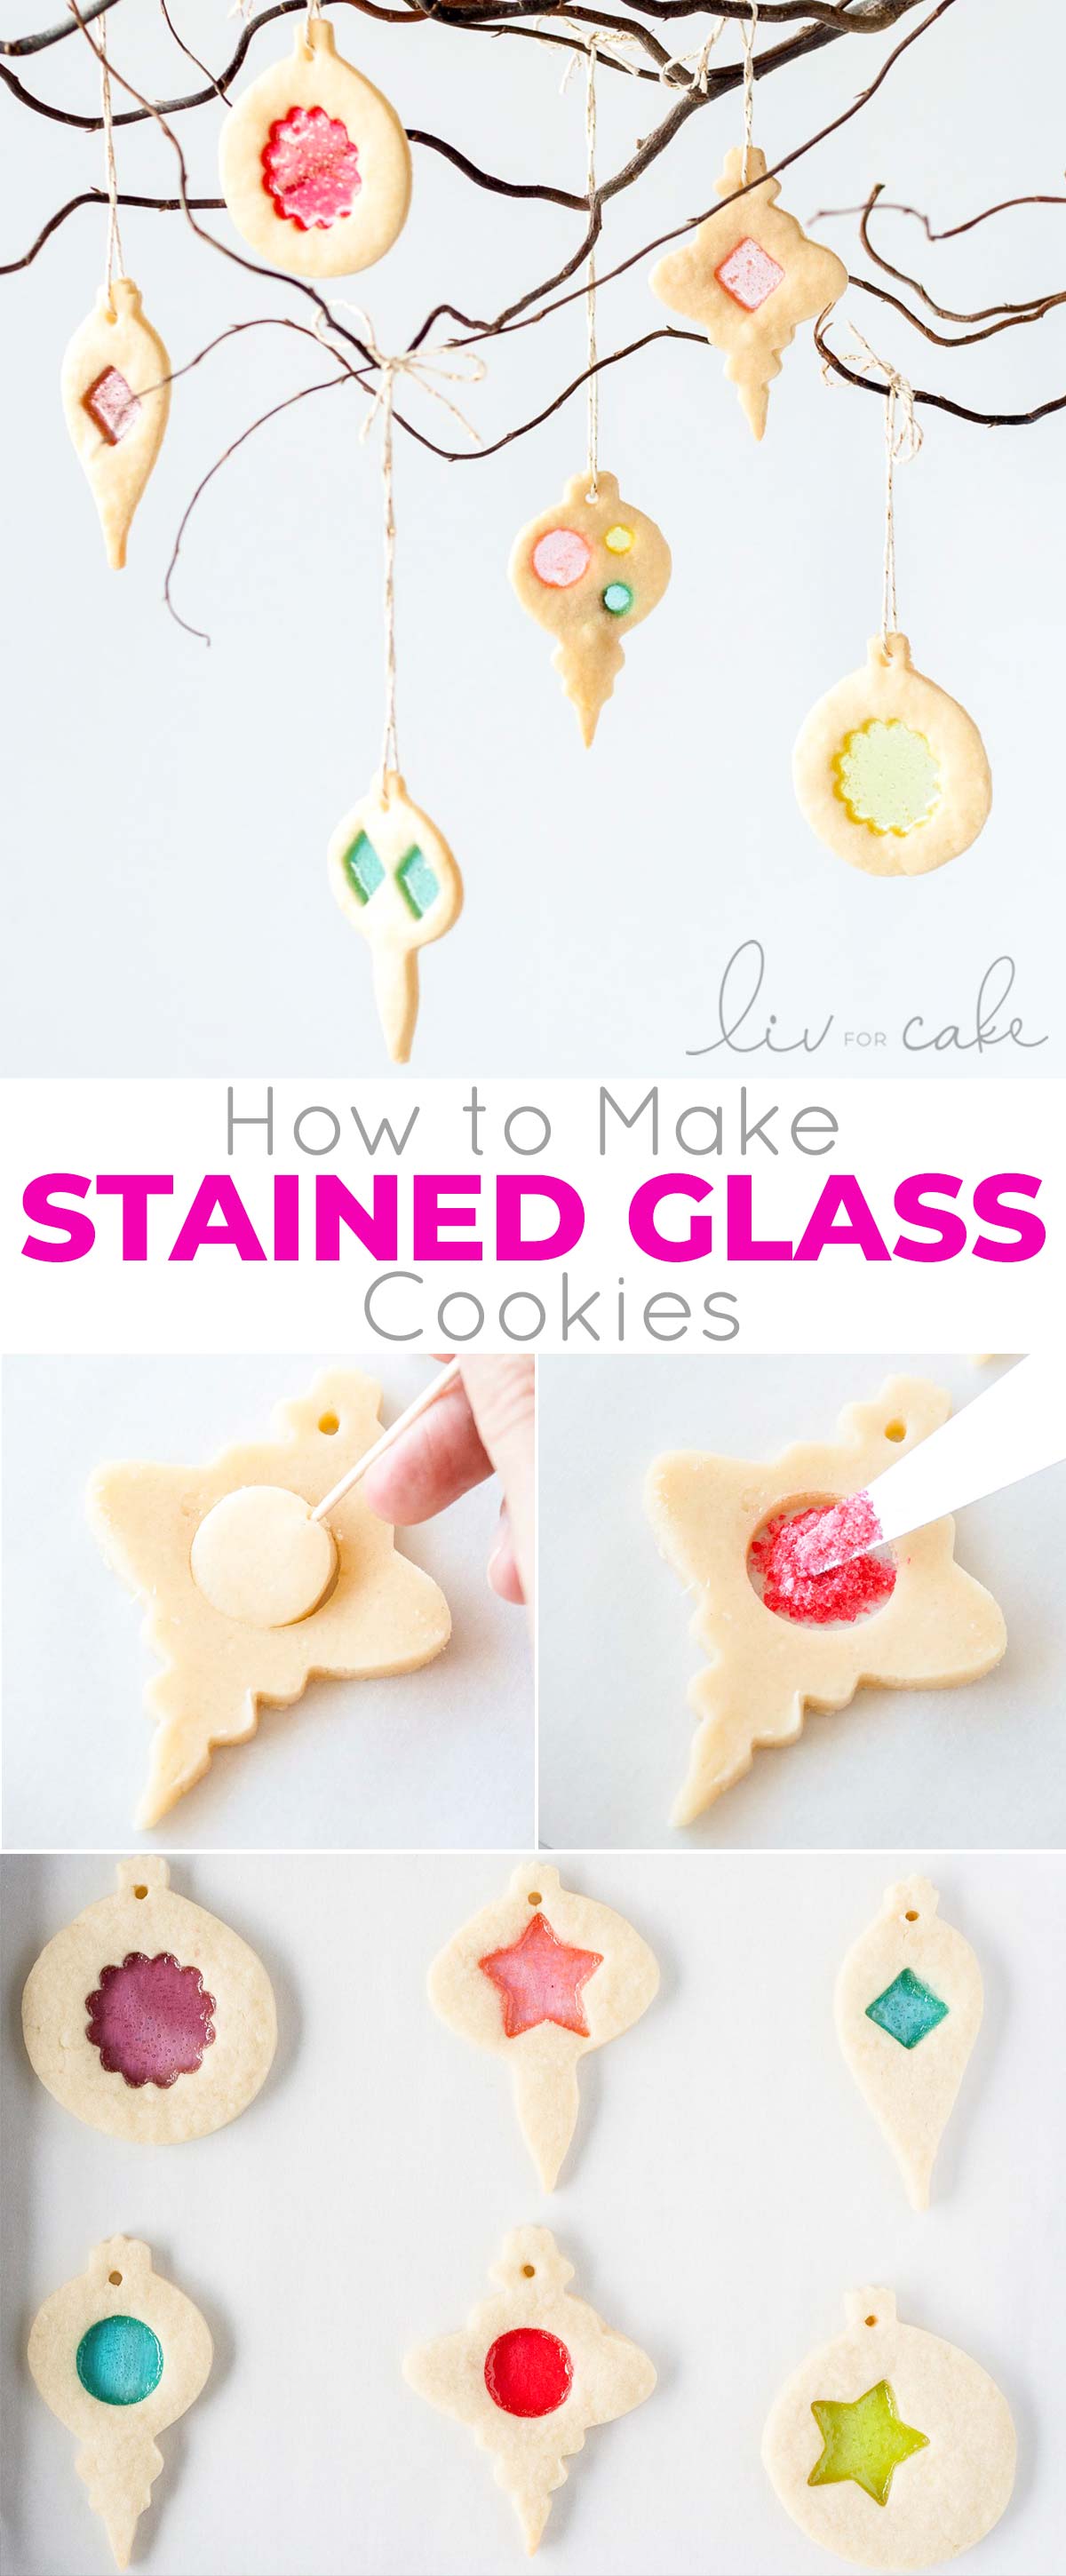
Learn how to make stunning stained glass cookies with this detailed tutorial! Perfect for holiday cookie exchanges or hanging on your tree.
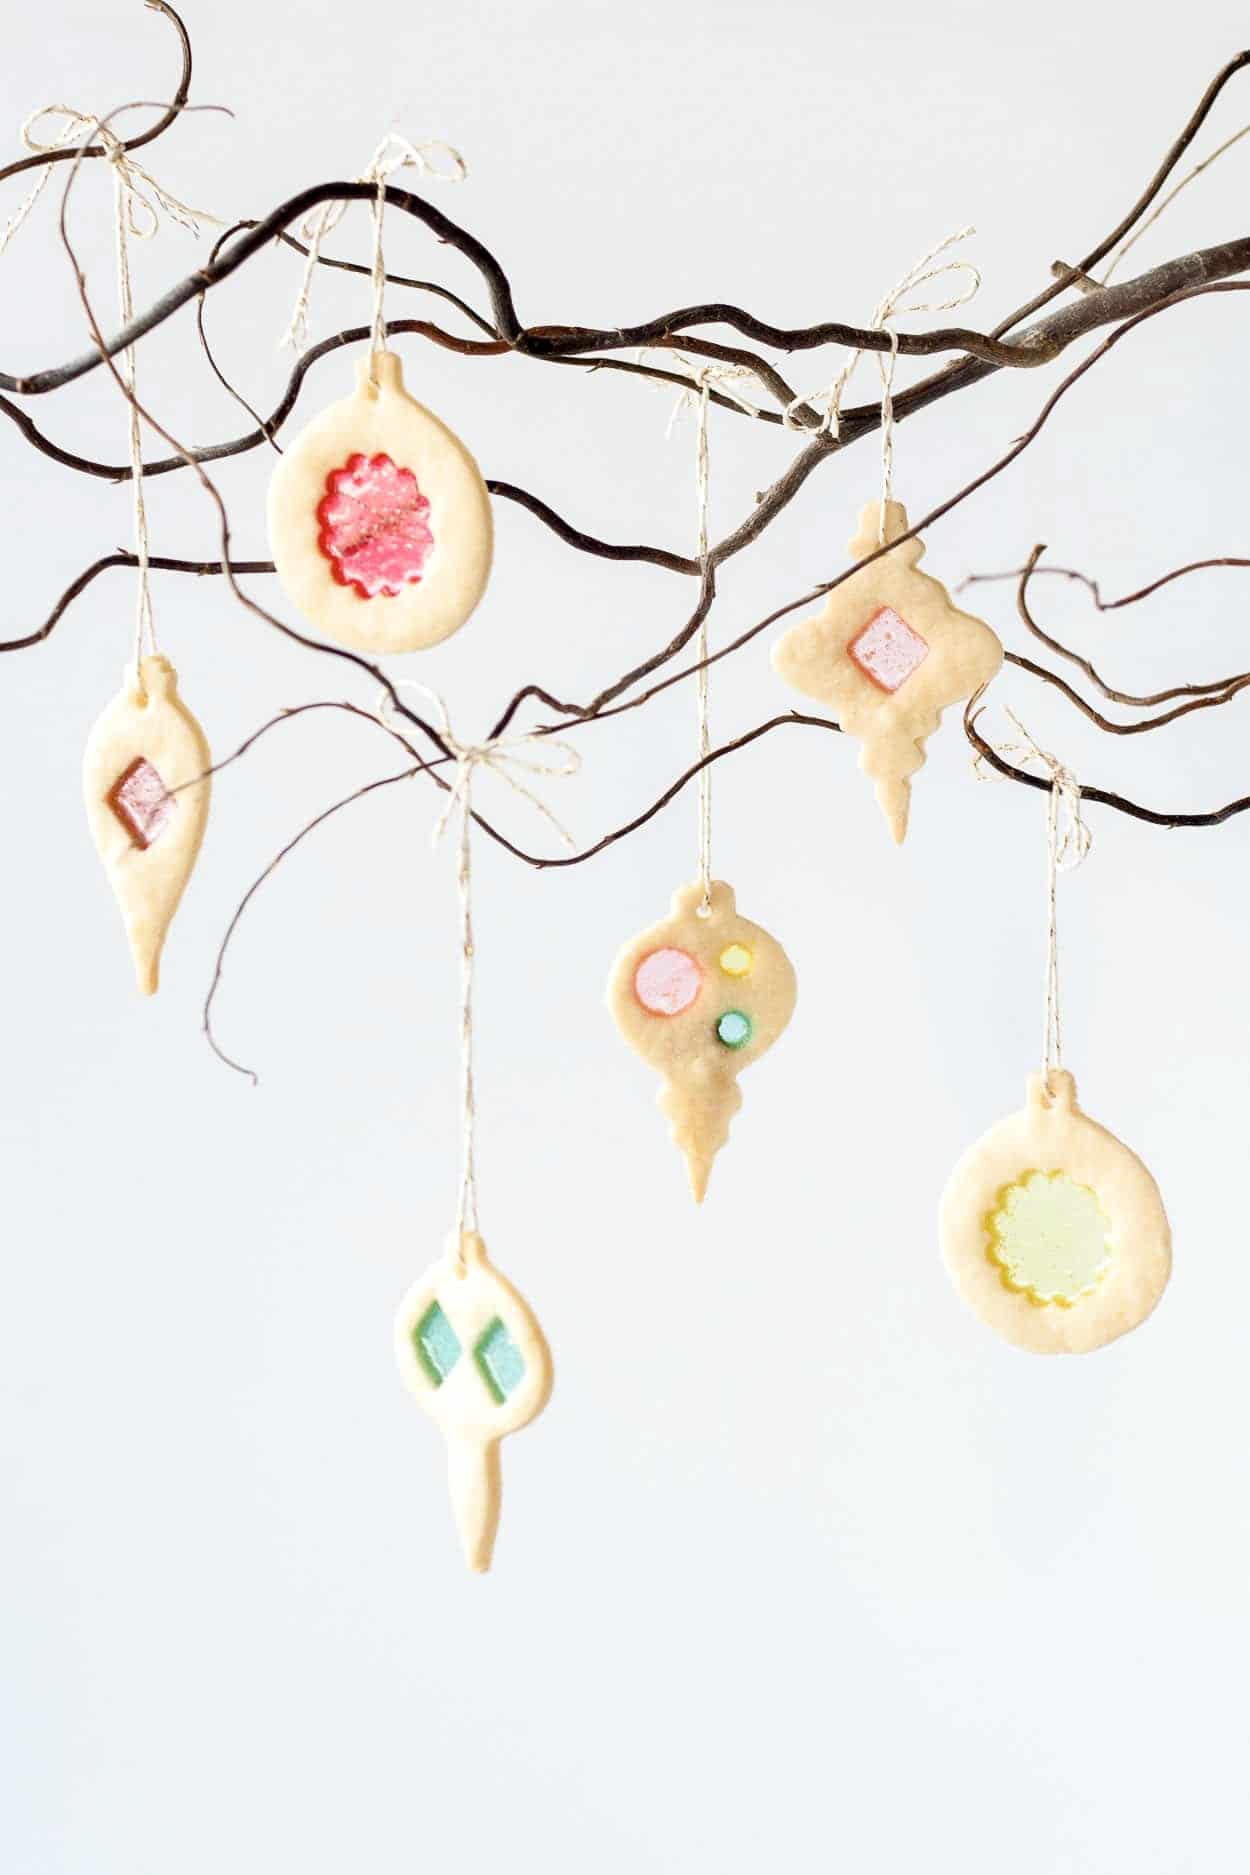
I would be lying if I told you these Stained Glass Cookies were easy to make. They aren’t exactly difficult per se, they just take a crapload of time. Especially if you’re a bit of a perfectionist… ahem.
But seriously, how pretty are these cookies?? Totally worth the effort.
I created a tutorial so that you can wow your friends and family and adorn your tree with these pretty Christmas cookies!
Oh yeah, they’re also 100% edible. Cookie + candy makes for a yummy combo if you can allow yourself to eat any of them. I snacked on some duds, but the best ones are staying right on the tree for the holiday season!
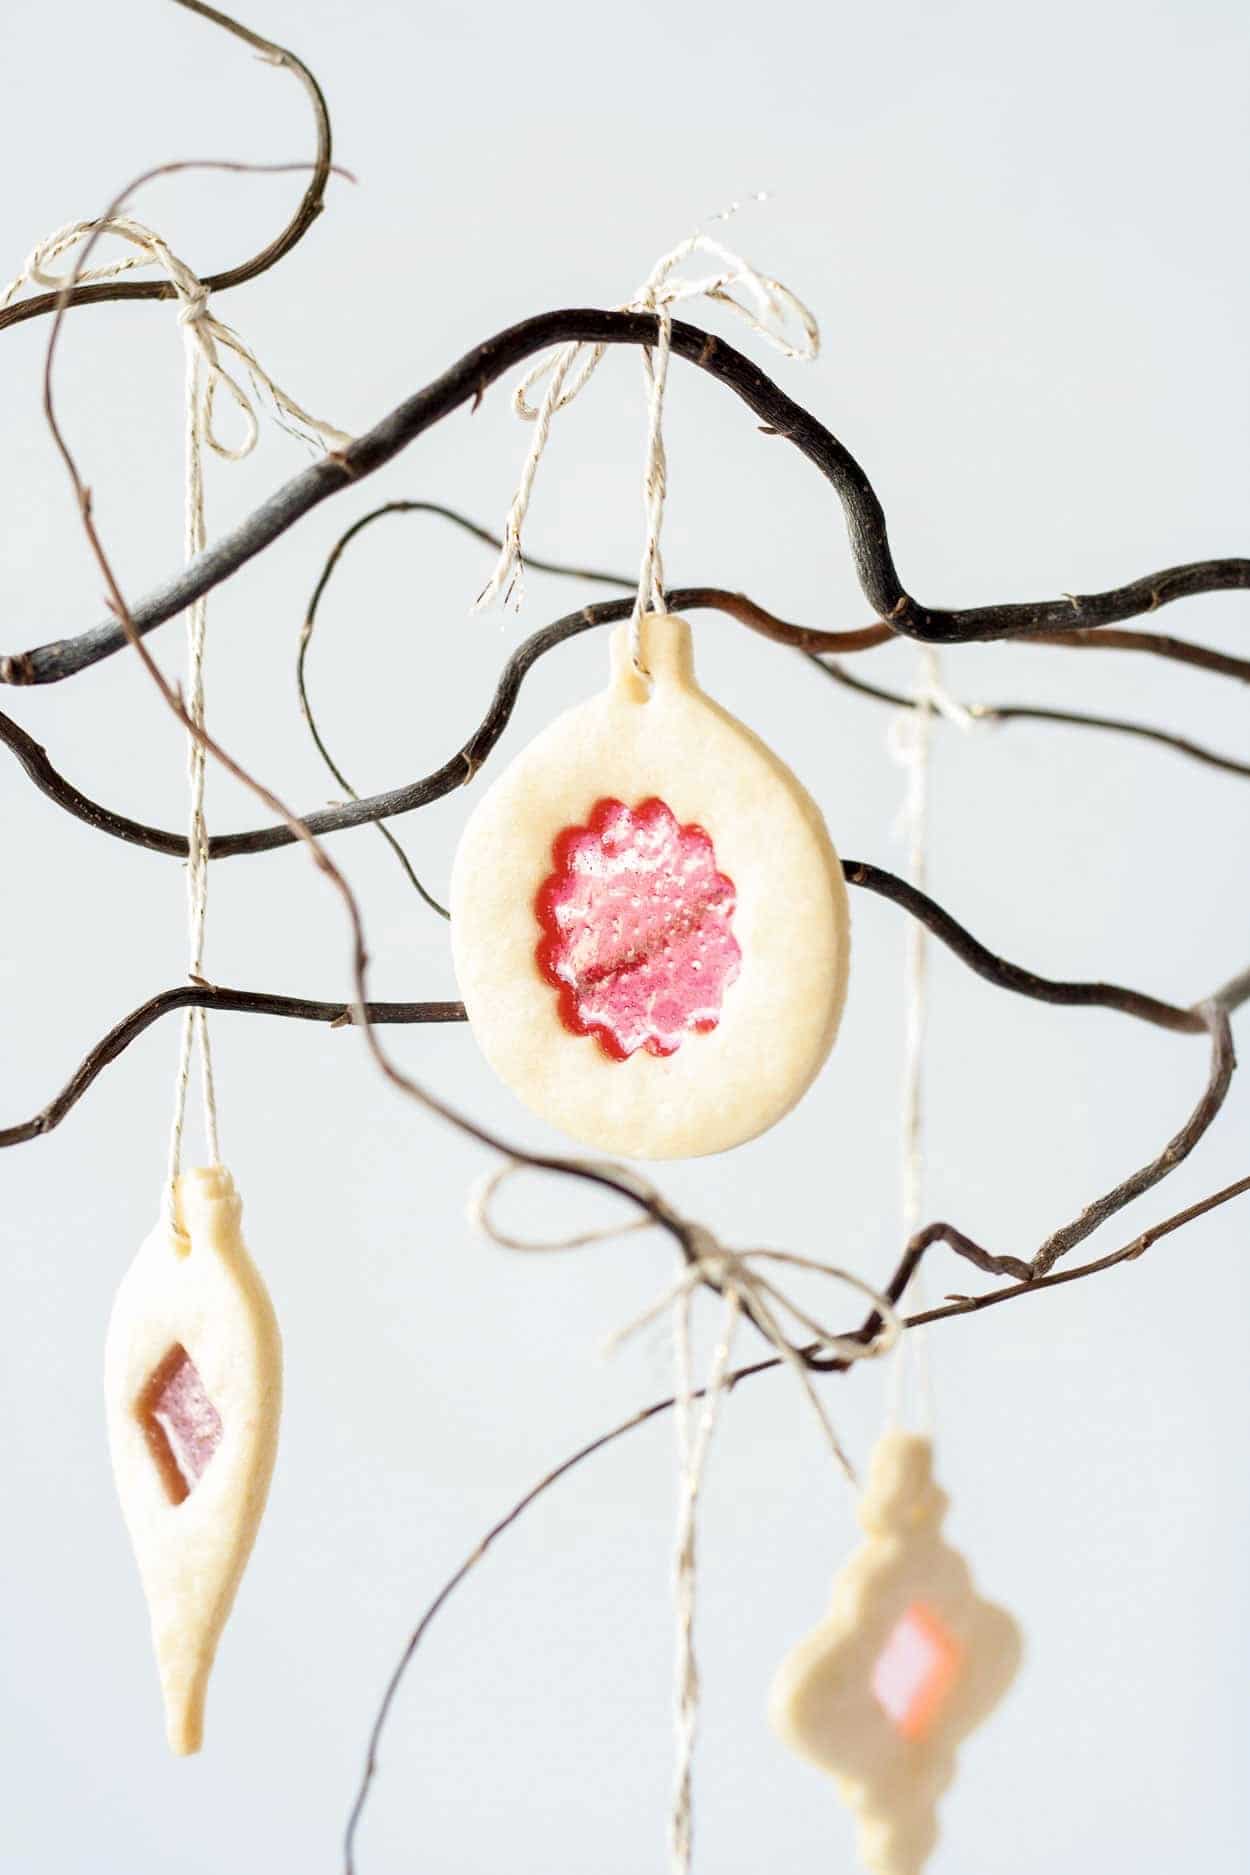
How to Make Stained Glass Cookies
The stained glass in these cookies is made of crushed up hard candies. They can be any candy you like as long as they are hard. I used Jolly Ranchers because I liked the range of colors, but you could use Lifesavers or something similar.
You’re going to need a food processor or a kitchen mallet or something similar to crush the candies up.
You want to get them to the consistency of sand, not powder. In hindsight, store-bought sanding sugar would probably do the trick — I haven’t tested it though! (UPDATE 2020: Sanding sugar does not work)
I used a food processor to pulverize one color at a time. It took about 15 seconds or so for each color. If you live in a house, a kitchen mallet would be an easy option, but if you’re in an apartment with neighbors, I’d advise against it. Even the food processor was super loud!
Though I suppose you could always console your neighbors afterward with cookies.
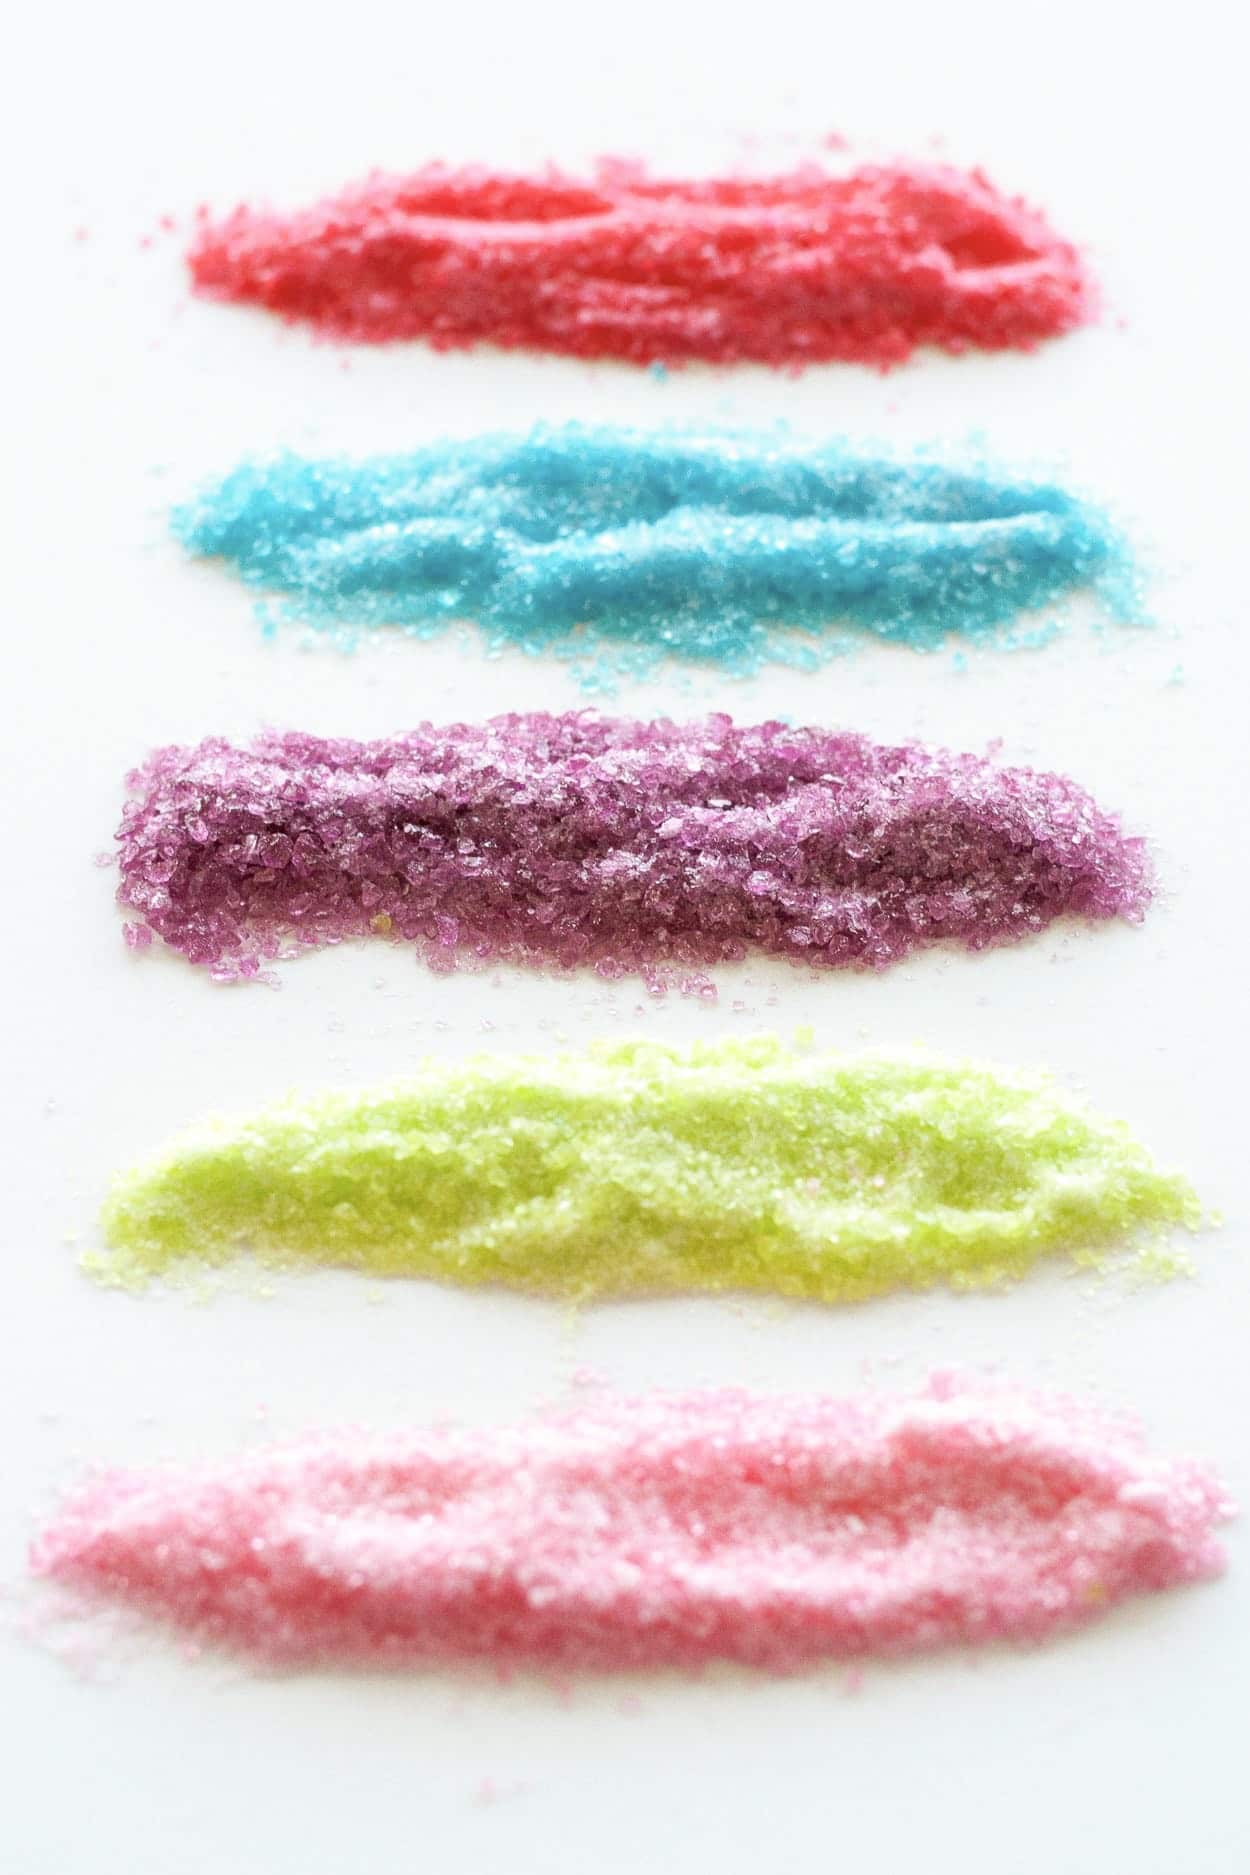
You can make the crushed candy in advance, but I did it while my sugar cookie dough was chilling.
I’m going to skip over the rolling and cutting out the dough process because it’s pretty straight forward (aka I didn’t take any pictures of it – sorry!). Important to note is to chill your dough.
After you’ve made the dough (according to the recipe below, or using your favorite sugar cookie recipe), wrap it in plastic wrap, shape it into a flat disc, and stick it into the fridge for about an hour.
Once chilled, take 1/4 of that dough and roll it out to 1/8″ thickness. Use your favorite cookie cutters to cut shapes out and place them onto a lined baking sheet. Here are the ornament cookie cutters I used. So perfect for the holiday season!
After you’re done cutting out the shapes, the dough will have softened a bit. If you plan to use these stained glass cookies as ornaments, use the blunt end of a kitchen skewer to poke a hole into the top of the cookie.
Do this when the cookie dough is soft — if it’s straight out of the fridge, it will be too hard and the dough will crack when you try to poke the hole. I know from experience! That poor first batch…
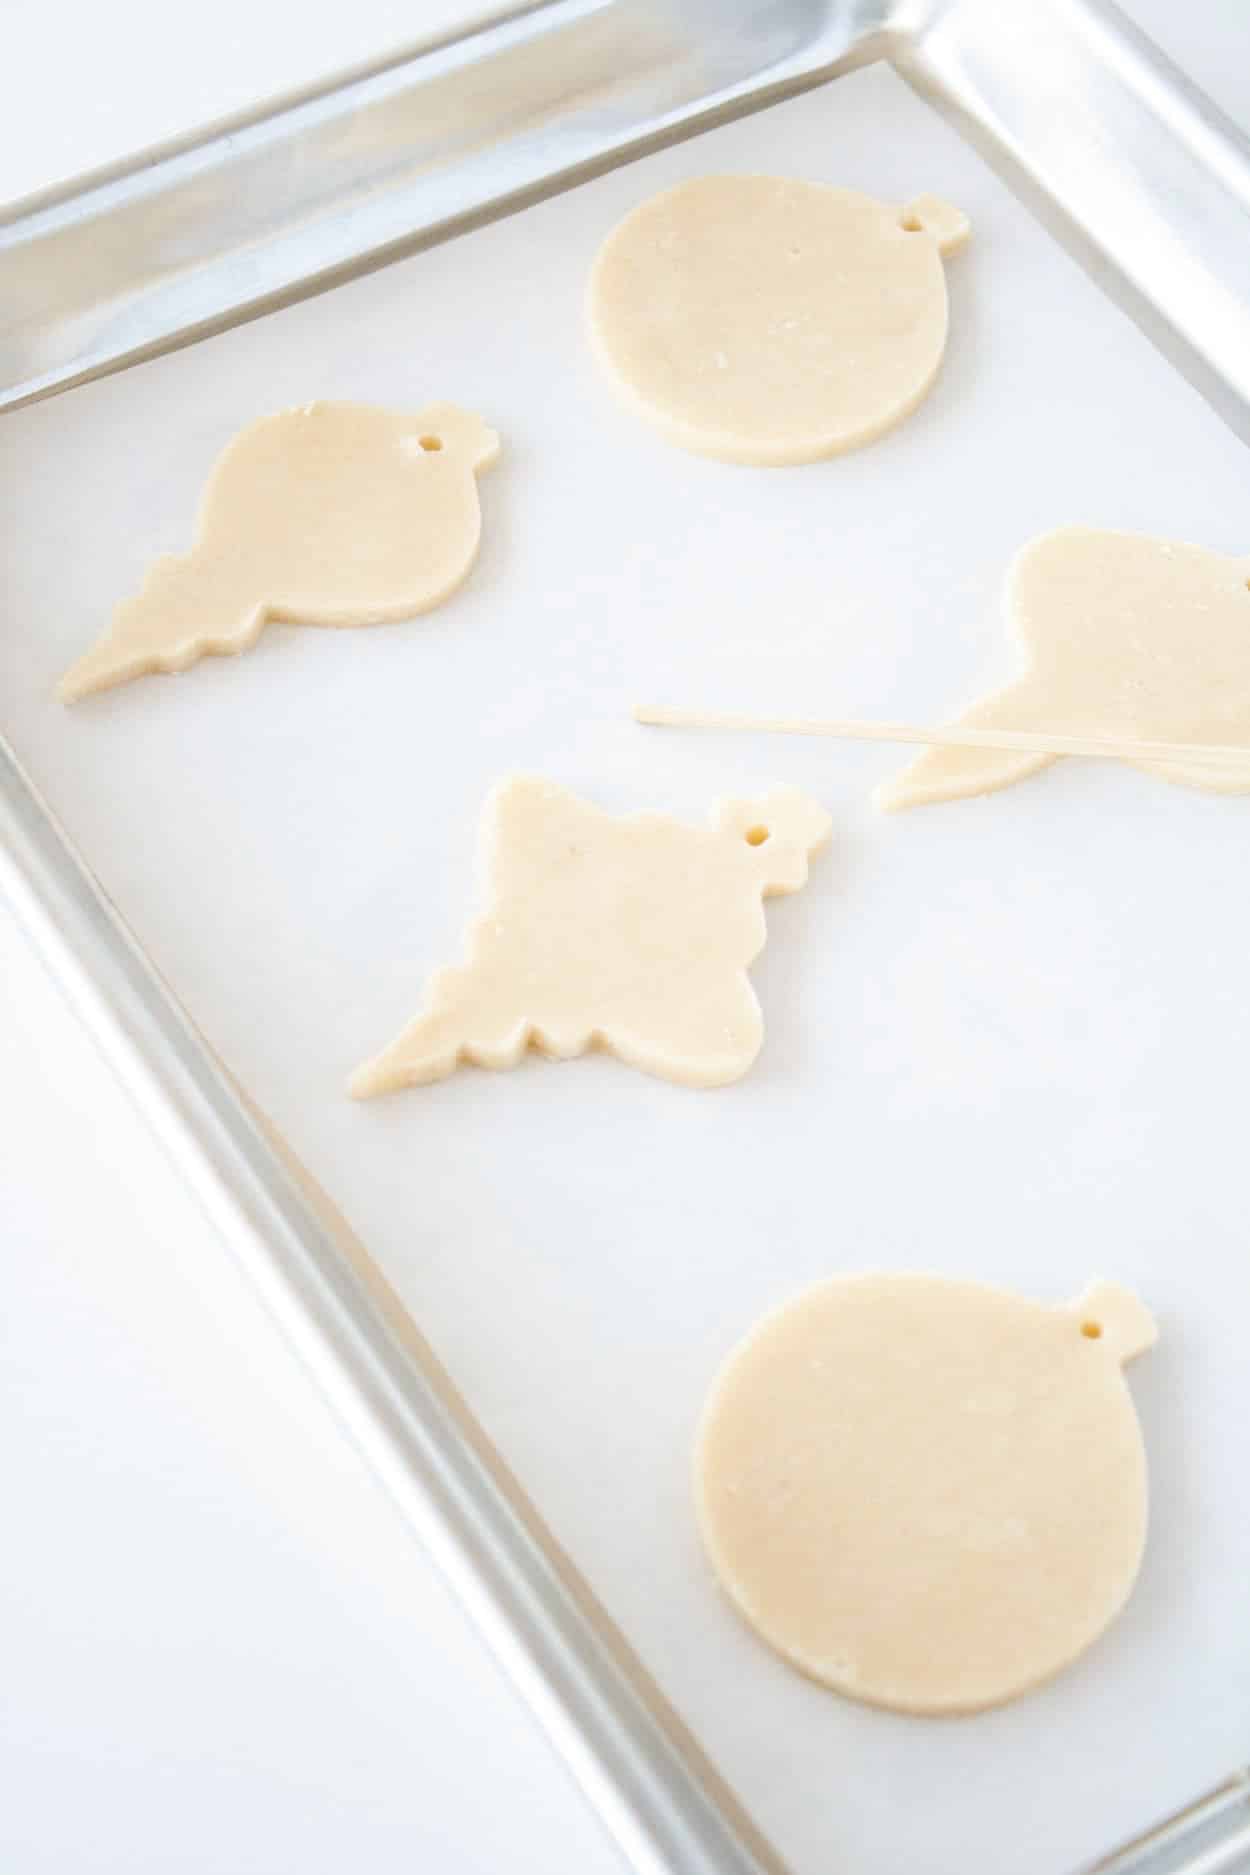
Once that’s done, place the cookies into the fridge to set again while you work on another 1/4 of the dough.
Remove the chilled cookies from the fridge and use smaller cookie cutters or a sharp knife to cut shapes for the stained glass. Use a toothpick to nudge out any stubborn cutouts left behind.
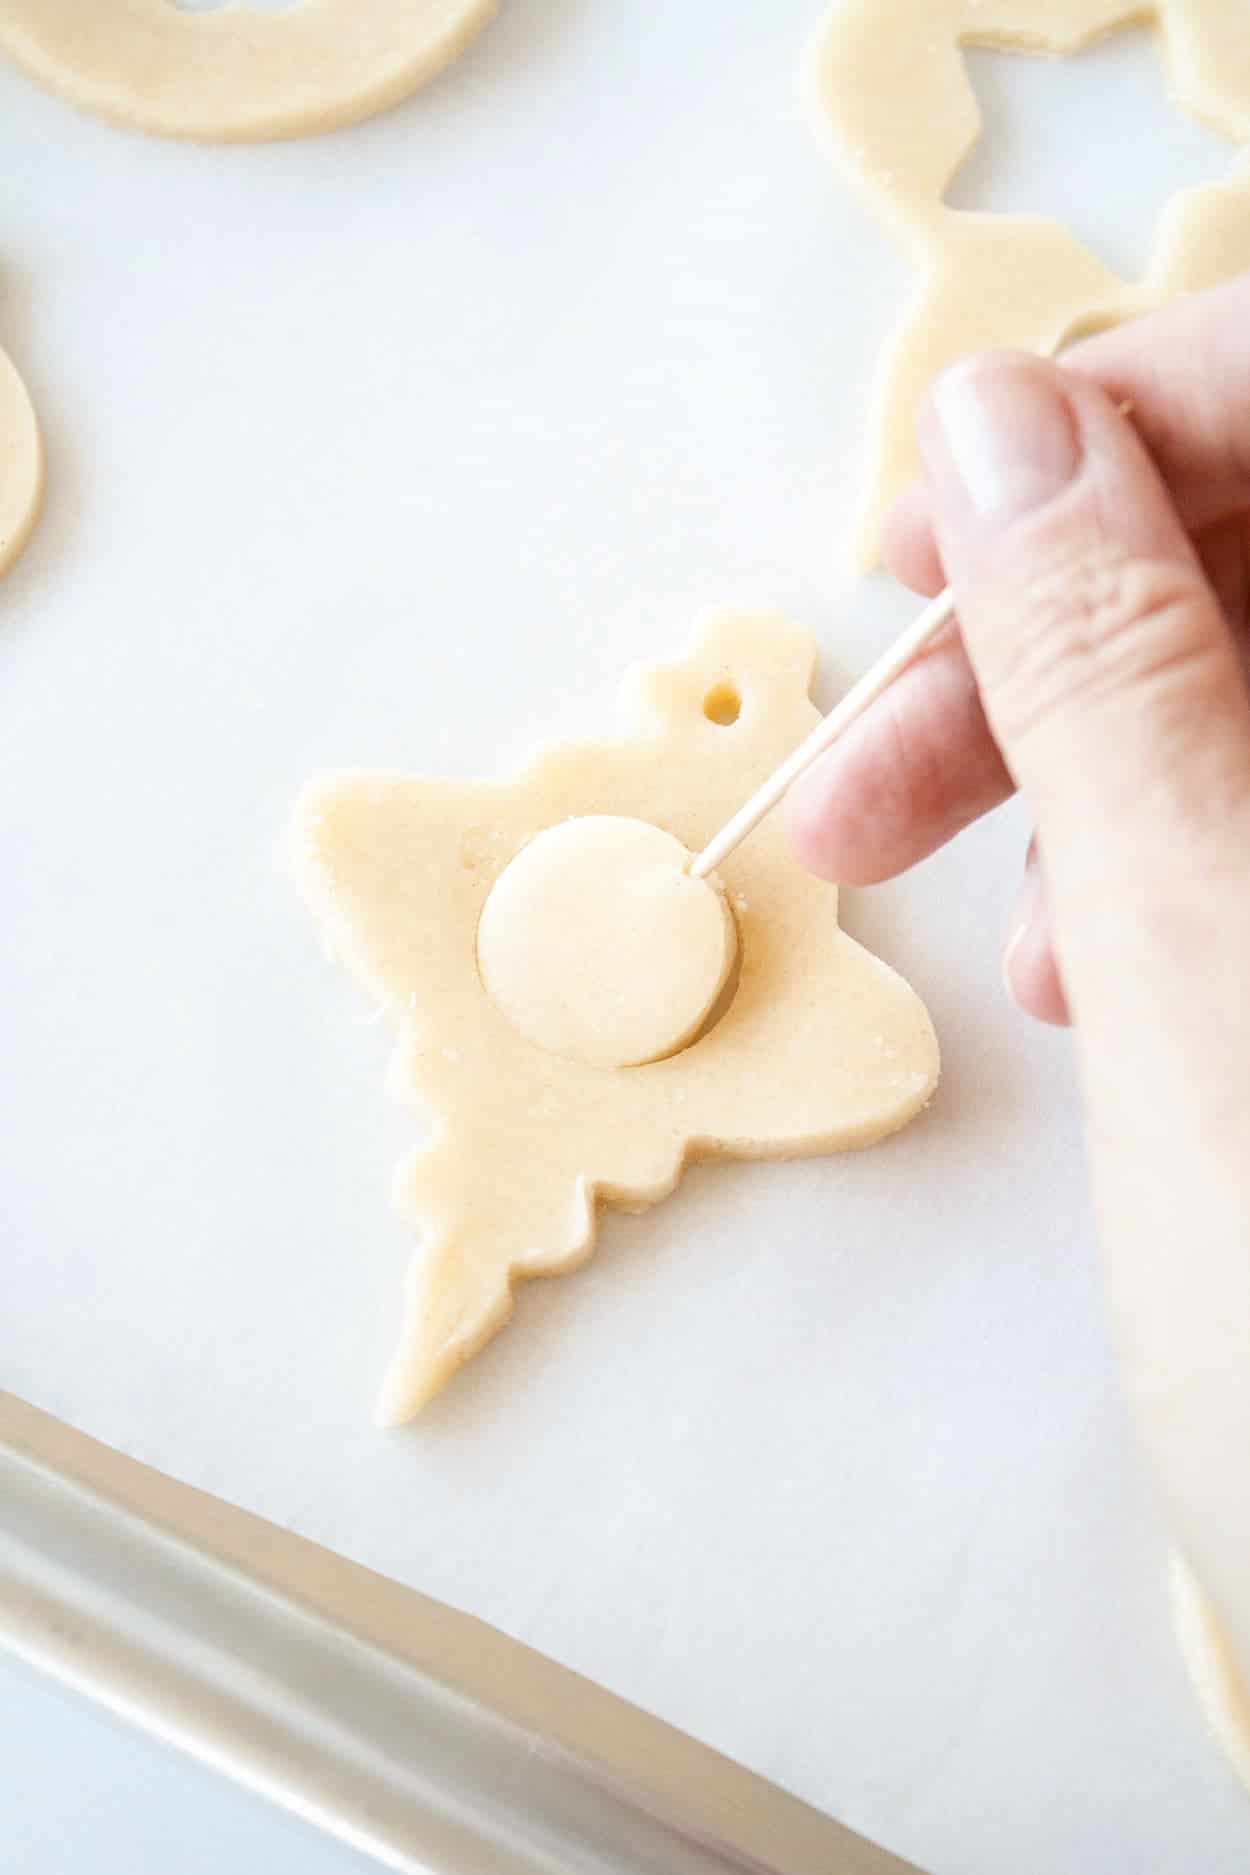
Next, use a tapered offset spatula or the tip of a small knife to fill in the cutouts with your crushed candy.
Be careful not to get any on the cookie itself — use a pastry brush to brush off the excess.
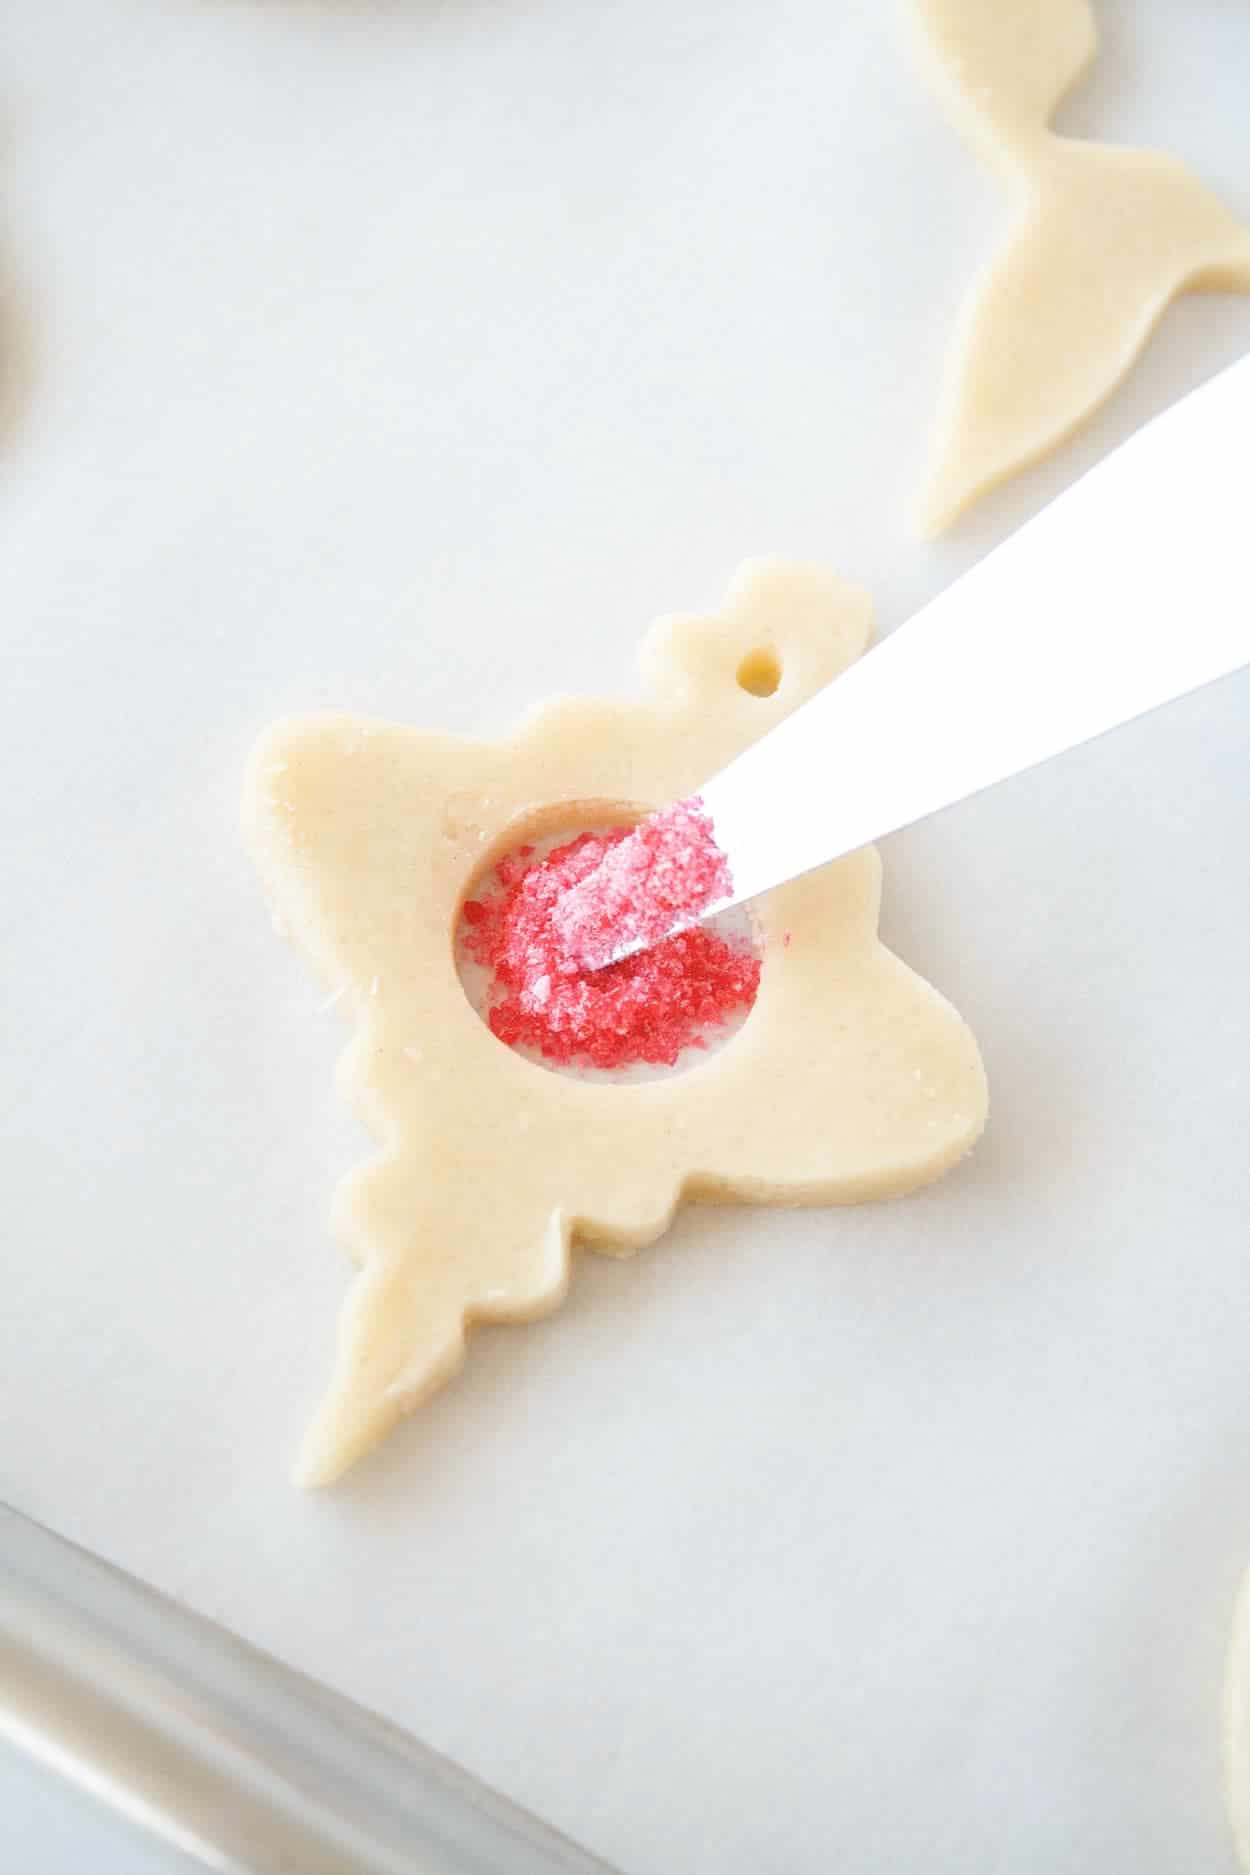
Fill with crushed candy just to the top of the dough. Spread evenly, and nudge into any nooks and crannies.
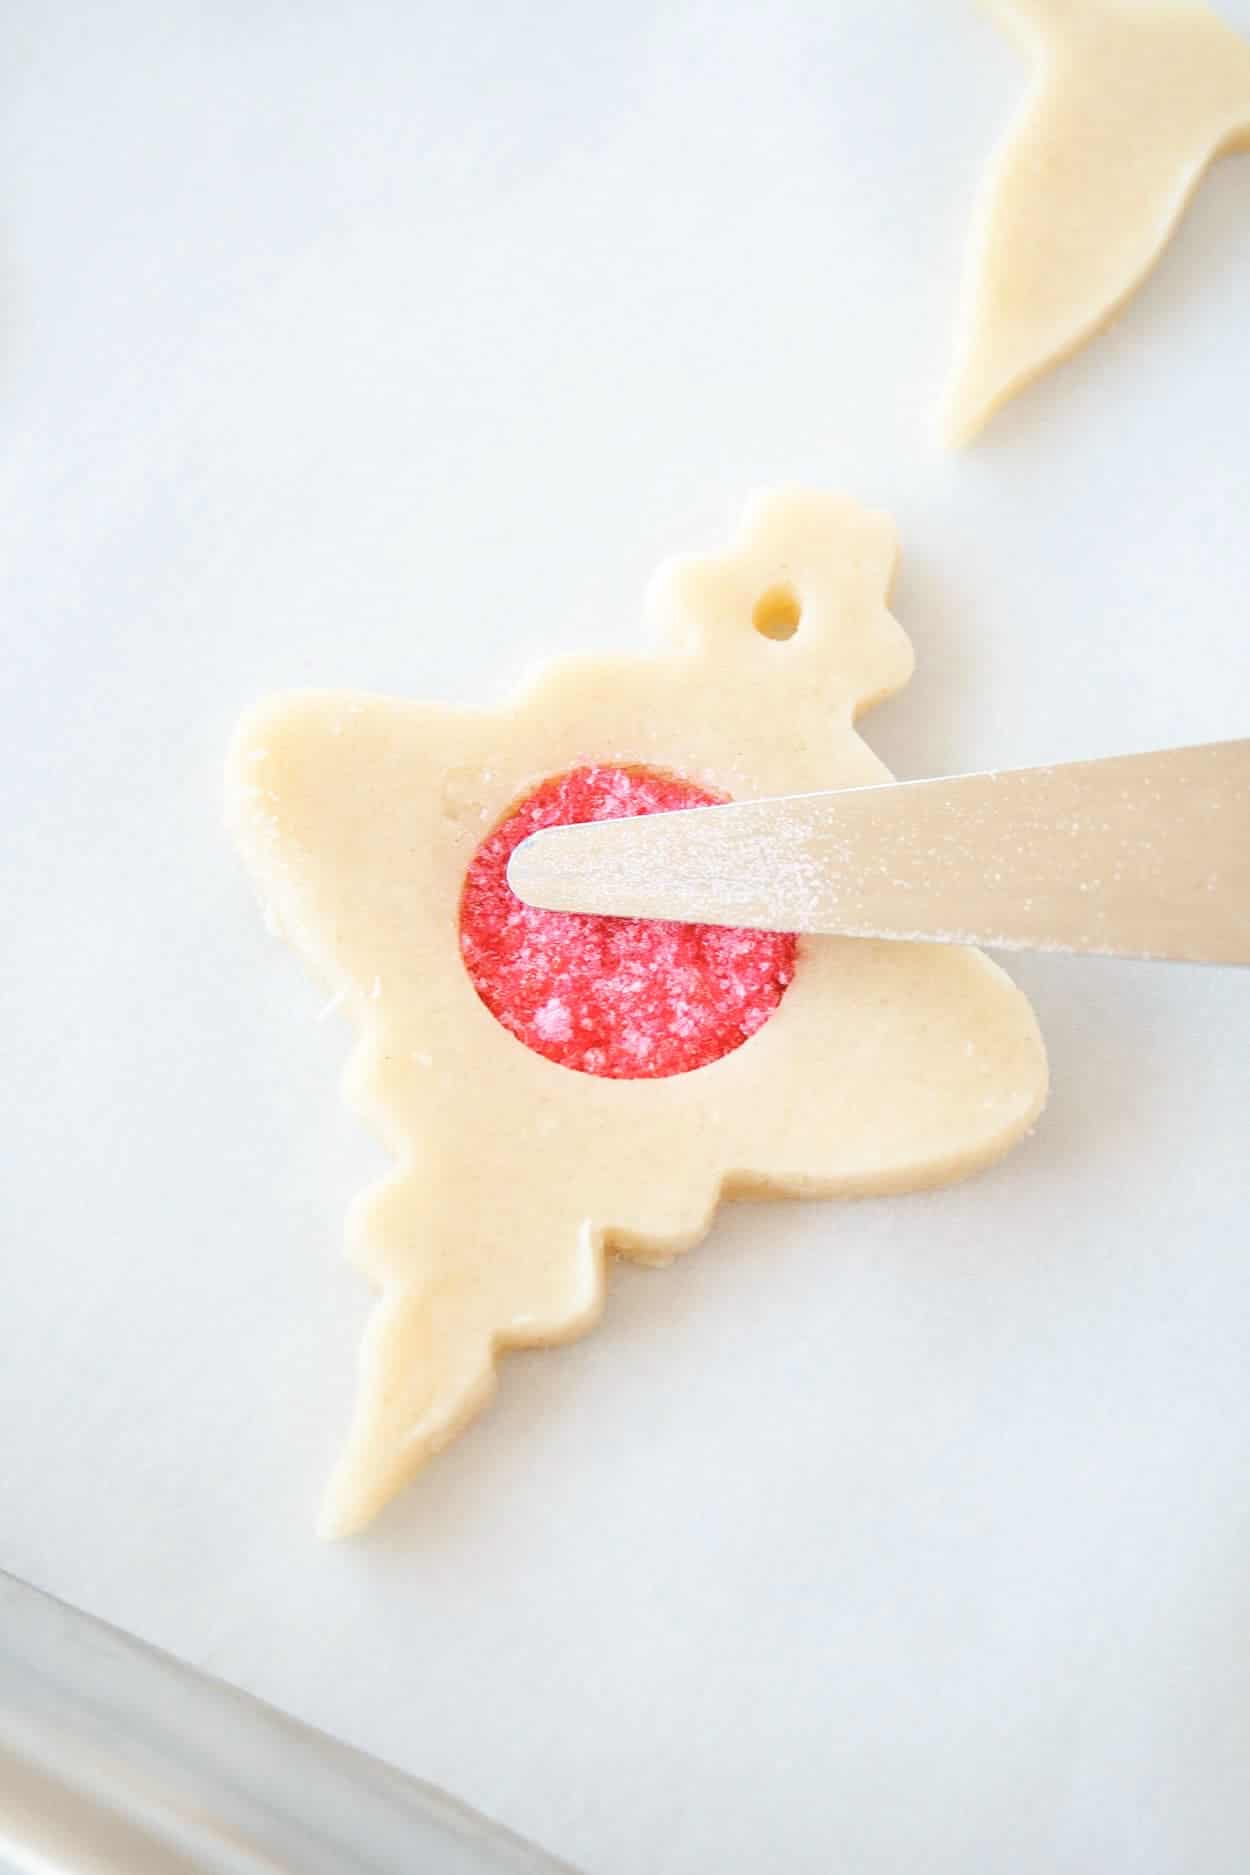
Once all cookies are filled, you may want to pop them back into the fridge for 15mins to set up a bit. You know, if the cookie dough has softened too much because you spent WAY too much time making sure each cookie was perfect.
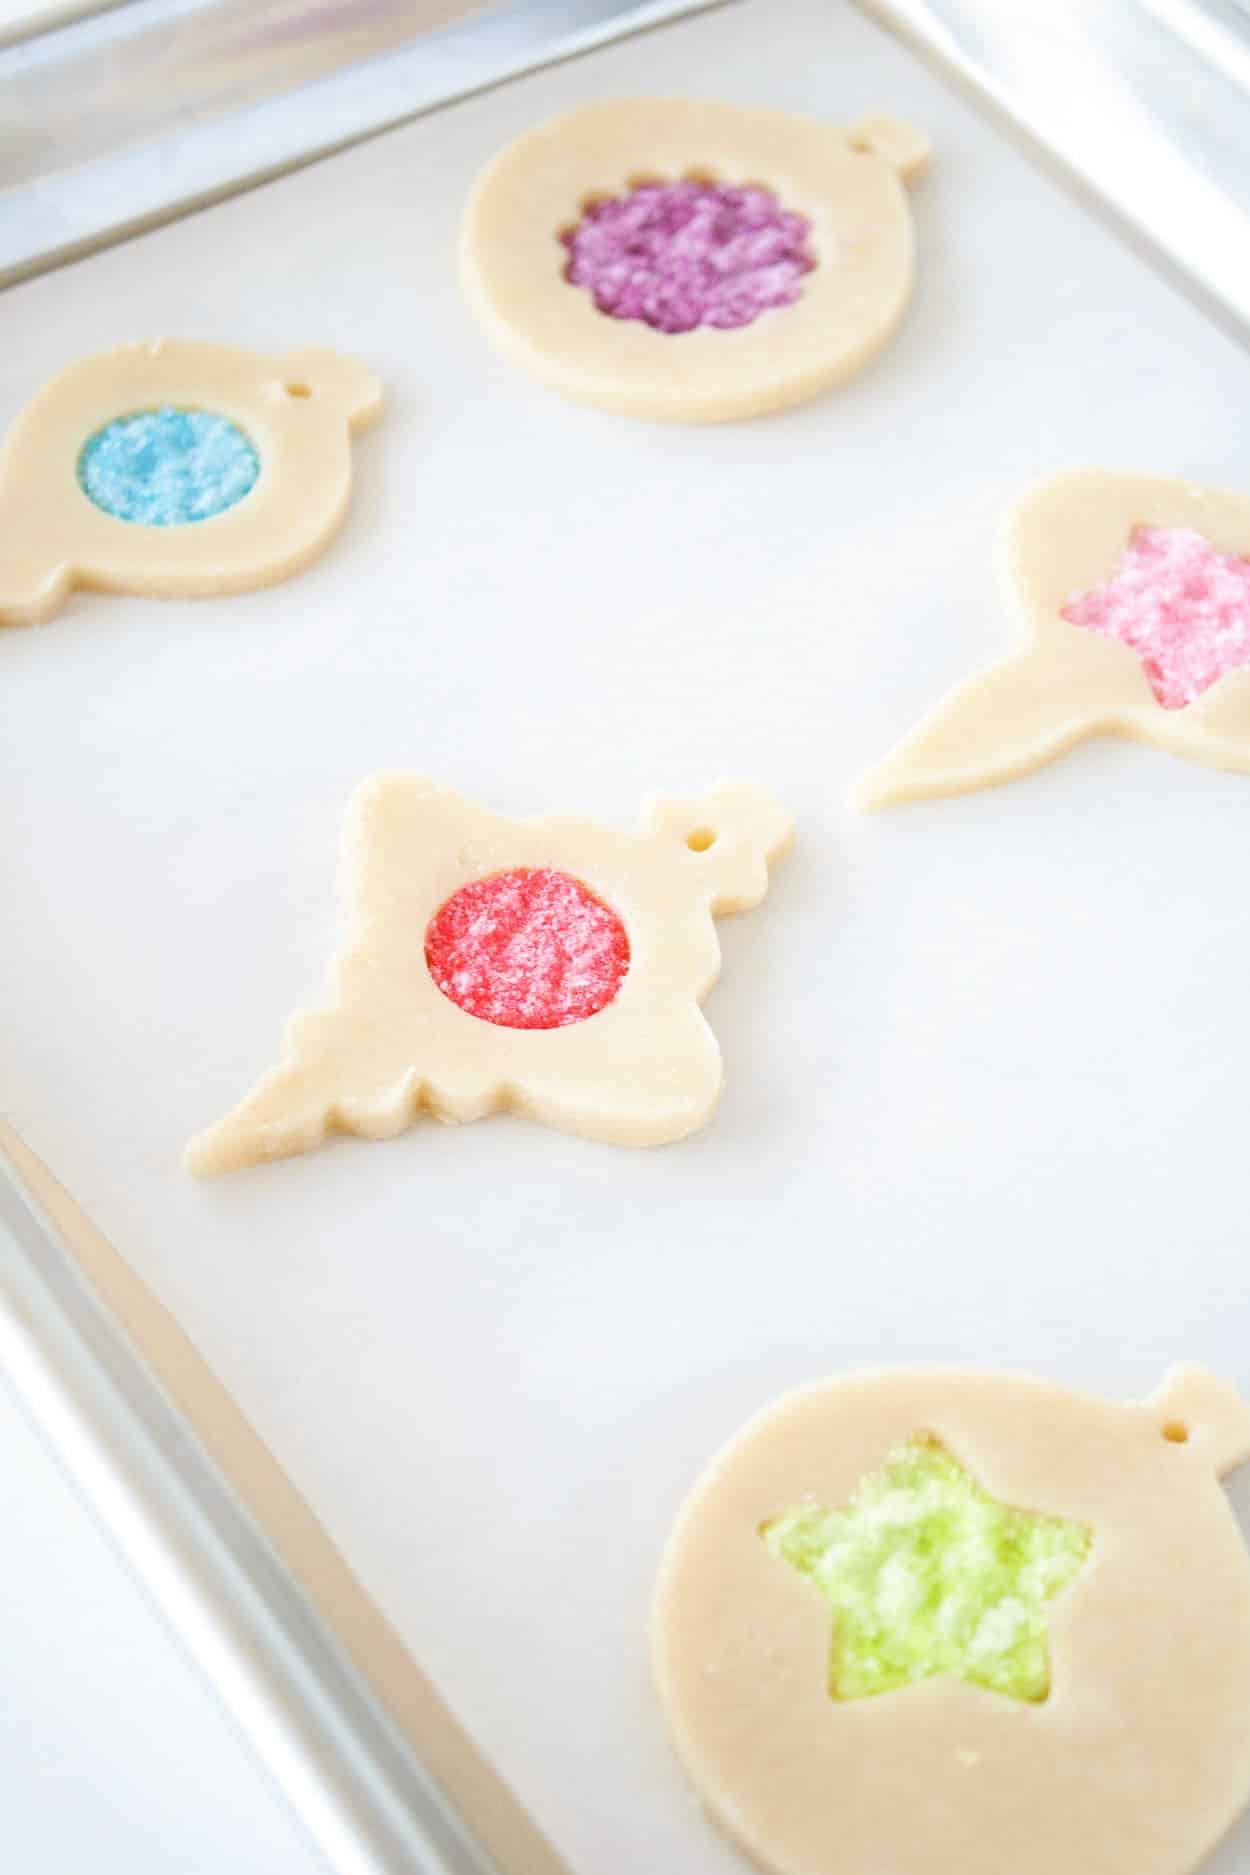
Once ready, pop them into a preheated oven for about 8 minutes — depending on the size and thickness of your cookies.
Start checking the cookies at about 7 minutes, and watch them like a hawk.
Like. A. Hawk.
You want to cook them just until the edges start to lightly brown and the candy has melted — NOT until the cookies are brown and the candy has caramelized.
Hello, ruined first batch!
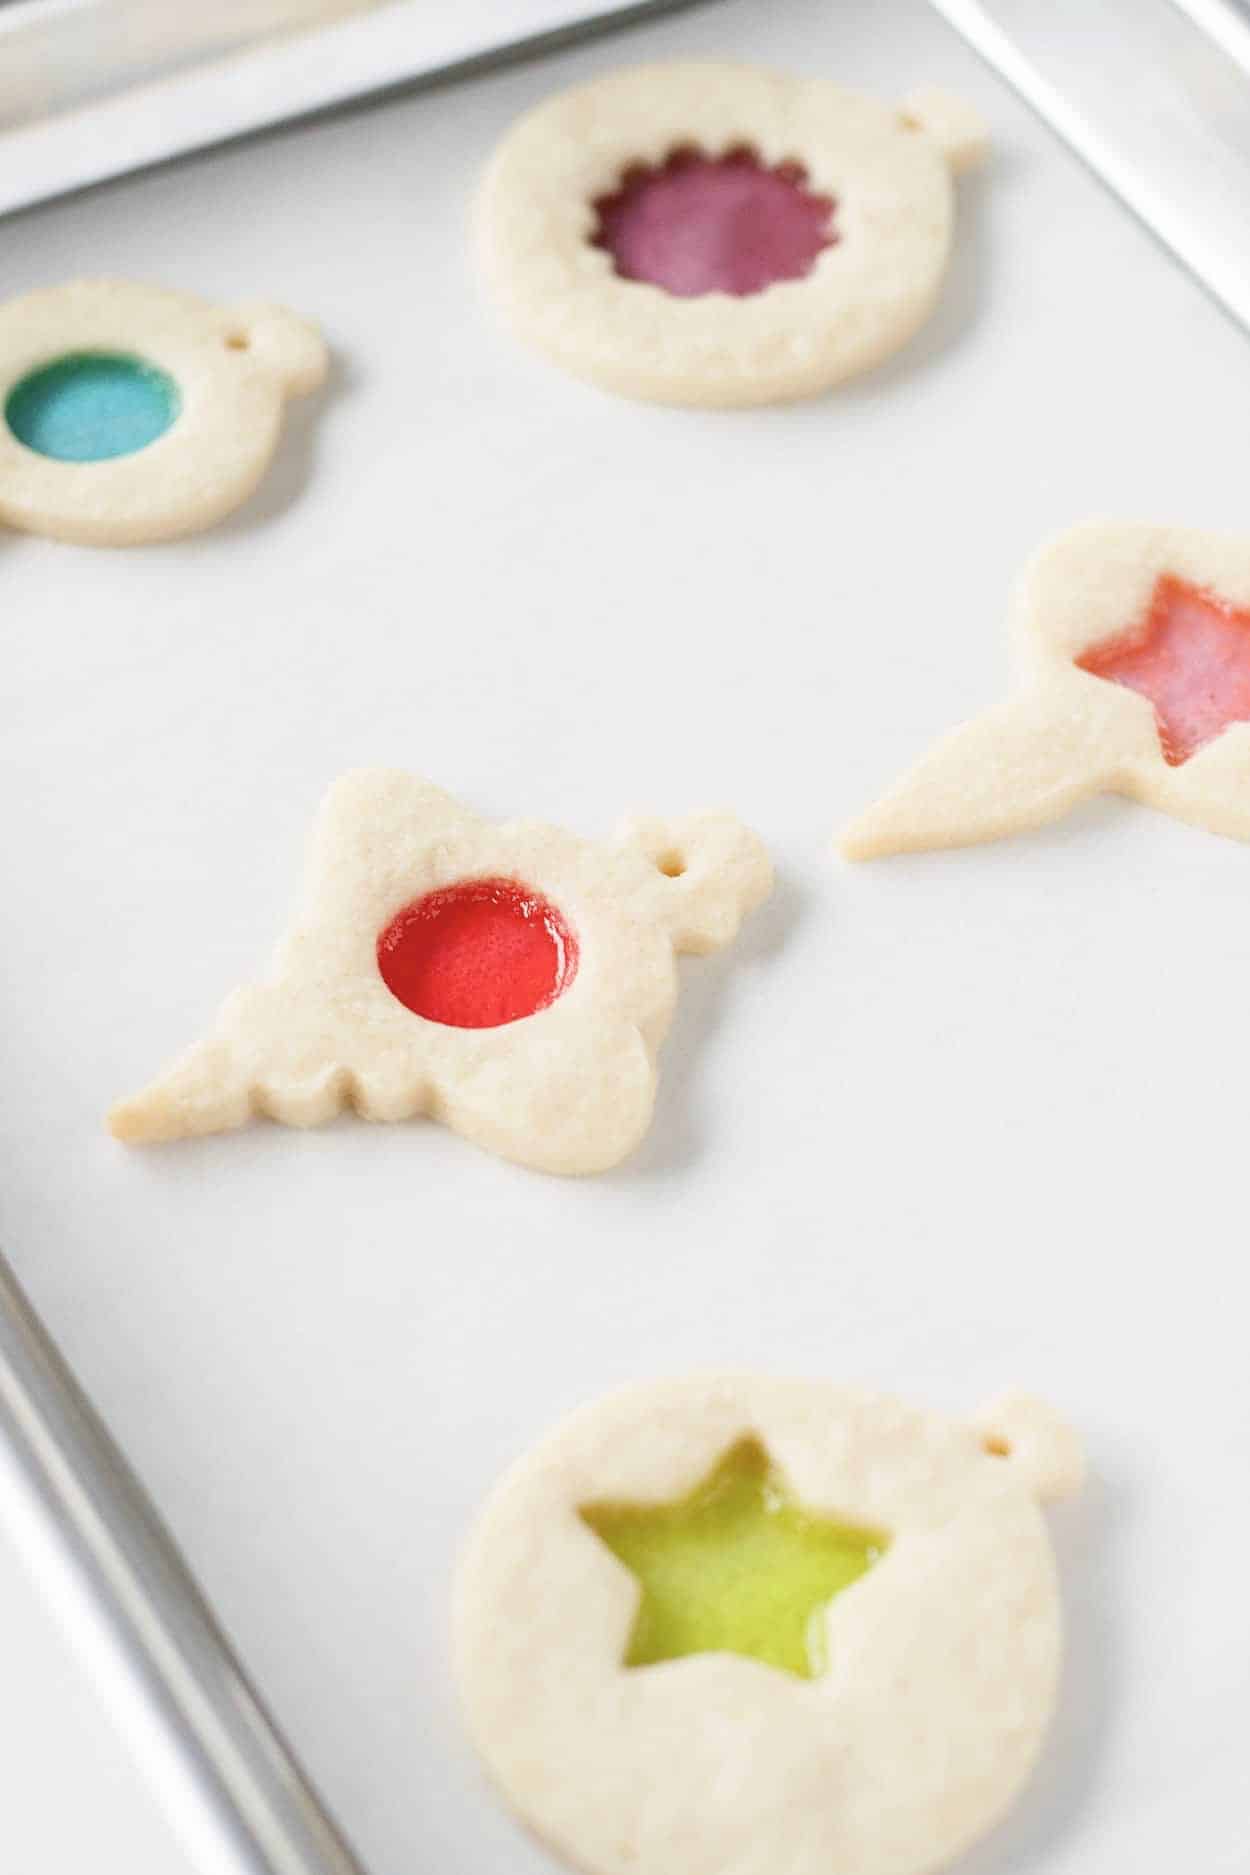
Let these guys cool completely on the sheet pans to let the candy harden. Don’t try to move them or you’ll ruin all your hard work.
Once the stained glass cookies are cool, carefully peel them off the parchment or silicone mats. Thread with some string and hang on your tree!
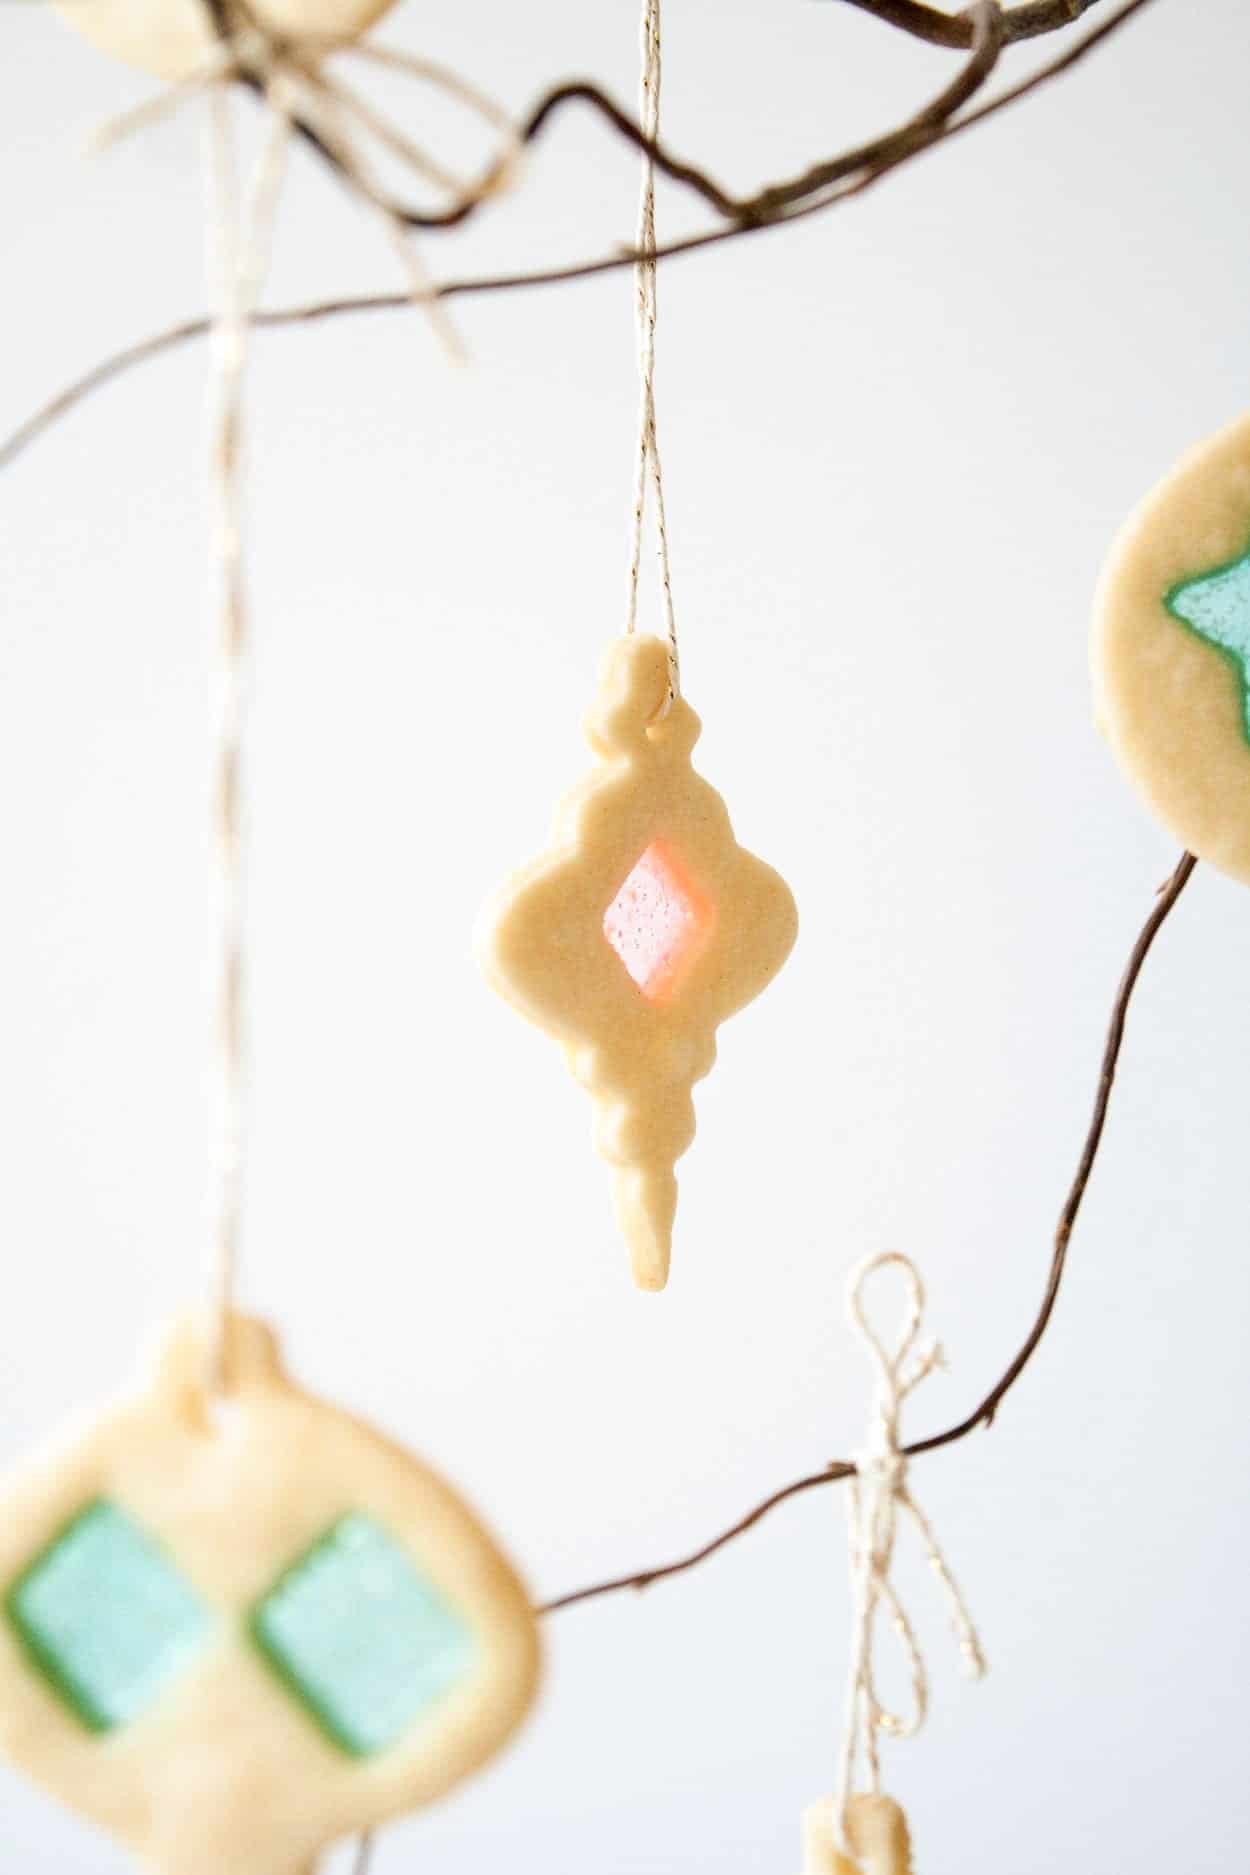
One thing to note: this recipe makes a LOT of cookies (depending on the size and thickness of course).
I ended up using half the dough and had about 36 cookies. I did NOT want to make 72 stained glass cookies, so I popped the rest of the sugar cookie dough into the freezer to be used at a later date.
So you may want to cut the recipe in half unless you’re making larger cookies.
Looking for More Christmas Cookies?
- Dark Chocolate Candy Cane Cookies
- Chocolate Dipped Ginger Cookies
- White Chocolate Candy Cane Cookies
- Eggnog Cookies With Rum Sugar Glaze
- Maple Sugar Cookies
Tips for these Stained Glass Cookies
- I used Jolly Ranchers because I liked the range of colors, but you could use Lifesavers or something similar or try sanding sugar. (UPDATE 2020: Sanding sugar does not work)
- You can freeze any extra cookie dough for up to 3 months.
- Here are the cookie cutters I used. Any will work but the amount of cookies the recipe makes depends on the size of cutters you use.
- Chill the cookies before baking so that they maintain their shape.
- Let cookies cool completely on the baking sheet. You want to make sure the sugar has hardened and set.
Stained Glass Cookies
Ingredients
- 2 3/4 cups all-purpose flour 390g
- 1/2 tsp baking powder
- 1/2 tsp salt
- 2/3 cup granulated sugar 132g
- 1 cup unsalted butter 227g, room temperature
- 1/2 large egg 2 tsps, lightly beaten
- 1 1/2 tsp vanilla extract
- 1 package assorted hard candies 198g, eg. jolly ranchers
Instructions
Dough:
- In a medium bowl, whisk together the flour, salt, and baking powder. Set aside.
- Beat butter and sugar with an electric mixer until pale and fluffy. Add egg and vanilla and mix until combined.
- Reduce speed to low and gradually add in flour mixture. Mix until dough starts to clump and hold together.
- Scrape dough onto a sheet of plastic wrap and use the plastic wrap to form it into a thick, flat disc (avoid touching dough with your hands). Chill for 1 hour.
Candies:
- Separate candy by color and pulverize them separately in a food processor until they reach a sand-like consistency. Place each color into a small bowl.
Cookies:
- Preheat oven to 350F and line baking sheets with parchment or silicone mats.
- Take 1/4 of the dough and roll it out to 1/8″ thickness between 2 pieces of parchment or on a floured surface.
- Cut cookies out and place them on your prepared baking sheet using a small spatula. Make a small hole in the top with the blunt end of a wooden skewer. Chill in the fridge while you do the same with the next 1/4 of dough.
- Remove cookies from fridge and cut out shapes for the stained glass with a small cutter or a knife. Use a toothpick to pry out any pieces that don’t come out.
- Using the tip of a small knife or tapered offset spatula, fill each hole with the crushed candy pieces, filling just to the top of the dough. Nudge into corners as needed and be careful not to get any on top of the cookie dough (brush off any excess). Chill for 15mins if cookies have softened.
- Bake for 7-10mins (depending on size and thickness of cookies) just until the candy has melted and the edges start to brown. Rotate cookies at 4mins for even baking. Start watching at the 7min mark to make sure the candy doesn’t start to caramelize.
- Cool completely on baking sheets.
- Repeat with the remainder of the dough.
Notes
Originally published on Dec 2, 2015



Apryl says
there’s no way this recipe makes 72 cookies, unless they are super tiny 1″ cutouts. i’m probably going to get 30 cookies out of the whole batch. super disappointed.
Olivia says
Hi Apryl, sorry to hear you didn’t get as many cookies as I did. Perhaps you rolled your dough thicker or used larger cookie cutters than I did.
Sherry J says
This idea is a show stopper…I am going to try:entering them.into our work conte, hope to take away the ‘presentation’ award… will keep you posted…
Olivia says
Good luck Sherry!
Taylor says
OMG these are genius!! I may have to convince my friends to make these on the day we do our cookie exchange hehe
Olivia says
Thanks so much Taylor!! I love how these turned out 🙂
Jenny says
These are absolutely stunning! I would never eat them and probably pack them away with other Christmas decoration 🙂 Thanks for sharing a brilliant idea
Olivia says
Thanks Jenny!! I couldn’t eat them either and I can’t remember if I packed some away for this year!
Natasha @ Salt & Lavender says
I was just on the FBC site and read your interview. Just wanted to stop by and say these look great!! Sharing!
Olivia says
Aww thanks so much Natasha! Thanks for stopping by 🙂
Debbie says
Wow I love the cookie cutters you use, you’ve inspired me to make some and they turned out really nice. Thanks ?
Olivia says
Thanks Debbie! I’m so glad you tried this! 🙂
Amber Witt says
I’m currently making these cookies and I have run into a problem, they are way to dry. I’ve added about a half a cup extra of butter just to get the dough to stick to itself. Other than that they look great.
Olivia says
Hi Amber! Thanks for the feedback, surprised it was so dry for you! Mine was only dry in a small part, but most of it was fine. Please let me know how they turn out!
aurélia says
WAOUH MERCI BEAUCOUP POUR CETTE RECETTE SI COOL! JE VAIS ESSAYER !
Olivia says
Merci Beaucoup Aurelia! J’espère que tu les aimes!
Tiffany says
This tutorial looks so great. I really would like to try it out myself but I have no idea where to get the cookie cutters that you used, especially the smaller ones that you used inside the ornaments themselves. I am not very skilled at the whole creativity aspect myself so I have never tried to tackle this type of thing before. Could you tell me what those little type of cutters are called and where I could possibly find some?
Olivia says
Hi Tiffany! The cookie cutters I have amassed through the years, but here are some links to similar ones like the ones I have:
Fluted cookie cutters
Mini Cookie Cutters
I hope this helps and I hope you try these out! They’re really not difficult to do, just a bit time consuming :).
Karly says
These cookies are gorgeous! Thanks for linking up with What’s Cookin’ Wednesday!
Olivia says
Thanks so much Karly!
Mel @ The Refreshanista says
These cookies are so beautiful! Such a fantastic idea 🙂
Olivia says
Thanks so much Mel! xo
jacquee | i sugar coat it! says
Yours turned out stunning! With those hanging from the tree, you may mess up Santa’s delivery schedule. 😉
Olivia says
Hahahah, Thank you!! <3 <3 <3
Teri Giese says
Must say, Olivia, everything about your blog is just, well, elegant. Have become inspired by those cookies! Have wanted to create for years, as you said, a bit consuming they could be. This year, must be done. Thanks for the post, and the elegant inspiration! Such a lovely! happy Holidays!!
Olivia says
Hi Teri! Thank you so much for the kind words about my blog!! I hope you try these cookies (and that you found the tutorial helpful). Please let me know how they turn out if you do! Happy Holidays to you as well!
mimi says
Excellent tutorial! I was enamored with it as soon as I saw it!♡♡♡
Olivia says
Thank you Mimi! <3 xo
heather @french press says
these are absolutely beautiful!
Olivia says
Thanks so much Heather!!
Rachel @ Simple Seasonal says
Such beautiful cookies! I want to run into my kitchen and give this a try!
Olivia says
Thank you Rachel!! Do it! hahaha 🙂
Tux | Brooklyn Homemaker says
seriously gorgeous! I can’t take it!
Well done!
Olivia says
Thank you so much Tux!! <3
charityk says
looks good, although i picture my kids biting out the center and throwing out the rest of the cookie 🙂
Olivia says
Haha, I will eat the leftover cookies! I don’t like the candy part as much 🙂
Medeja says
Oh these are just so beautiful!
Olivia says
Thank you Medeja! 😀
Elizabeth says
Unique idea! Beautifully executed. Thank you so much for sharing this post, Olivia. 🙂
Olivia says
Thank you Elizabeth! 🙂