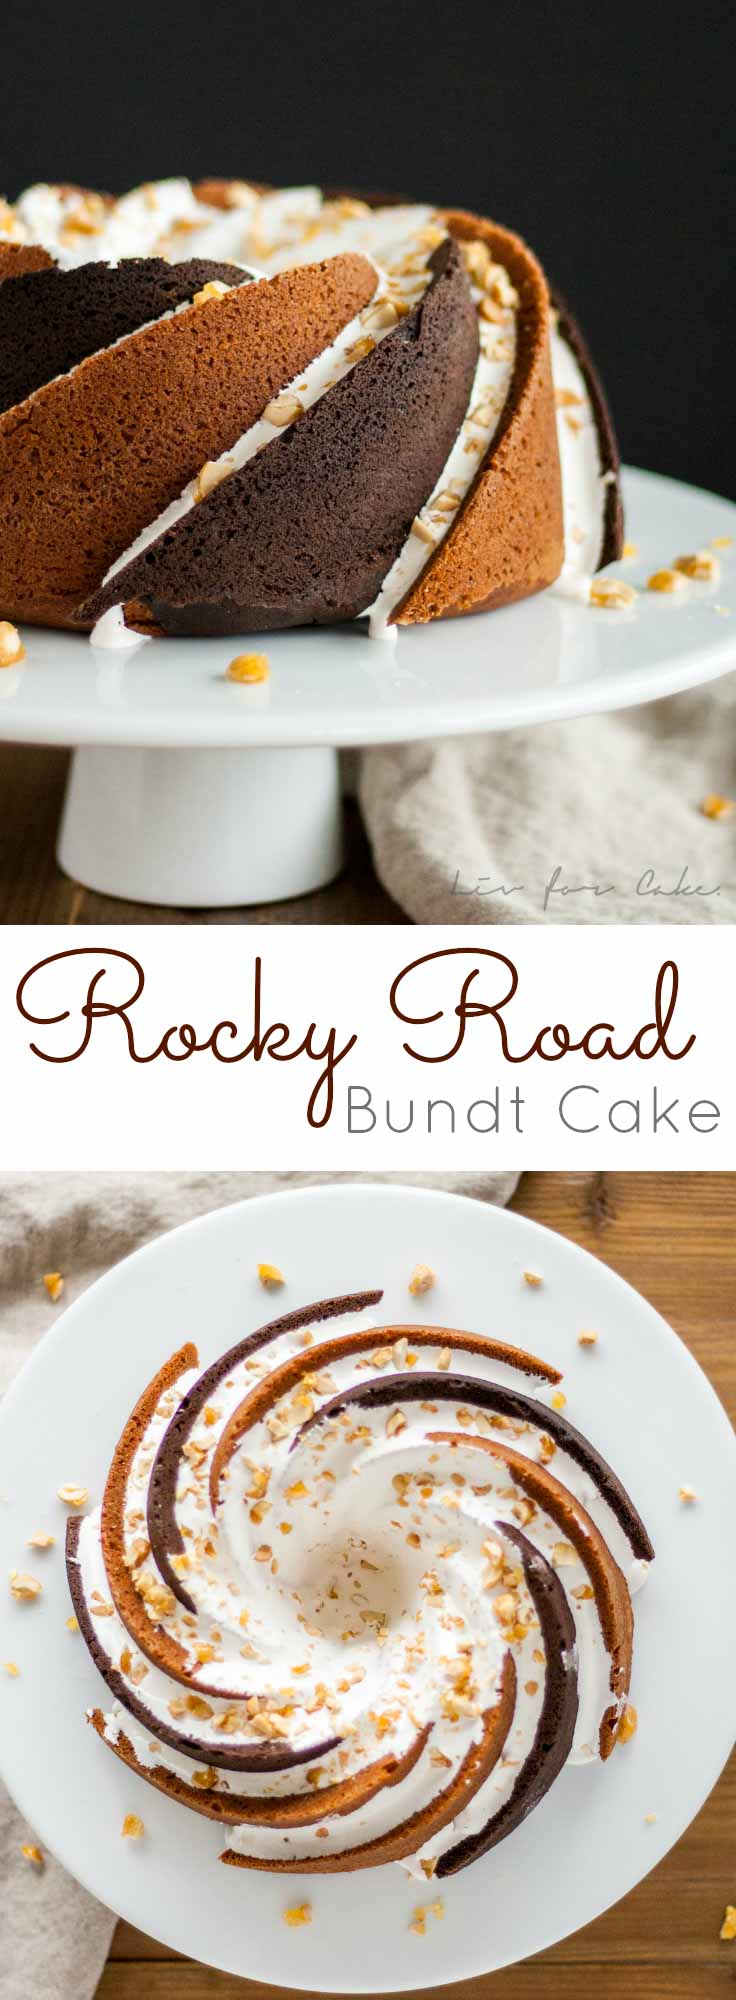
Rocky Road Bundt Cake! Alternating swirls of peanut butter and chocolate cake with a marshmallow glaze topped off with some candied peanuts.
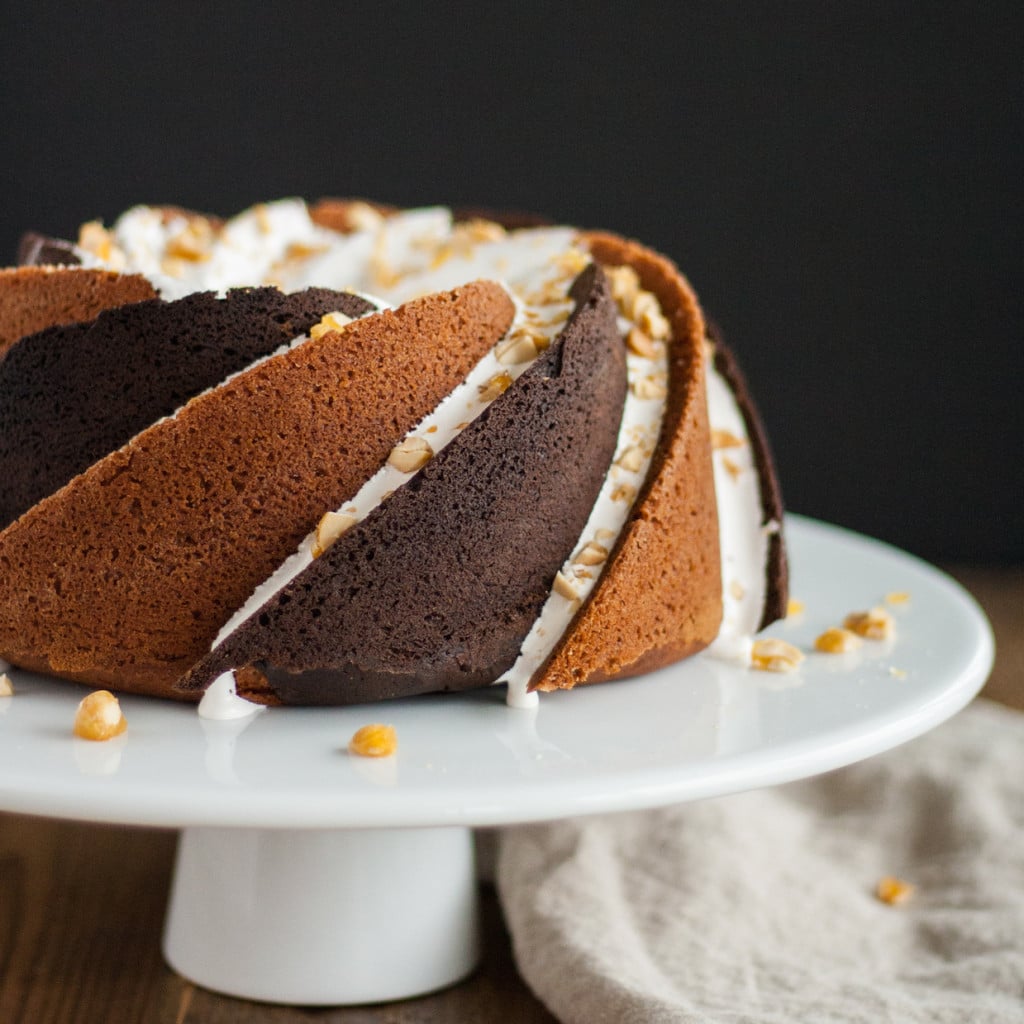
I don’t usually toot my own horn, but does this cake look amazing or what??
I was brainstorming ideas with Ryan a few weeks ago, about this month’s Bundt Bakers theme: Rocky Road, hosted by the lovely Laura from Baking in Pyjamas. Did you know that the ingredients in Rocky Road vary depending on where you live?? I decided to stick with the American version since it’s the one I grew up with, even though I don’t think I’ve ever had a Rocky Road anything. Crazy, right?
Anyhow, I knew I wanted chocolate and peanut butter to be the focus, but I didn’t want to do a chocolate bundt since I did one last month. I also wanted to use the Heritage Bundt pan, as I thought the spirals would make for perfect “roads” and go with this theme.
We tossed around a few ideas, but nothing was exciting, and then Ryan said the words just as I was thinking them… “you know what would be cool, is if you could alternate chocolate and peanut butter spirals”. Challenge accepted.
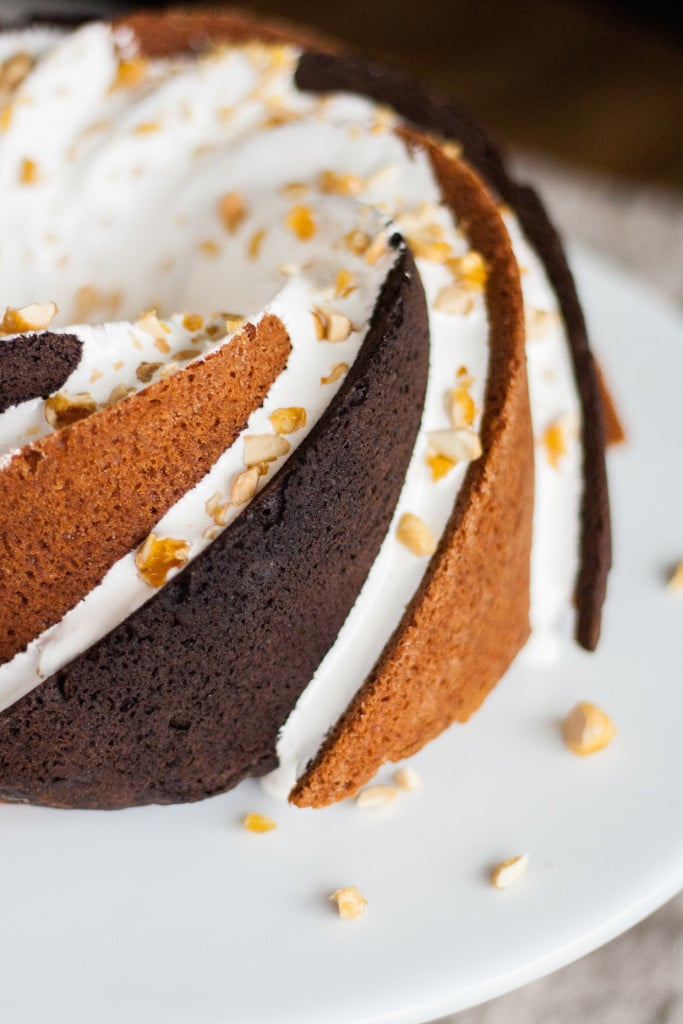
This wasn’t exactly difficult to do, but if you’re a perfectionist like me, you’re gonna have a bit of a hard time trying to make it look perfect.
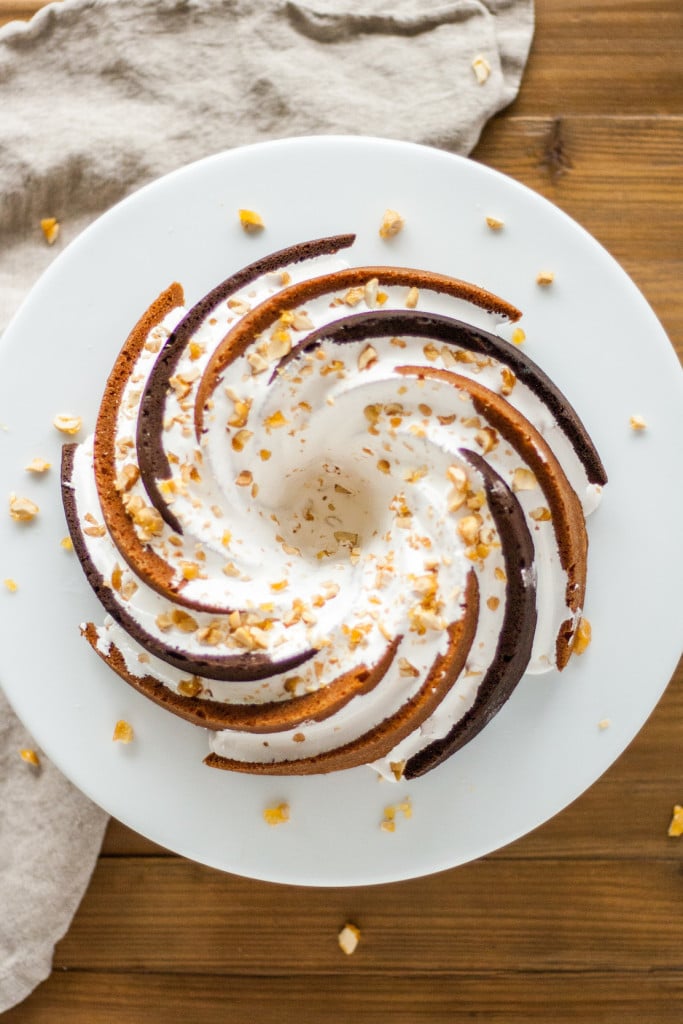
After making the peanut butter cake batter, I split it in half and added cocoa powder to one of the batches. Then I filled a piping bag with each of the batters, and piped the cake batter into the spirals. I started with the lighter, peanut butter batter and filled in every other spiral, being careful to not overfill them. Really I just needed the “shell” of the cake to look right – the inside was going to be marbled anyhow. I used a skewer to nudge the batter into the thinner areas of the spirals.
Then I did the same with the chocolate batter, making sure that the edges and points where the two batters met were as clean as possible. But I also knew I’d be pouring a glaze down each crack, so I didn’t worry too much if there was some overlap. Once each spiral was filled, I layered the remaining batter in the pan and marbled it with the same skewer. (For a detailed tutorial see here).
Let me tell you, the fact that there is an odd number of spirals nearly had me rethinking this whole idea. My poor OCD. I’m hoping that you’ve gotten to this point in the post and haven’t noticed this. If you have, welcome to my world!
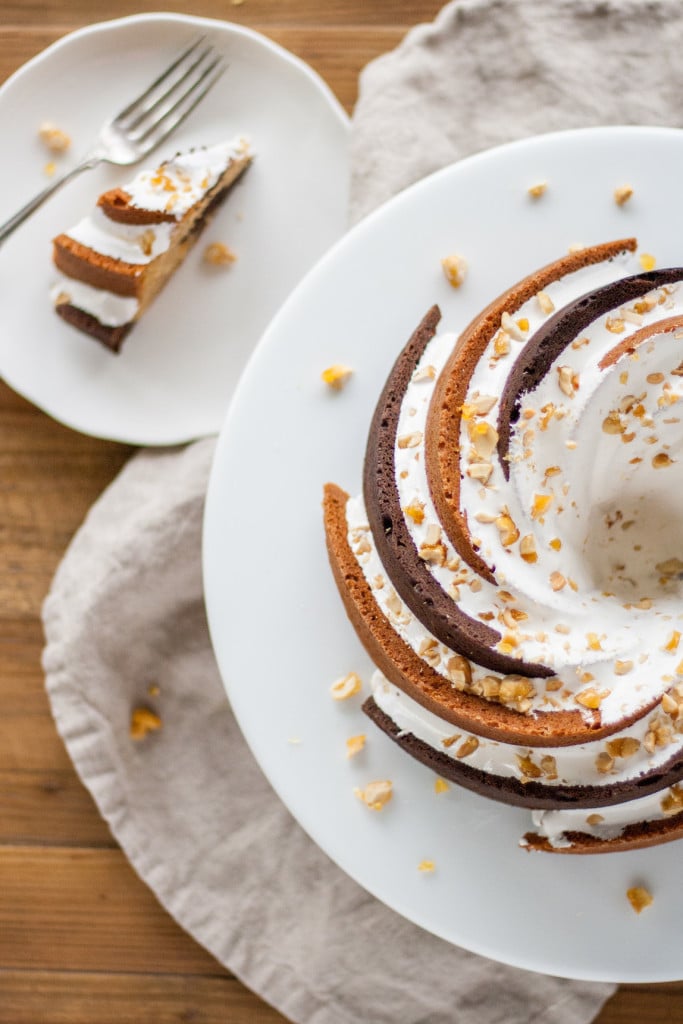
I patiently waited a good 15mins before I turned the cake out onto a cooling rack and removed the pan, holding my breath the entire time. Thankfully, it was perfect. Yay!
And just so you know how crazy I am… there was some noticeable (to me) flour dust on the chocolate parts of the cake from the cake release I used on the pan. So I mixed up a bit of the two cocoa powders I used (black cocoa & Dutch-processed) and used a small pastry brush to brush the cocoa onto the cake. To me, this made a HUGE difference. Ryan likely would not have even noticed the flour dust to begin with :).
Had this been an all chocolate cake, I would have dusted the pan with cocoa powder instead of flour. I could have dusted each alternating spiral with flour and cocoa, but that’s just crazy talk (it did cross my mind, but laziness prevailed).
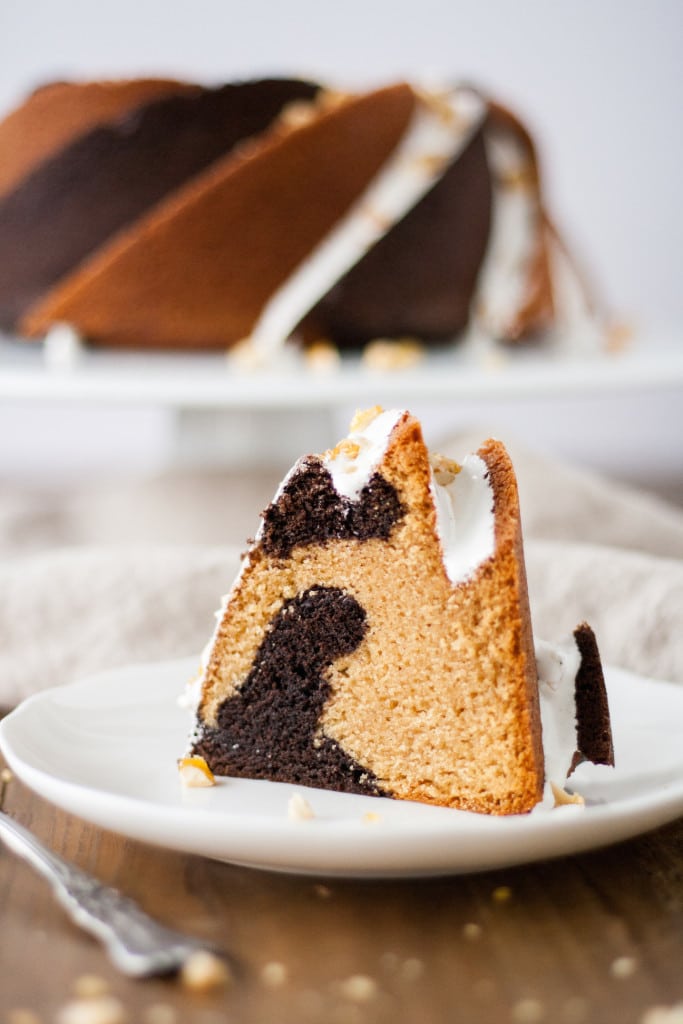
I made an easy marshmallow glaze to drizzle into the cracks, and sprinkled the top with some chopped up candied peanuts.
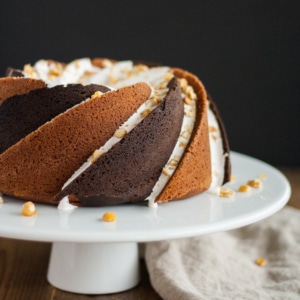
Rocky Road Bundt Cake
Ingredients
Bundt Cake
- 2 1/2 cups all-purpose flour
- 1 1/2 tsps baking powder
- 1 tsp baking soda
- 1/2 tsp salt
- 1/2 cup unsalted butter room temperature
- 1 cup smooth peanut butter smooth, not natural
- 1 cup light brown sugar packed
- 1/2 cup granulated sugar
- 2 tsps vanilla extract
- 3 large eggs
- 1 cup milk room temperature
- 3 Tbsp Dutch-processed cocoa powder I used 2 Tbsp black cocoa and 1 Tbsp Dutch-processed
Candied Peanuts
- 1 cup peanuts roasted, unsalted
- 3/4 cup granulated sugar
- 3 Tbsp water
- 1/4 tsp kosher salt
Marshmallow Glaze
- 2 cups marshmallow fluff store bought or homemade
- 1/2 cup powdered sugar
- 2 Tbsp heavy whipping cream
Instructions
Rocky Road Bundt Cake:
- Preheat oven to 350F and grease & flour a 10 cup Heritage Bundt pan (I use homemade cake release).
- In a medium bowl, whisk together the flour, baking powder, baking soda, and salt. Set aside.
- In a stand mixer fitted with the paddle attachment, beat butter and sugars on med-high until light and fluffy. Approx 2-3mins.
- Add peanut butter and vanilla, beat until thoroughly combined.
- Reduce speed and add eggs one at a time, thoroughly incorporating after each addition.
- Reduce mixer to low. Add flour mixture in 3 portions, alternating with 2 portions of milk. Mix until just combined.
- Pour half of the batter into a medium bowl, set aside.*
- Add 3 Tbsp cocoa powder to remaining batter and return to stand mixer. Beat until just combined.
- Prepare 2 separate pastry bags and fill one with chocolate batter and the other with peanut butter.
- Pipe the batter, alternating the colors, into the cracks of the Heritage bundt pan, being careful to avoid spilling over into neighbouring cracks. **
- Once cracks are sufficiently filled, add remaining batter in alternating layers and use a kitchen skewer to marble it. Spread the batter evenly.
- Bake for 45-50mins or until a skewer comes out clean.
- Remove from oven and transfer bundt pan to cooling rack for 10-15mins. Rap the bundt pan against the counter to loosen it then turn cake out onto cooling rack to cool completely.
Candied Peanuts:
- Line a baking sheet with parchment or a silpat.
- Place sugar and water into a small pot over med-high heat. Stir only to combine.
- Wash down the sides of the pot with some water and a pastry brush to prevent sugar from crystallizing. Do this from time to time, as needed, while the sugar is cooking.
- Continue to cook sugar until the caramel reaches a medium amber color. Do not stir at any point.
- Add in peanuts and salt and stir for 1 minute to coat.
- Pour peanuts onto baking sheet and spread evenly. Allow to cool completely, then roughly chop.
Marshmallow Glaze:
- Place marshmallow fluff, and icing sugar into a medium bowl, stir well to combine. Add 2 Tbsp of cream and stir until glossy and smooth. Add more cream as needed until desired consistency is reached.
- Using a small measuring cup, pour glaze carefully into the cracks of the cooled bundt cake.
- Sprinkle top with chopped candied peanuts.
Notes
**I used a kitchen skewer for the finer points of the cracks. It’s a process. Bundt cake recipe adapted from Bake or Break.



Dave says
Hey there !
Just took it out of the oven and waiting fir it to cool for 15 but have a question.
I piped into each section as you said (and cursed my own OCD about the uneven cracks lol) but I initially piped to the very top of the outside of the bundt tin. Once I put the filling in I realised my mistake and kind pushed all the edges down to meet where the batter was sitting in the tin.
Do you pipe to the very top and let the cake rise up over the edges you have piped or only like 2/3 of the way to the top (on the outside of the tin not the inside cone part pf course)?
Thanks for the recipe very clever 🙂
Olivia says
Hi Dave! I did pipe almost to the top of the Bundt pan. You can kinda see in the photos in my tutorial here: https://livforcake.com/twotoned-bundt-tutorial/ It was a little higher than the rest of the cake batter but I think it helped make the sharp edges/ends 🙂
Joy Kling says
Hi Liv! It’s me again! I wanted to thank you for this recipe and the inspiration you provide to us all. Check out my cake on my cake blog. Here’s the link! I think I did a really good job! I’m proud of me! https://cakewerx.org/?p=152
Olivia says
Hi Joy! I just read through your post. You did such an amazing job on that cake! It’s definitely no small feat. I hope you all loved it 🙂 I can’t wait to see what you bake up next!
Viney Pepper says
Oh my! You’re in big trouble, lady. Ok. It’s in the oven. Did I have fun? Umm… no. I’m a fairly skilled baker and my OCD was sent over the edge by this one. What a hot mess my kitchen was. I’m not that hopeful for such a brilliant turnout is yours. I couldn’t keep the batter up near the bottom of the pan which is the bottom of the cake? I couldn’t keep it from sliding down the side so I have no idea how you got such sharp corners on the bottom of the cake. But, I like your cocoa powder idea. That’s it! I’m going to paint the bottom or the edges are crisp. I’ll try and take a picture of the final result. Homemade marshmallow cream for me.
: P
Olivia says
Hi Viney! Haha, I hear you. This one is not for the faint of heart! I hope it turned out beautifully for you!
Lisa says
I’m a little late to the party here, but I LOVE your recipes. I was looking for a great recipe to show off the swirls in my bundt pan, and I’ve found it. I won’t be making it soon, however, because I’m going to make your decadent white chocolate cake (half recipe, in 4″ and 6″ pans) for my son’s birthday. I have Type II Diabetes, and I usually make low or no sugar baked goods, but my son gets the real thing, and he’ll be taking it home with him. I get one small piece, and then I JOG. Thanks for all the great recipes.
Olivia says
Hi Lisa! Thanks so much for the sweet comment 🙂 Please let me know when you try this one, it’s still one of my faves! I hope your son loves the white chocolate cake!
Debbie says
Olivia not sure if you check old post comments, but I made this cake and yes the OCD way I put the different colors in just as you did one swirl at a time, and the homemade marshmallow cream and my husband loved it. Now his birthday is 2 days and I wanted to make him a peanut butter chocolate cake just like this one but in layers. Would I use the same recipe and just put it in a cake pan or would I have to adjust anything? I am doing one layer peanut butter one layer chocolate and so on. Thank you so much for posting such a beautiful cake and delicious one at that. It will be a 4 layer cake with peanut butter frosting and chocolate frosting on the entire outside of the cake.
Olivia says
Hi Debbie! This would work just fine in regular cake pans and splitting up the colors. The baking time would be much shorter though, since they won’t be as thick. Be sure to not fill the pans more than 2/3rds full or so. Also, if you’re feeling more adventurous, I highly recommend this cake! https://livforcake.com/peanut-butter-chocolate-cake/
Debbie says
Thank you for your quick response, I am going to make the layers today and I will use your Peanut Butter Frosting love Swiss Meringue Buttercream also. This cake should be an adventurous trip for me lol. I am doing four layer peanut butter, chocolate layer, etc. Then two frosting peanut butter and chocolate and then chocolate Swiss meringue on the whole cake with decorations should be a real adventure in my kitchen for 2 days. Thank you so much. I have a few more questions I should have already asked in the previous post should I use a simple syrup for the layers? Bundt cakes seem to be denser than layer cakes and I want it to be fluffy layers. Also have you done the Swiss meringue with peanut butter in it? How much peanut butter should you use I saw in the other post you used powdered peanut butter, and I don’t have time to order that and can’t find it in stores in my area? And last how many layers do you think I will get from this batter? Again thank you so much for all your help as I said before your the best.
Olivia says
Hi Debbie! You could use a simple syrup if you like, there is no harm, especially since it’s more of a Bundt cake consistency like you say. I have done a Swiss Meringue buttercream with Pb here (https://livforcake.com/banana-chocolate-chip-cake-peanut-butter-frosting/) It was equally delicious but the PB made the frosting much softer. I prefer using the PB powder as a result, but both are delicious! I’m not sure re: layers. It depends on the pan size and I’ve only ever made this in a Bundt 🙁
Debbie says
Thank you again. I went ahead and did two 9 inch cake layers and they are thick enough to cut in 4 layers or if you had 4 pans you could just do 4 and have them just the right size for a tall cake. The cake came out beautiful thank you so much for the recipe. Making the buttercream today and the party tonight. Thank you again for answering all my questions. Love your blog and all your recipes all the cake are so beautiful I think I am going to do them one at a time except the ones I have already done. But, this time no adventures just doing as written. Have a wonderful day.
Olivia says
You’re so welcome Debbie!! And thank you! 🙂 You should email me a photo once it’s done. I’d love to see it!
Ruth-Ann says
The overhead photo sent me on a hunt to find this pan and be willing to dish out the dough. It’s truly stunning! Glad for the BBB tip as they had a good price plus I got the coupon. I’m now waiting for delivery… so excited! I would like to try this recipe for a fundraising auction and know that I will take way longer than I’d like like to do everything and probably have some fail all no the way (even with a trial run). For that reason I’d like to avoid trying to make the fluff this round. What could I substitute and achieve an appropriate texture for a similar finish? Also will your fluff or a substitute hold at room temp for 2-3 hours? Thank you! I greatly appreciate the tutorial too!
Olivia says
Hi Ruth-Ann! I LOVE this pan, it’s such a stunner. I’m excited that you’re going to try this!! You could totally use store-bought fluff instead for the trial run and the final. Or you could just do a powdered sugar glaze (powdered sugar + water). Any of these alternatives or the homemade will be fine for a few hours at room temp. Let me know how it turns out! 🙂
Ruth-Ann says
Thanks for your reply. One more question… would “regular ” (eg. Fry’s or ghiradellis or a mix of the two) be enough to get the dark light contrast or is black cocoa powder necessary? I’m not sure where to get it here (Winnipeg)? Thanks!
Olivia says
I find the regular cocoa’s don’t give a dark enough color (for my liking) but if it’s not easy to find black cocoa, the regular will work too :). You can find the black cocoa on Amazon 🙂 http://amzn.to/2BIN503
mouny says
Ce serait super bien si ces recettes étaient en français………!
Au moins en les comprenant on s’en régalerait aussi !!!!!
Olivia says
Hi there! You should be able to translate these recipes using your internet browser.
Rachel says
This looks SO good! You could always do an ‘AAB’ pattern rather than ‘AB’ since you’ve got the multiples of 3, although that said, how would you ever choose which to do more of, the PB or the chocolate?! 😉
Olivia says
Hi Rachel! Yes, that is a great idea! I will have to try that next time 🙂 It would be a tough choice for sure though 😉
Cindy Rodriguez says
This is such a gorgeous bundt cake. Then you throw in peanuts and a marshmallow glaze…be still my beating heart!
Olivia says
This Bundt is still my fave 🙂 Thanks Cindy! xo
Anthea says
Hi, thank you for the tutorial. Imagine how beautiful it would look with rainbow colours.. yay!!!
Olivia says
Omg that is a GREAT idea! I might have to try that 🙂
Marisa @ marisasitaliankitchen says
Beautiful cake…looks scrumptious!
Olivia says
Thank you Marisa! 😀
Stef says
My mind is officially blown!
Olivia says
Ahhh thank you!!! 😀
Nancy says
Hi Olivia, this cake is beautiful. I would love to make this for my daughter this weekend. Unfortunately she has a nut allergy. Could you please tell me how I can change the recipe but not loose the consistency? I’m afraid if I take the peanut butter out, the cake will get runny. Please help. Thanks.
Olivia says
Hi Nancy! You could try removing the peanut butter and increasing the butter to 1 cup. That should work fine! Or you could use the simple pound cake from this tutorial:
http://livforcake.com/2015/06/twotoned-bundt-tutorial.html
Hope that helps! Let me know how it turns out :).
Nancy says
Thanks for the advice!
Maaike says
Dear Olivia,
I want to make your cake for my birthday. But I only have 1 pastry bag. Can I do it with a spoon?
Or do I have to buy another one?
Thanks!
Love Maaike
Dutch
Olivia says
Hi Maaike! I’m sure you could do it with a spoon, it would just be a little harder to keep clean lines. Just make sure you nudge the batter into the cracks with a skewer. Did you see the tutorial I have for this here?
Good luck and let me know how it goes! 🙂
Maaike says
Dear Olivia,
I Bought pastry bags. So I did it your way. I write my own blog and used your recipe. So every dutch baker can make your recipe now. I linked your website.
Mine is foodfoozle.com. Thanks for the quick respons
Maaike
Olivia says
Thanks Maaike! I will check it out! 😀
amanda sullivan says
also I couldn’t find icing sugar can I substitute anything?
Olivia says
You can try leaving it out altogether, should still work!
amanda sullivan says
what type of cream do you use?
is it heavy whipping cream?
Olivia says
Hi Amanda, yes heavy whipping cream!