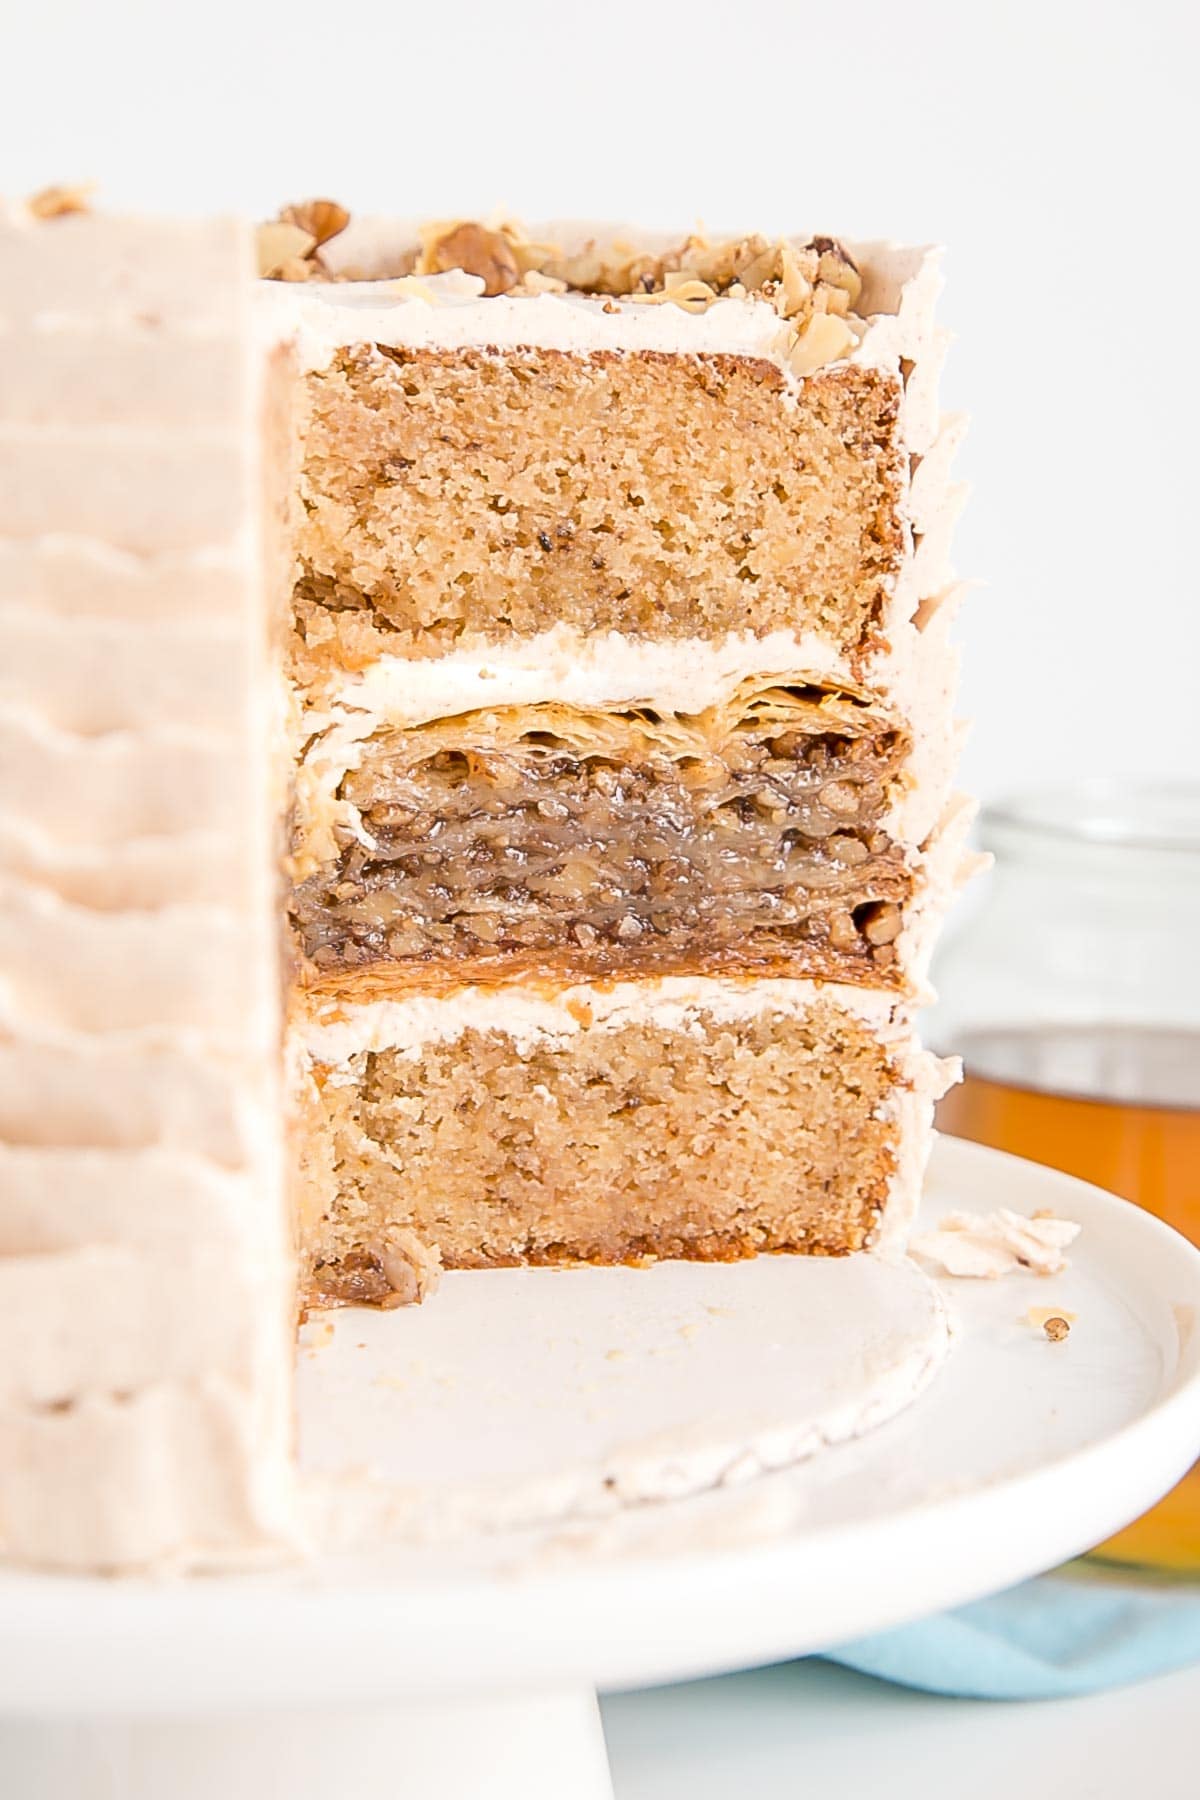
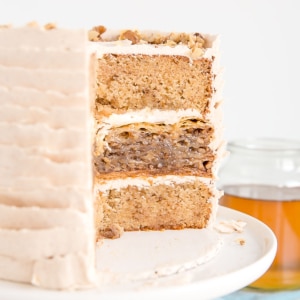
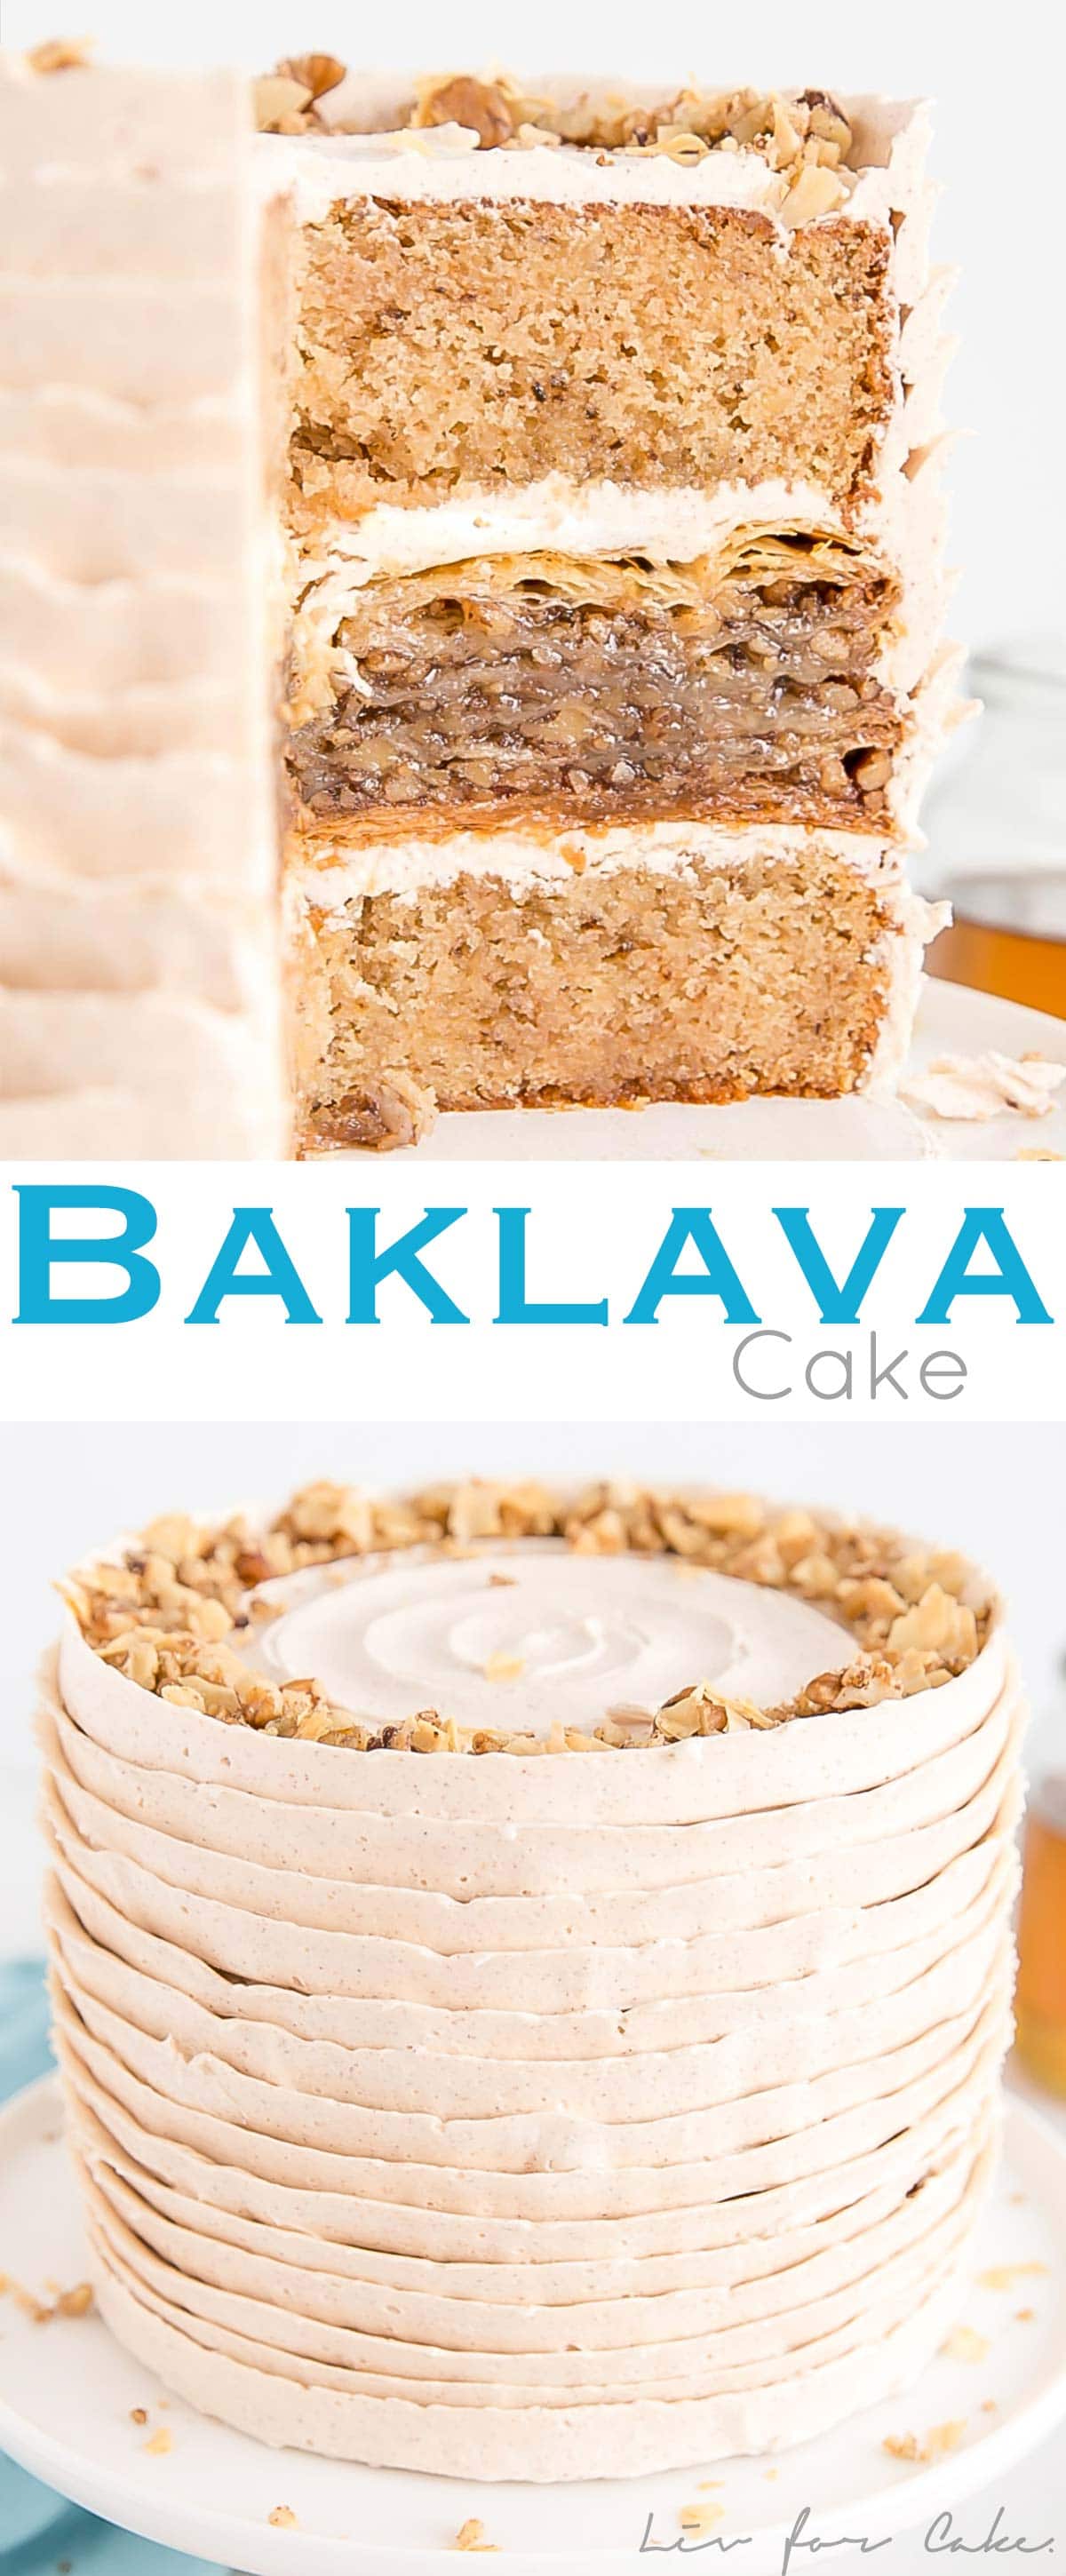
Baklava Cake! A sticky sweet baklava sandwiched between two delicious honey walnut cake layers covered with a honey cinnamon buttercream.
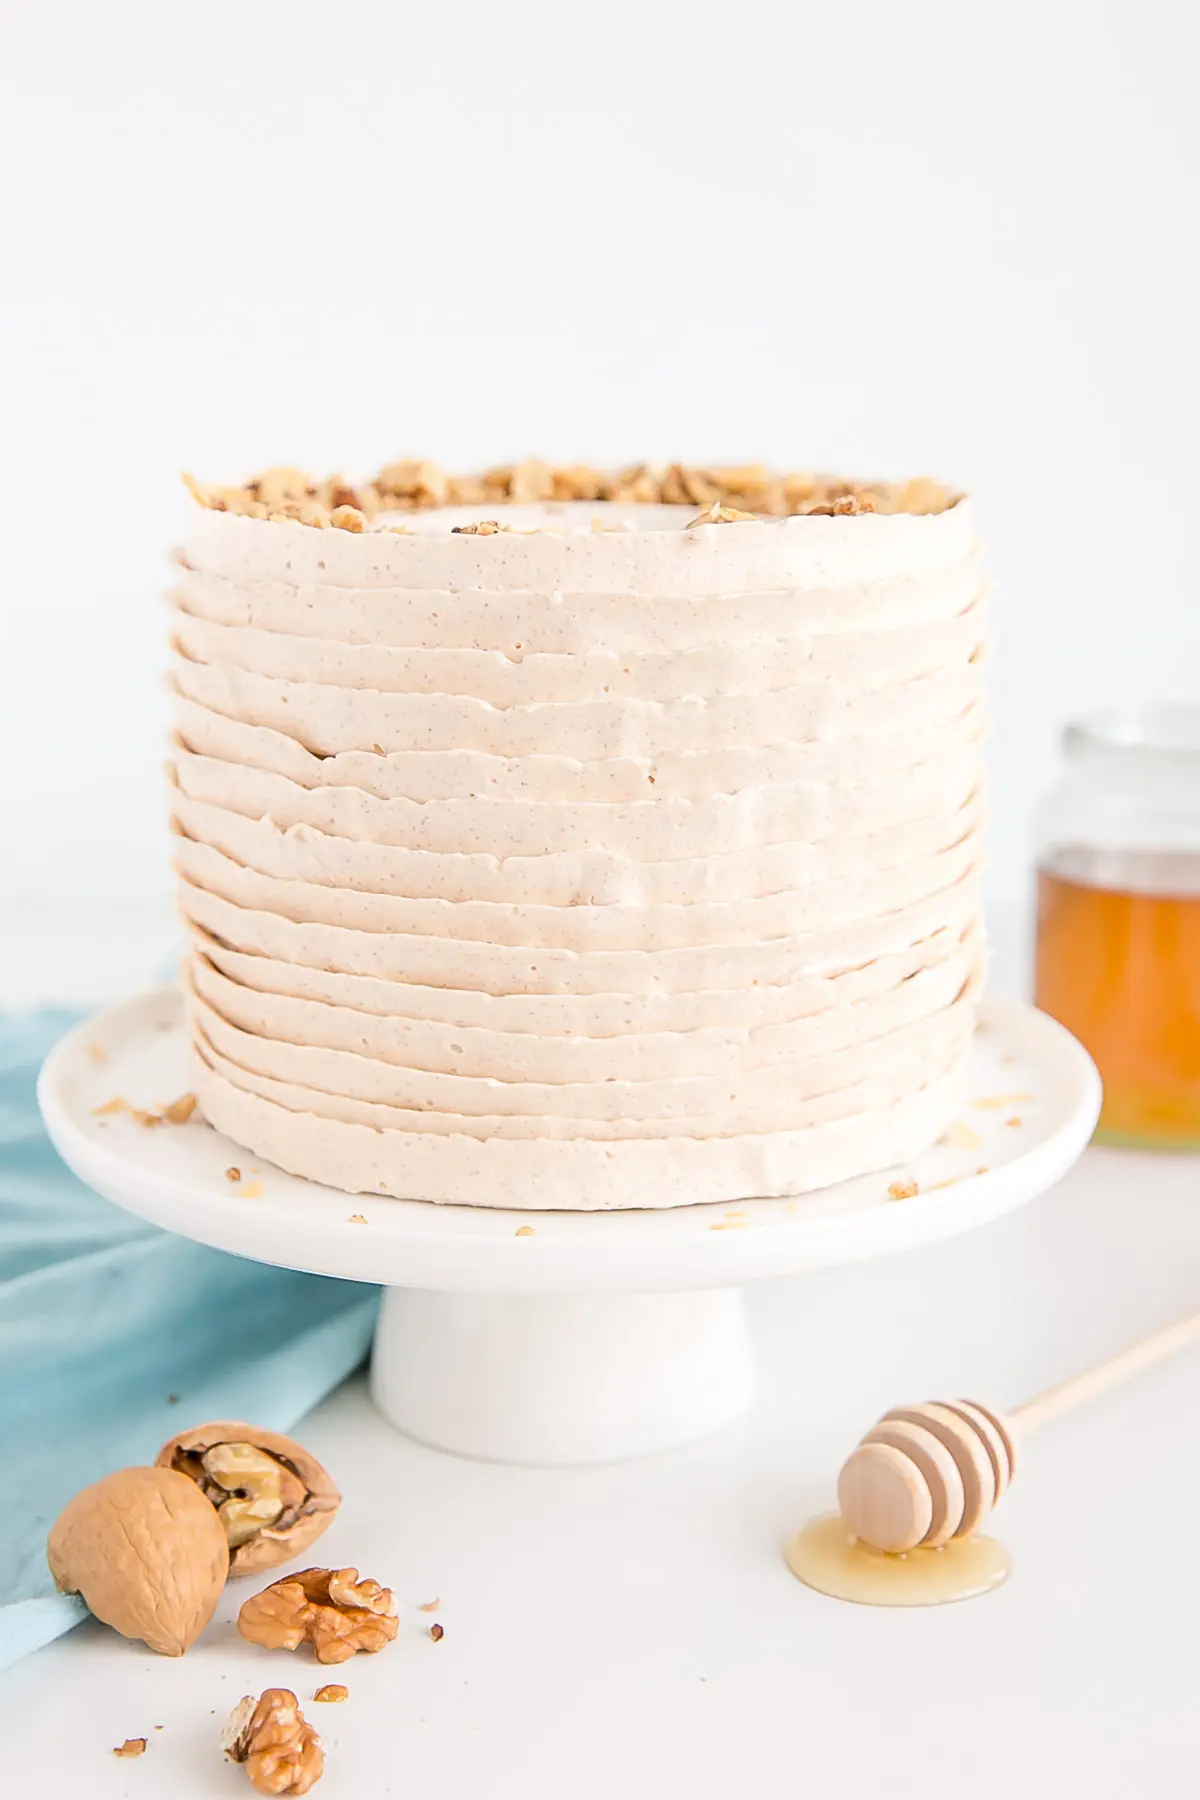
I am so excited to bring this Baklava Cake to you today. This recipe was harder to nail down than most, but it honestly turned out better than I expected in the end. The cake layers failed on me numerous times, and the only reason I kept going is because they tasted SO good. Like, amazing. Like, you’ll want to bake up just the layers and have them around for snacking or with your coffee/tea or for breakfast (no judgment).
Before we get into the deliciousness of the cake layers themselves, let’s talk about what Baklava even is. Spoiler alert: it’s delicious and you should definitely try it.
What is Baklava?
Baklava is a sticky sweet pastry made with dozens of layers of buttery Filo dough, chopped nuts, and honey syrup. Recipes for this vary greatly depending on where you’re from. It can be made with pistachios, walnuts, or almonds, and can include cardamom or cinnamon or rose water.
I kept it simple with honey, cinnamon, and walnuts, because that’s how I like it, but you could make any version you prefer.
How do you make Baklava?
Baklava is actually fairly easy to make, it’s just a bit tedious and time consuming. It took me about 30mins just to assemble, using 35 sheets of filo.
To make baklava, you start off by greasing your pan and then begin layering sheets of filo that you brush with melted butter. Start with 10 buttered sheets, and then spread the walnut filling. Next is 5 buttered sheets and filling, etc. etc. for as many rounds as you like, and top it off with 10 buttered sheets of filo.
Once you’re all layered up, you cut the baklava (before baking) into diamonds (I did squares) so that the syrup can penetrate through once it’s baked.
Bake the baklava (mine took 1h 15mins) then immediately pour the honey syrup over it. Cool completely, and let sit for at least 6 hours to a couple of days for the pastry to soften.
What kind of pan should I use for Baklava?
Normally, baklava is made in a 9×13 pan, but since I was making a cake I wanted a round pan. I needed to be able to get the baklava out of the pan in one piece, so I used a 6″ springform pan. Being springform though, some of the butter and honey syrup leaked out.
Ideally, I’d recommend one of those pans with the removable bottom that you push up. There might still be some leakage, but probably not as much. You could maybe get away with a regular cake pan and attempt to turn the baklava out of it, but I haven’t tried this myself. If you go this route you may want to line the cake pan with foil and have it overhang so you can pull the whole thing out.
Because I was using a round pan, I used a cake ring as a guide, placed it on top of the stack of filo, and cut around it with a sharp knife. I was hoping I could just press the cake ring through the filo to cut it, but that wasn’t going to happen, so a regular cake pan would work as a guide too, or even a 6″ cake board.
Tips on working with Filo Dough
Filo is extremely delicate, dries quickly, and tears easily. Though torn sheets are still totally useable, here are some things to keep in mind when working with it:
- Thaw in refrigerator. Thaw frozen pastry overnight in the refrigerator. Bring to room temperature before using.
- Keep it covered. Filo dries out and becomes brittle very fast so always keep the pastry covered with a damp (not wet) tea towel or similar.
- Handle with care. Filo is delicate and tears easily. Be gentle with it.
Honey Walnut Cake Layers
I didn’t want to use just plain vanilla cake layers here, because I felt like that would have been a cop-out. As much as possible, I wanted to emulate those delicious baklava flavors in the cake layers — something I thought would be a simple process.
I used my Almond Cake as a base for this, because it’s one of my faves and the layers baked up so beautifully. I tried a simple swap of walnut “flour” (I pulsed walnuts in a food processor to make this) instead of almond flour, and swapped some of the honey for sugar. The layers baked up okay, but the tops were kinda funky and they sank just a bit. It wasn’t up to my standards, at any rate (appearance wise).
I assumed it was the honey in my recipe, but numerous attempts later it turned out it was the walnuts. My cake layers just kept caving in while still in the oven, some worse than others, and the only determining factor seemed to be the amount of walnut flour I put in there.
I assumed walnut flour would be a straight swap for almond flour, but that’s clearly not the case (though pistachio flour worked just fine). I guess maybe because walnuts have more oil in them or something? I still don’t understand the exact science of why it went wrong, but just know that I tried a bunch of times to get it right.
When you’re making this recipe, I recommend weighing your walnut flour if possible. With the amount I’ve indicated in the recipe, it won’t be the end of the world if you use a bit too much, but your layers might sink in a bit. You can easily trim them off to level though.
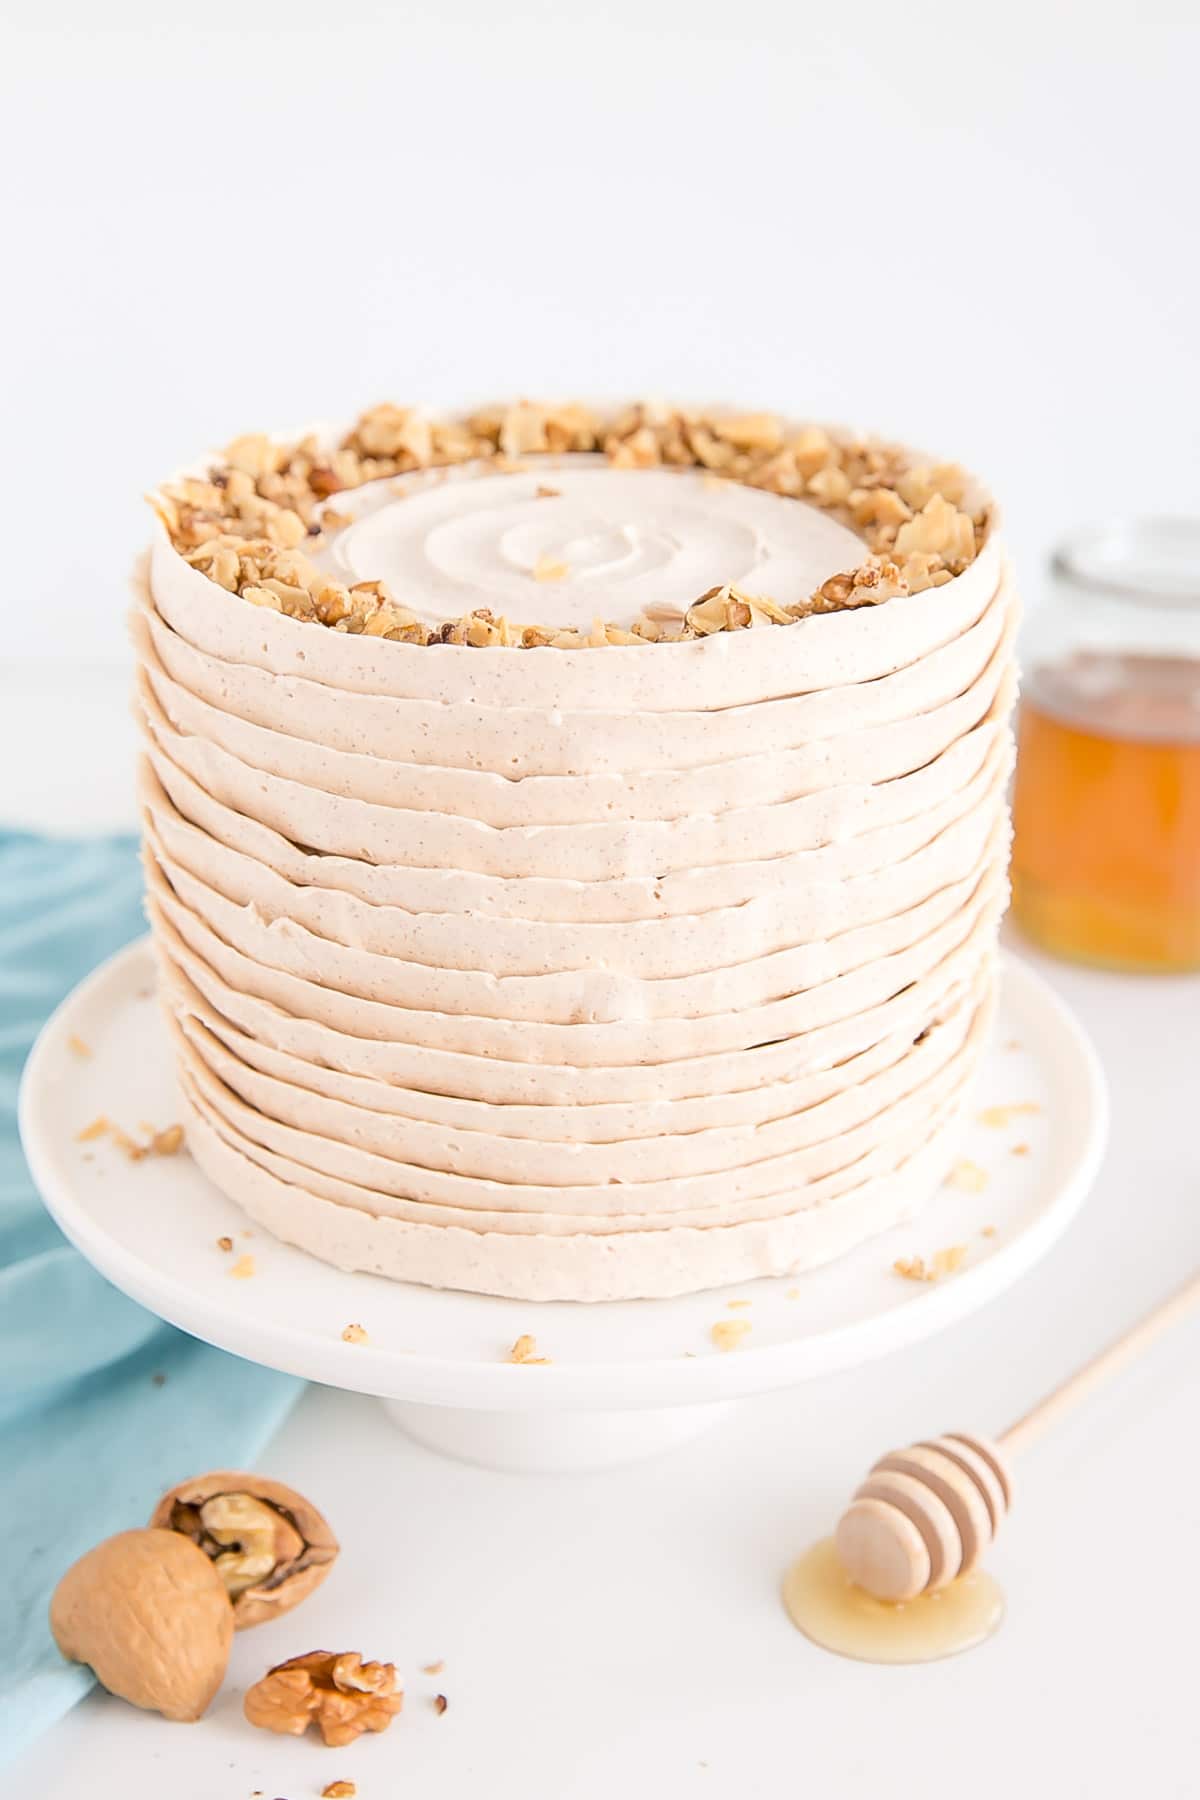
With all the trouble with the cake layers and trouble with butter/syrup leaking out from the baklava, you’d think it would be smooth sailing from there on out. Not so. Decorating came with its own bundle of challenges.
I thought it would be a great idea to try and emulate the layers of filo with the frosting technique. It seemed simple in my mind. I had seen a video of it ages ago. I can’t remember where or I’d link it, but it was these perfectly smooth (and even) buttercream layers.
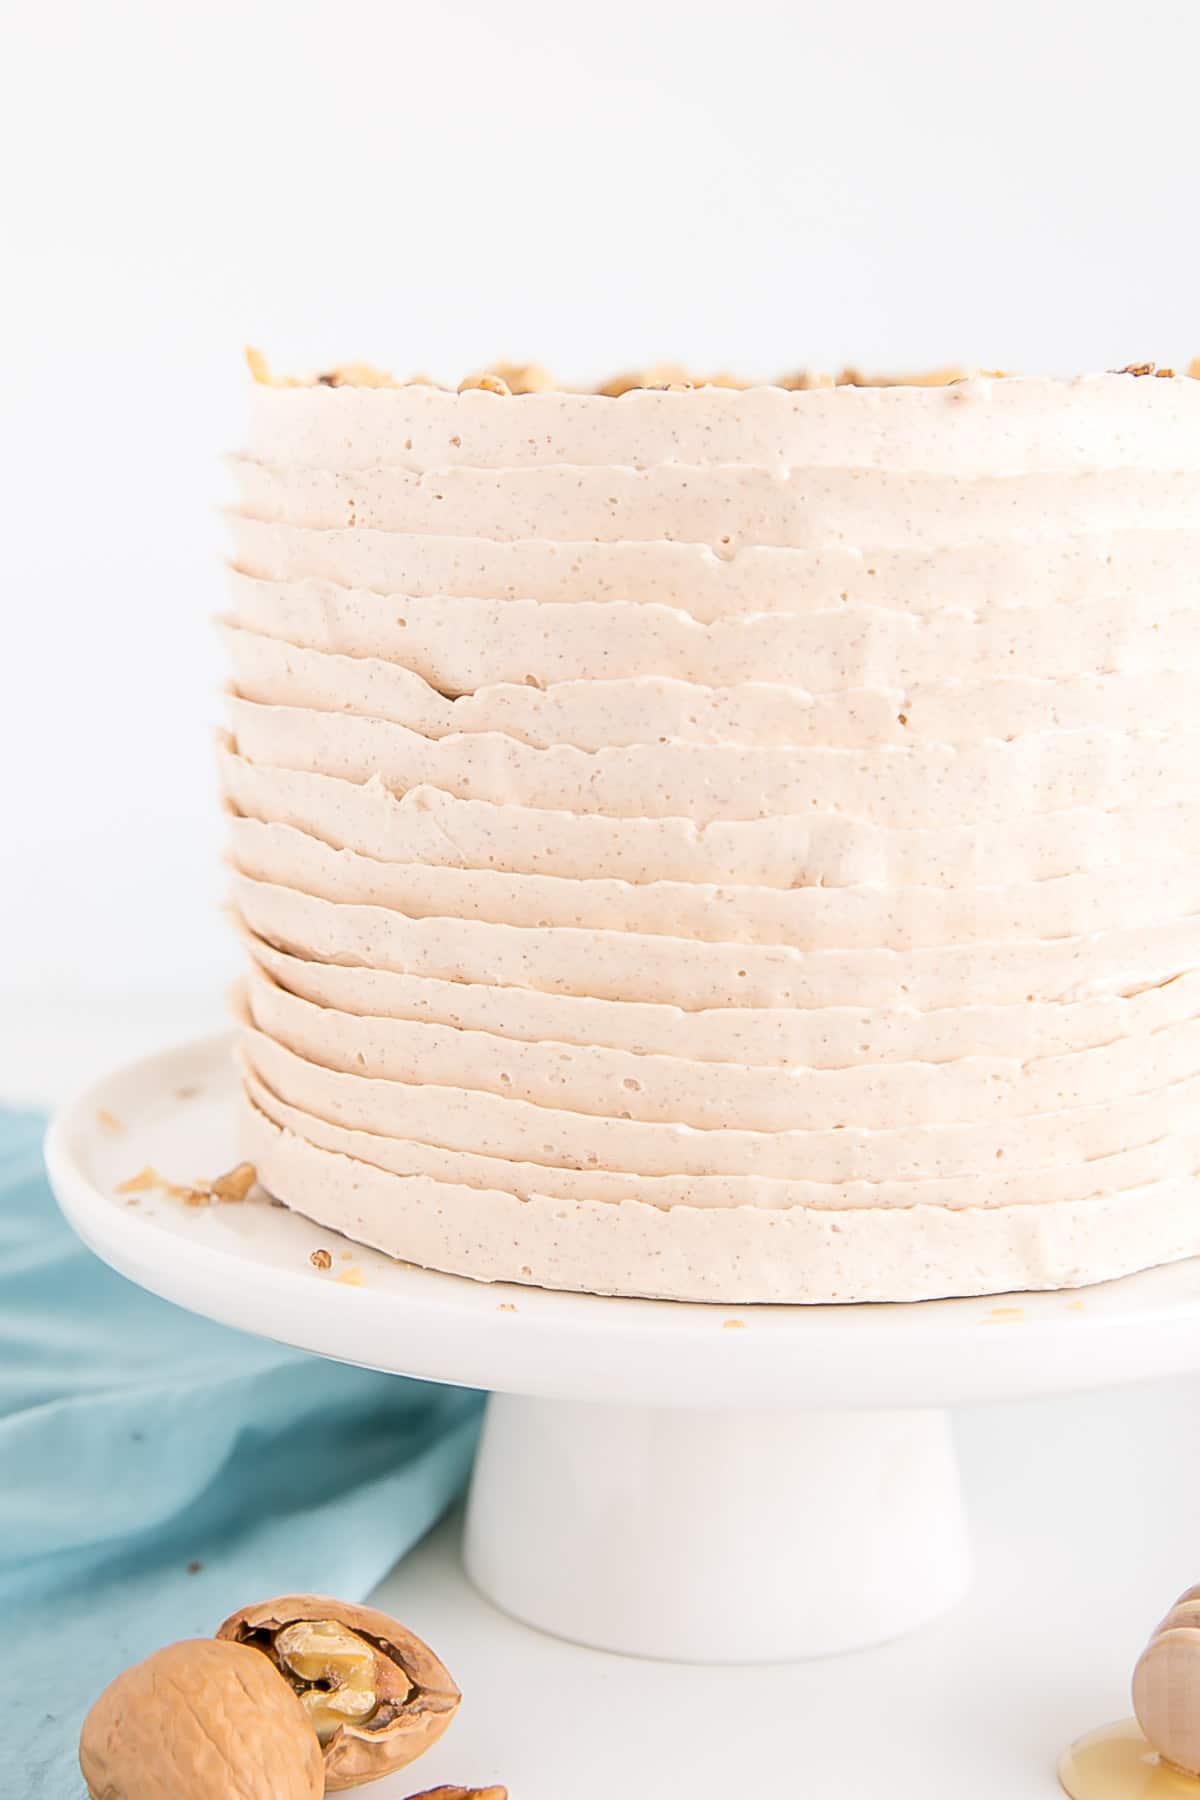
So first of all, I was worried that I wouldn’t have enough frosting. I always stress out about not having enough. It’s either just barely enough or I’ve made so much I could frost a whole ‘nother cake. Ridiculous.
Anyhow, I fitted my piping bag with a medium sized petal tip (I used #125, but others would work too) and got to work. It’s honestly much harder than it may look to get perfectly even and straight lines. Especially if your frosting is coming out a bit jagged (which mine was). Whatever. Filo layers aren’t perfect either, right?
Because I was worried about having enough frosting, I didn’t totally pipe the lines all the way around once I got past the top couple layers. That would be the “back” of the cake, I figured, and I’d adjust the frosting recipe as needed. Well I actually ended up having more frosting than I needed, and could have done continuous pretty(ish) lines instead of trying to patch them with the extra frosting after.
I don’t really have any tips for you in terms of making the lines smoother. It just takes practice to nail down the piping pressure + turntable turning speed (and clearly I need more of that).
I put the cake in the fridge to set the frosting, and somehow managed to smush the entire back of it. Thank god I put it in back side first!! The back already looked like crap from my patch job, but now it had a nice dent in it too.
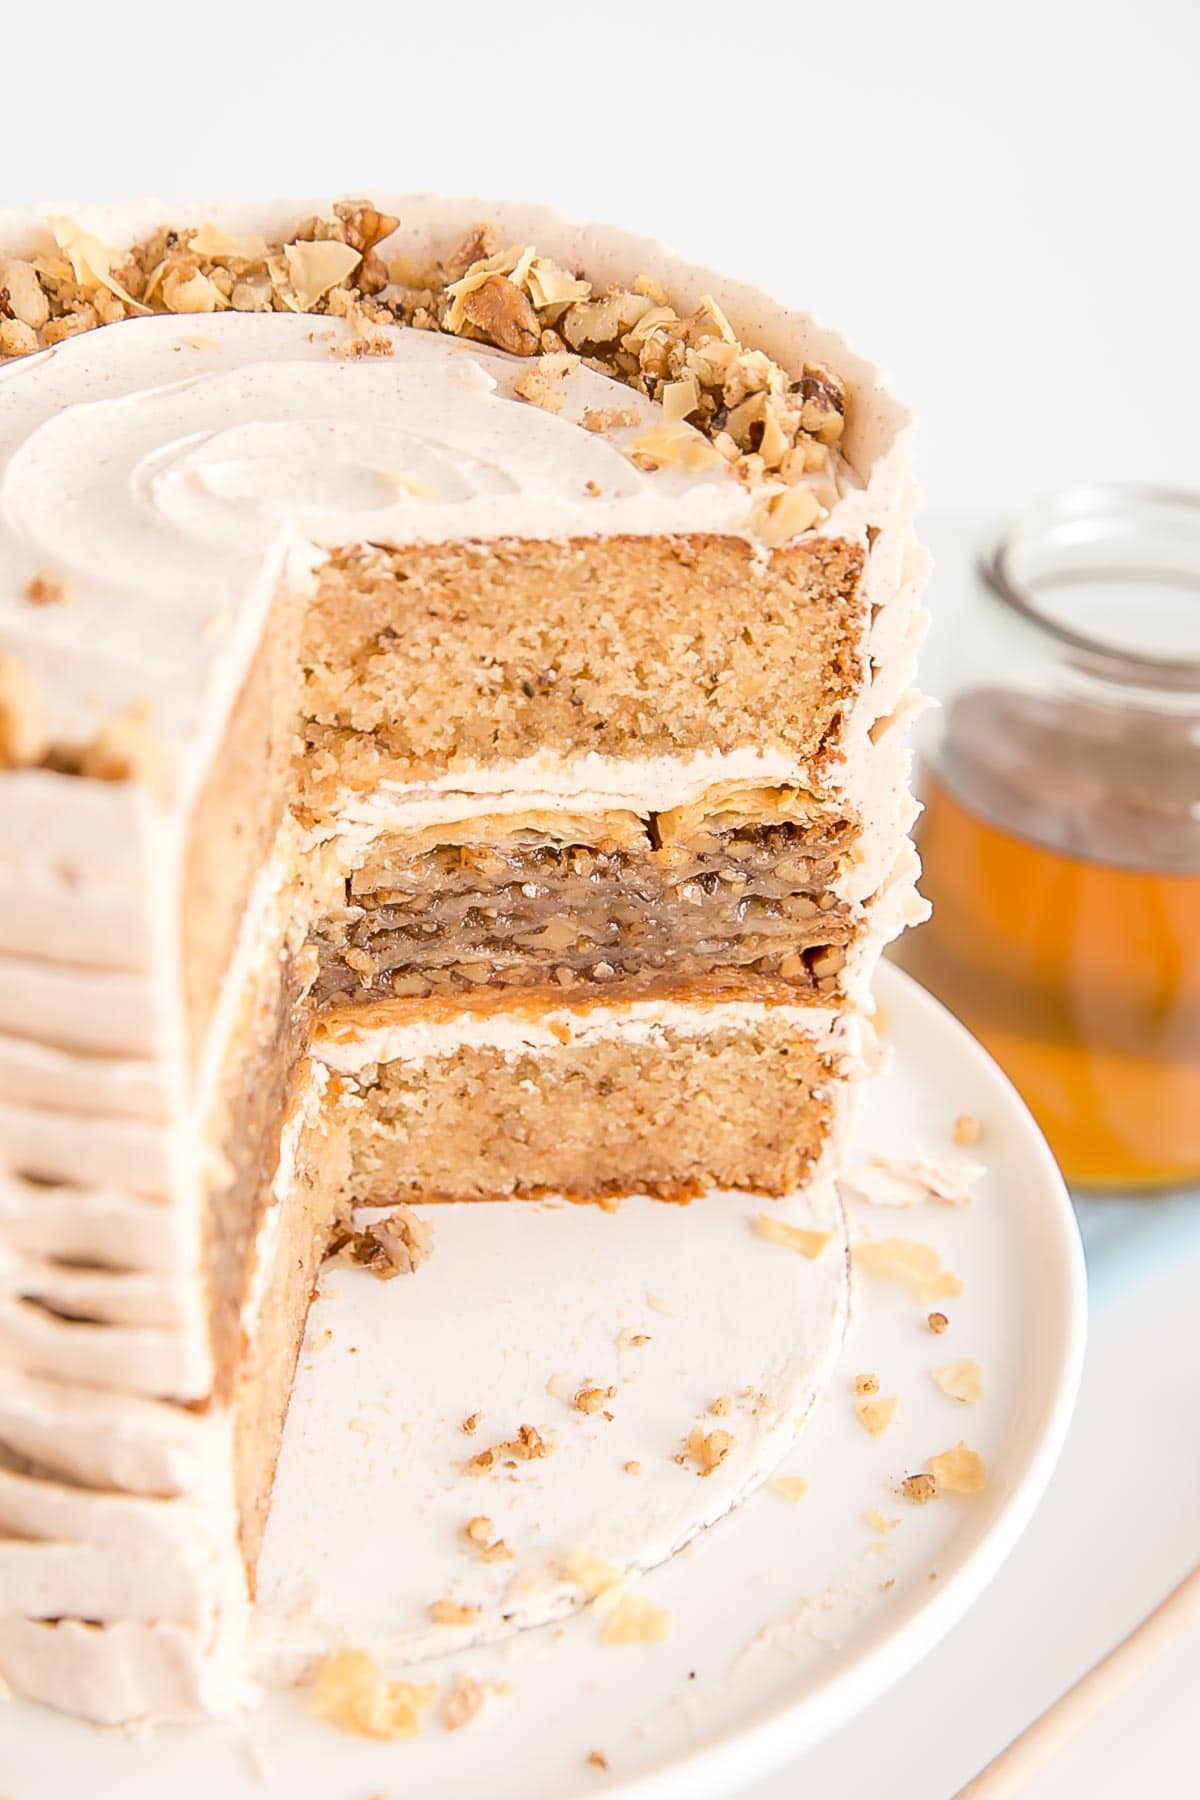
Unfortunately, when I was cutting the cake for pics, I didn’t really think about where I was cutting it, and ended up having the crappy patched area positioned right in the front of the cut cake pics. I tried to hide it as best I could (aka crop as much as I could), but if you look closely on the left side of the cake here you can see the mess.
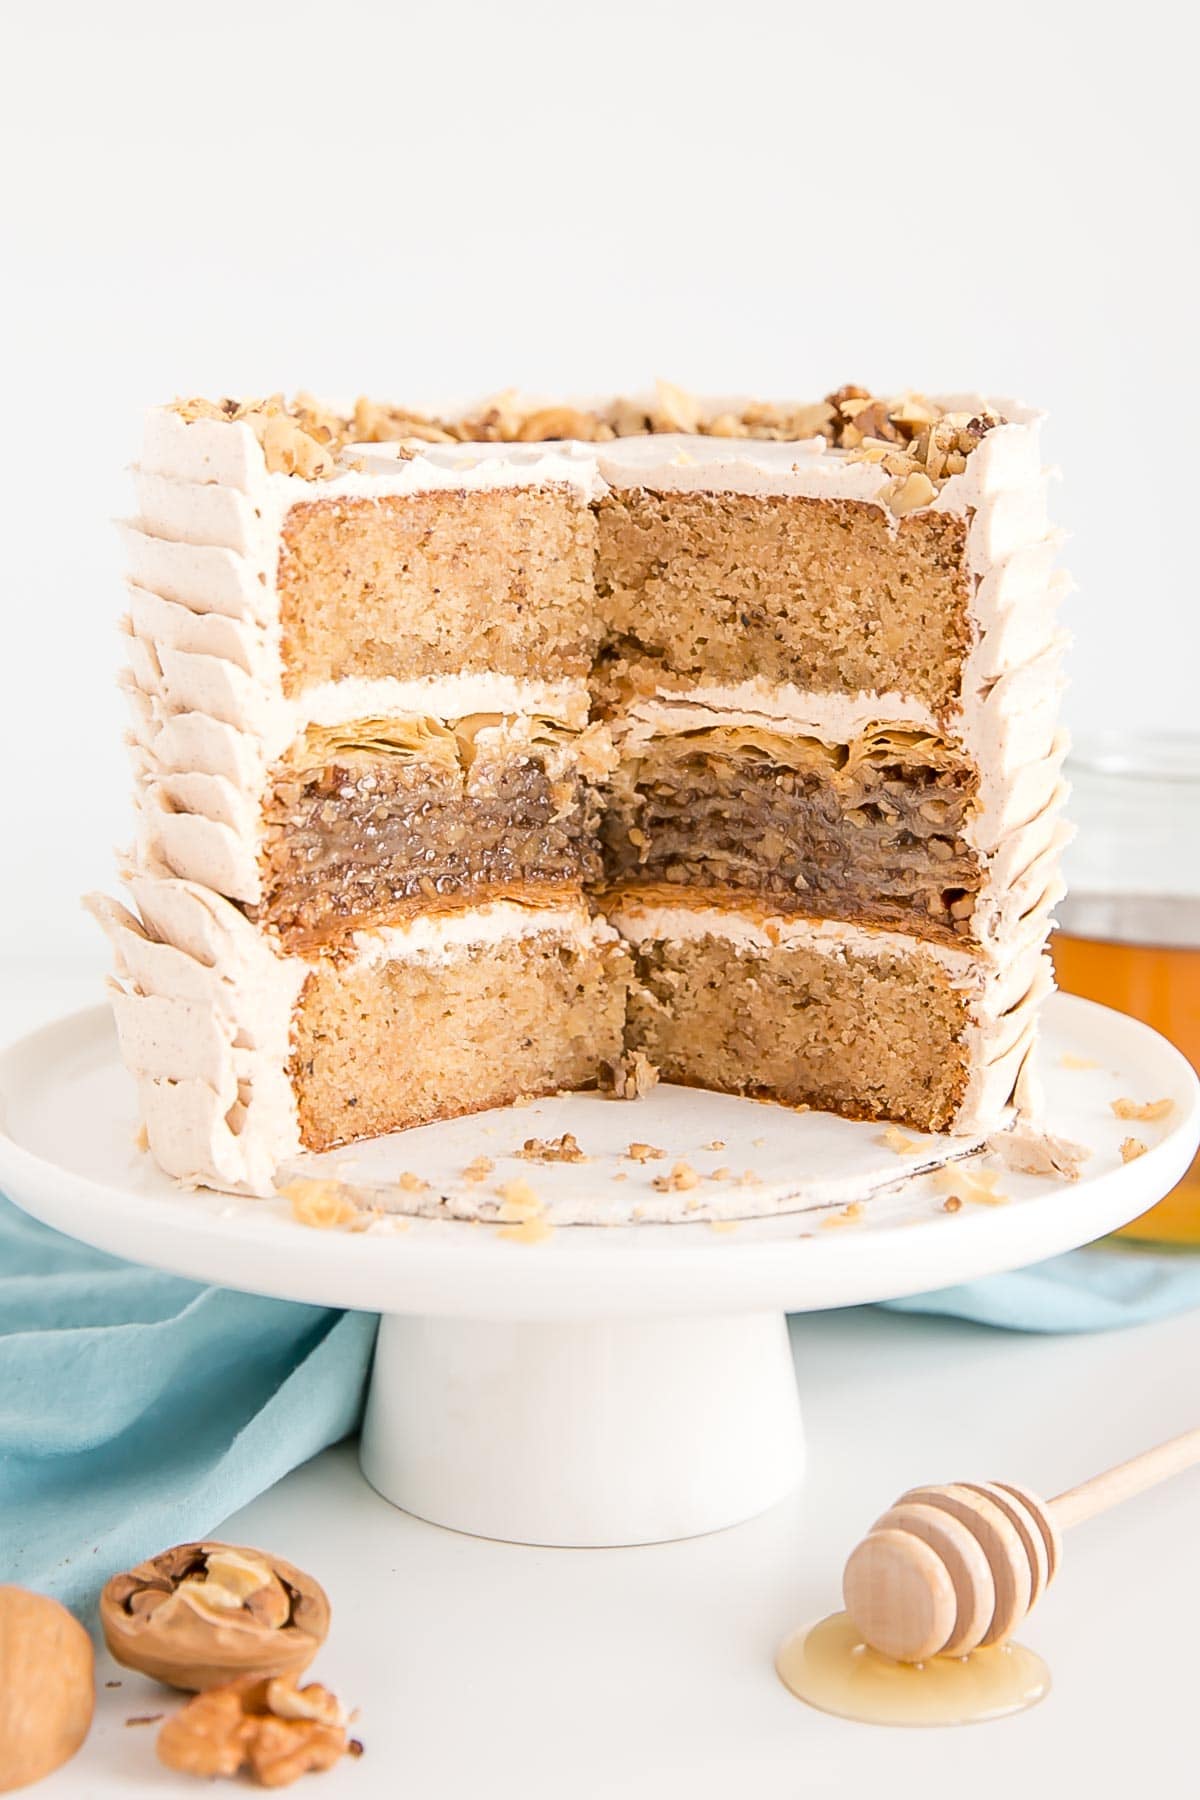
And to add one final insult to injury, the plate that I ended up using had a huge crack in it. Like practically split down the middle. I noticed this mid-way through pic taking.
Instead of rotating the slice of cake — which would have involved cleaning the cake plate and replating it, I opted to cover the crack with a giant piece of flaked filo. You can see it right next to the fork. LOL.
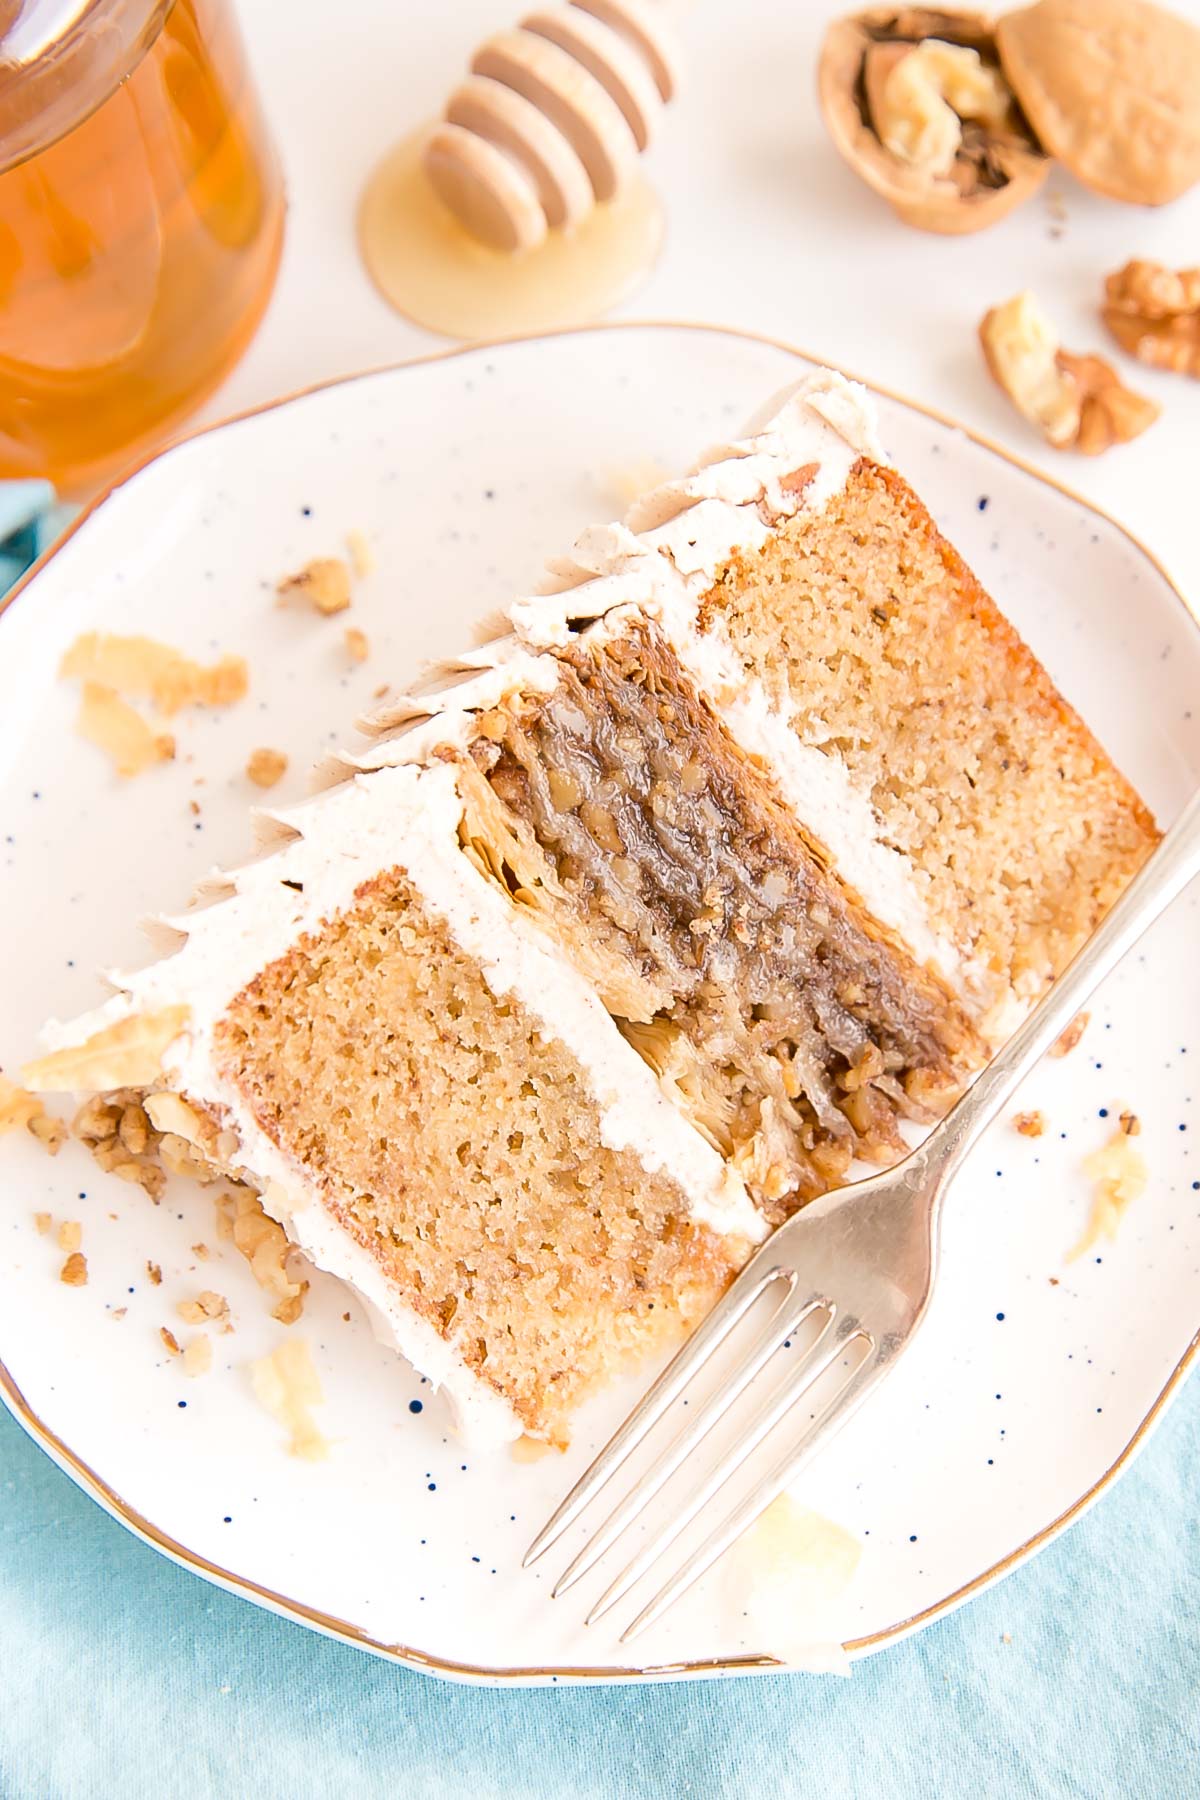
Laziness prevails in the Liv for Cake kitchen. With some things anyhow. The perseverance of nailing this cake recipe was well worth it. It is honestly one of the best tasting cakes I’ve ever had.
The honey walnut cake layers are a new favorite. I can hear Ryan rolling his eyes as I type this. He thinks I’m fickle and that everything is a “new favorite”, but I swear, this one really is!!
And you know what? I don’t even like honey. Not on its own, and not really in/with anything else. And this cake is honey heavy. But omg, it just goes so well with the walnuts and the cake and everything. I hope you love it as much as I do!
Looking for more Nutty desserts?
- Pear & Walnut Cake
- Milk Chocolate Almond Cake
- Pistachio Cake
- Walnut Cake
- Nutella Banana Cake
- Almond Amaretto Cake
Tips for making this Baklava Cake
- To make an 8″ cake, you can 1.5x the recipe (change the Servings to 18 to get the amounts).
- If you’d rather skip making the baklava layer but want three 6″ honey walnut cake layers, 1.5x the cake recipe.
- See tips above for working with filo dough.
- Don’t like honey? Neither do I, but I love this cake! If you want to tone down the honey flavor throughout, you can use a simple syrup on the baklava instead, and leave the honey out of the buttercream.
- If you don’t like walnuts, you can use pistachios or almonds instead.
- Be sure to check my Swiss Meringue Buttercream post for tips and troubleshooting.
- To help ensure your cake layers bake up nice and flat, check out my Flat Top Cakes post!
Baklava Cake
Ingredients
Honey Syrup (make 2 days in advance, at same time as Baklava):
- 1/2 cup granulated sugar
- 1/4 cup honey
- 1 Tbsp lemon juice
- 6 Tbsp water
Baklava (make 2 days in advance):
- 8 oz filo dough (half a standard package)
- 1/2 cup unsalted butter melted
- 1 cup chopped walnuts 227g
- 1/4 tsp ground cinnamon
Honey Walnut Cake:
- 1 1/4 cups all-purpose flour
- 1/4 cup walnut flour ~ 30g fine ground walnuts
- 1 1/2 tsp baking powder
- 3/4 tsp salt
- 1/2 cup unsalted butter room temperature
- 3/4 cup granulated sugar
- 1/4 cup honey
- 2 large eggs room temperature
- 1 tsp vanilla extract
- 2/3 cup milk room temperature
Honey Cinnamon Swiss Meringue Buttercream:
- 5 large egg whites
- 1 1/4 cup granulated sugar
- 1 1/2 cups unsalted butter room temperature
- 1/3 cup honey
- 1 tsp ground cinnamon
Assembly:
- chopped walnuts
- baked filo chips optional
Instructions
Honey Syrup (make 2 days in advance, at same time as Baklava):
- Place sugar, honey, lemon juice, and water into a small pot. Bring to a boil and simmer 3-4 mins. Remove from heat and cool completely.
- Reserve 1/4 cup of syrup to use on cake layers if desired.
Baklava (make 2 days in advance):
- Preheat oven to 325F and grease the sides and bottom of a 6″ pan with removable bottom.
- Pulse walnuts in a food processor a few times until medium to finely chopped. Transfer to a small bowl and combine with the cinnamon.
- Roll filo dough out onto a clean surface. Using a 6″ cake pan or cake ring as a guide, cut out a circle shape through all the layers. Cover filo completely with a damp towel and keep it covered while you work.
- Place one circle of filo dough in the bottom of your pan, brush with meted butter. Repeat until you’ve done 10 layers of dough. Brush top layer with butter and spread 1/4 cup of walnut mixture over top.
- Continue layering filo dough with brushing each layer with butter in between for a total of 5 layers this time. Brush top layer with butter and spread 1/4 cup of walnut mixture over top.
- Repeat two more times with 5 layers of filo each and finally with another 10 layers. The breakdown is like this:10 layers buttered filo1/4 cup walnut mixture5 layers buttered filo
1/4 cup walnut mixture
5 layers buttered filo1/4 cup walnut mixture5 layers buttered filo1/4 cup walnut mixture10 layers buttered filo (I did not butter the very top, but you can) - Cut the baklava into into about 1 1/2″ wide strips, then cut across to form squares. Try not to cut all the way through the very bottom layer.
- Bake for 1h 15mins or until top layer is golden brown. Remove from over and immediately spoon syrup over the baklava. Let sit uncovered until completely cool, then cover with a tea towel. Leave at room temperature for 2 days.
Honey Walnut Cake:
- Note: If making your own walnut flour, pulse the walnuts a few times, measure out 1/4 cup, then pulse again mixed with the flour. Otherwise it will turn to walnut butter.
- Preheat oven to 325F. Grease and flour two 6″ cake rounds and line with parchment.
- In a medium bowl, whisk flour, walnut flour, baking powder,and salt until well combined. Set aside.
- Using a stand mixer fitted with a paddle attachment, cream butter and sugar on med-high until pale and fluffy (approx 3mins). Reduce speed and add eggs one at a time fully incorporating after each addition. Add honey and vanilla and blend well.
- Alternate adding flour mixture and milk mixture, beginning and ending with flour (3 additions of flour and 2 of milk). Fully incorporating after each addition.
- Bake for about 40-45 mins or until a toothpick inserted into the center comes out mostly clean.
- Place cakes on wire rack to cool for 10mins then turn out onto wire rack. Allow cakes to cool completely.
Honey Cinnamon Swiss Meringue Buttercream:
- Place egg whites and sugar into the bowl of a stand mixer, whisk until combined.*
- Place bowl over a pot with about 1″ of simmering water. Whisk constantly until the mixture is hot and no longer grainy to the touch (about 3mins). Or registers 160F on a candy thermometer.
- Place bowl on your stand mixer and whisk on med-high until the meringue is stiff and cooled (the bowl is no longer warm to the touch (approx. 5-10mins)).
- Switch to paddle attachment. Slowly add cubed butter and mix until smooth.** Add honey and cinnamon and mix until incorporated.
Assembly:
- (optional) Trim tops of each cake layer just slightly or poke holes into them with a bamboo skewer. Drizzle each layer with about 2 Tbsp of the reserved honey syrup.
- Frost each layer of cake with approximately 2/3 cup of buttercream, spread evenly.
- Place one layer of cake on a cake stand or serving plate. Gently remove baklava from the pan and place on top of the frosted cake layer. Place remaining layer of cake on top of the baklava, frosting side down. Press gently.
- Frost and smooth the outside with a thin crumb coat. Chill for 20mins.
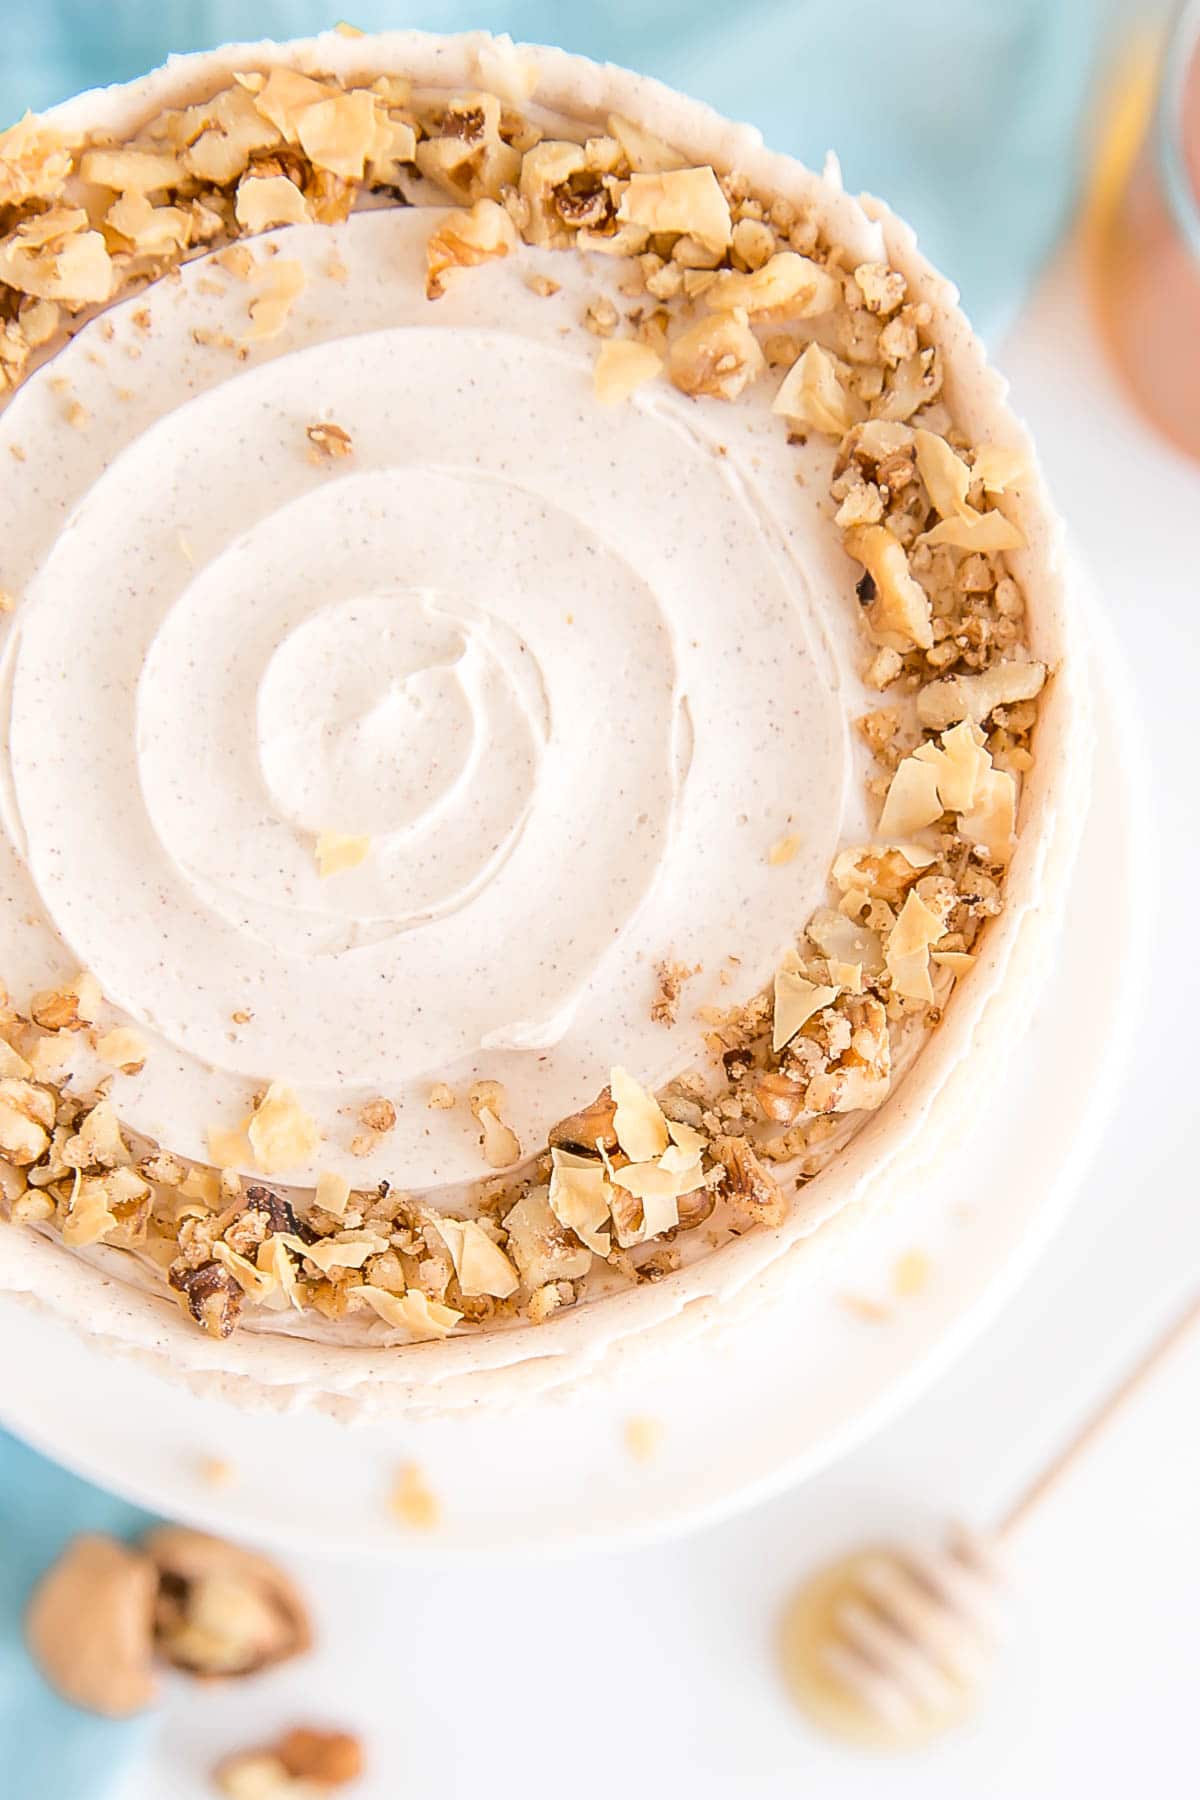
- Spread about 2/3 cup of frosting on the top of the cake. Smooth the top then use a small offset spatula to do a swirl.
- Using a piping bag fitted with a medium petal tip (I used #125), pipe rows of buttercream on the sides of the cake. Starting from the top and working your way down, narrow side of the tip pointing up. I started a bit higher than intended, but it gave the top a nice lip that I could fill with chopped walnuts.
- Sprinkle chopped walnuts and baked filo chips along the top of the cake if desired.
Notes
** The buttercream may look like it’s curdled at some point. Keep mixing until it is completely smooth. If it looks soupy, place it in the fridge for 20mins and rewhip. Baklava recipe adapted from Natasha’s Kitchen.



Elizabeth says
Very good
Olivia says
So glad you liked it, Elizabeth!
laurie beldam says
made it! wow what a great cake, my cake it self didnt rise alot but it tasted great, and with all the layers it didnt matter. i was a little short on icing and when i transfered the hot to the mixer, which i had wipped with lemom juice it got grainy, i wonder if i should have rinsed it afterwards. but it was still lovely, so fun everyone love it, and yes another labor of love
Olivia says
Hi Laurie! Glad everyone loved it 🙂
Janet Brown says
I made this for a birthday and it has been requested to serve with another family gathering next weekend! We had the birthday party in a restaurant that allows you to bring in dessert, and the chef sliced and plated it for us. He was quite amazed, had never seen a cake like that, then we left the last piece for the staff to share.
Olivia says
Hi Janet! How wonderful. I’m so happy to hear it was a hit! 🙂
Elizabeth Halen says
As for the egg whites, is it okay to use liquid egg whites? I’m just afraid of getting the yolk in the mixture 😅 TY
Olivia says
I do not recommend carton whites as I find they don’t whip a proper meringue. See more info here: https://livforcake.com/swiss-meringue-buttercream-recipe/
Elizabeth Halen says
Hello 🙂 I just have a question. Do you think the cake would be great without the baklava? Just the cake and the frosting?
Olivia says
Hi Elizabeth! Yes, I think it would be delicious. The cake layers are some of my most favourite ever! I talk about this in the Tips section of the post: If you’d rather skip making the baklava layer but want three 6″ honey walnut cake layers, 1.5x the cake recipe.
Elizabeth Halen says
Thank you for your response! I actually ended up making the baklava 😆 I’m waiting one more day to let them sit! Tomorrow I make the cake ☺️ I have one question about the cake. I have 2 nine inch circle cake pans and 2 rectangle 8inch pans. Which size will work best for the cake? Will I have to adjust the portions?
PS I made 2 baklava. One in the circle pan and one in the rectangle pan. 😁
Olivia says
Yes, you will definitely have to adjust the proportions! Converting pan sizes is always tricky. Here are some sites I use as a guideline:
http://www.joyofbaking.com/PanSizes.html
https://www.cookipedia.co.uk/recipes_wiki/Cake_tin_conversion_charts
Vivienne says
I made this a while back and it is to die for!!! I used a smaller square pan but it came out perfectly. The wait for the baklava was too long, that’s my only complaint!
Olivia says
Hi Vivienne! Thank you! So happy you loved it 🙂
Anna says
Amazing!
How i can show you how i made mine..
The only thing i changed is that i made a frosting with condensed milk and honey 🙂
Do you store it in fridge?
Olivia says
Hi Anna! I’d love to see a photo, you can email me at livforcakeblog@gmail.com 🙂 It will be fine at room temperature for a couple of days but otherwise I would refrigerate.
Meg says
Hey Liv! This cake looks divine. Any idea if / how it might freeze?! I’m going to be out of town for a friend’s birthday, but wanted to have a special cake for her special day. This would be off the charts as an option, if it can sit in a freezer for a week in advance…
Olivia says
Hi Meg! The finished cake should freeze just fine. Be sure to wrap it in some way or put it in something airtight.
Elizabeth says
I’ve not made this yet… But, I have since managed to put my eyes back in my head and close my mouth from the OH, MY STARS!!! Moment of seeing this cake. You blow my mind!! I have never (total truth) bothered to read Anything on sites like yours or watch videos. I look at a recipe and if it tickles me then I save and go at it. I am in awe of your site…taking in everything like a kid at the fair! Seriously, you blow my mind and that’s not easy to do. Your creations…the instruction…the videos…all of it! Your directions are concise and easy to follow. I found you by accident and am giddy that I did 🙂
Olivia says
Hi Elizabeth! I hope you try this soon, and love it! Thanks so much for the amazing feedback <3
B. Hayes says
I made this for my sons birthday. It was so good! I made the cake in one springform Pan and sliced it down the center to make two cake layers. The cake did not rise very high so the layers were fairly thin. Regardless, I really loved it and will definitely make it again.
Olivia says
Hi B! So happy you loved it. Thanks for your tips!