Learn how to bake flat cakes every single time! A simple tutorial on how to make sure your cakes come out nice and flat straight out of the oven.
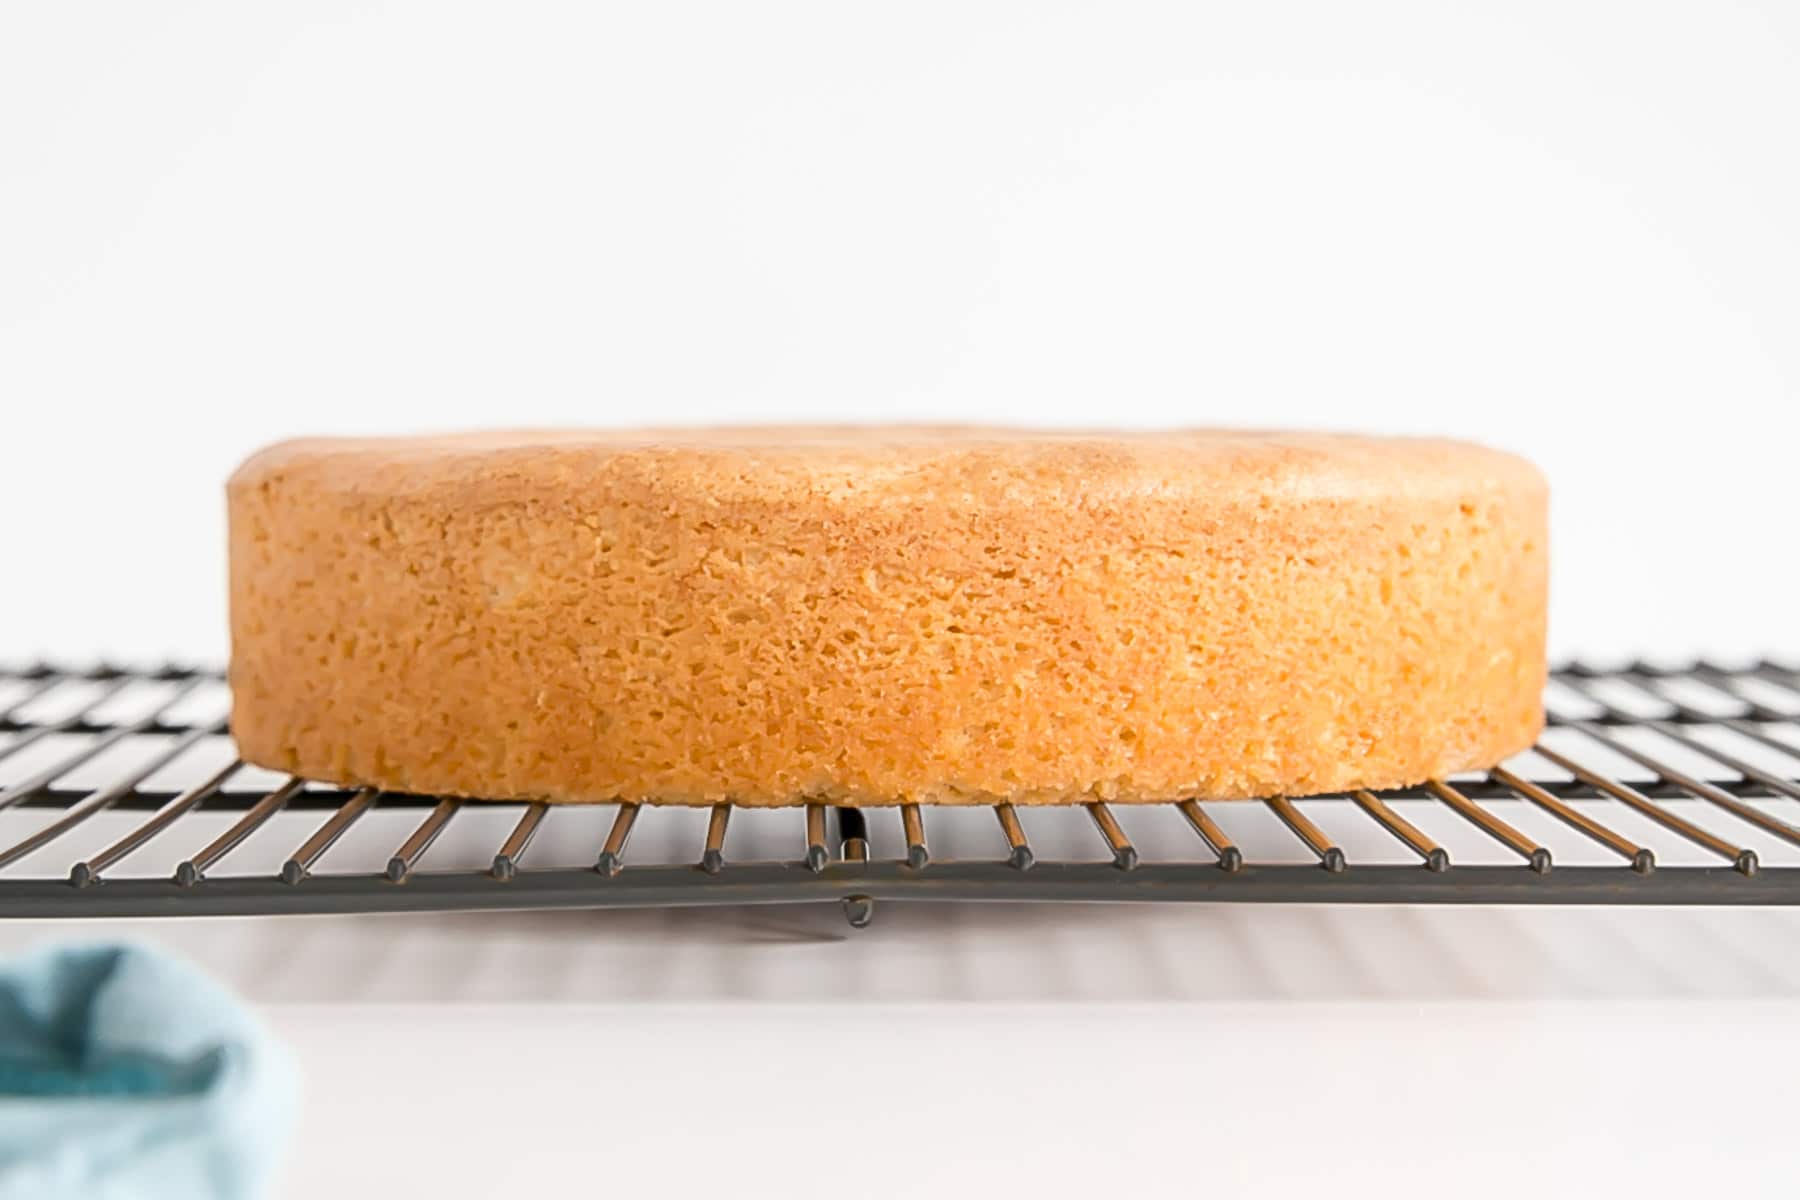
Leveling cakes is my least favorite thing to do ever. I think I’ve done it a total of ONE time and quickly looked for alternatives.
Leveling a cake is something you should do if it bakes up domed. Which, let’s be honest here, almost every single cake does.
A domed cake looks something like this:
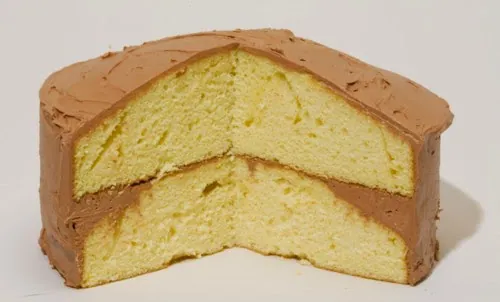
Delicious as it may be, it could be more aesthetically pleasing. Not to mention the uneven distribution of frosting! Those poor middle sections.
Why Do Cakes Dome?
When cakes go into the oven, the pans start to heat up quickly. This will make the sides and bottom of the cake cook faster and set which causes the uncooked middle to rise and dome because it has nowhere else to go.
It’s not easy to stack and frost a domed cake, so it should be leveled out prior to doing so.
To level a cake, you either get a huge frikken cake knife (which I bought specifically for this job and used ONCE) and go at it hoping you can cut off the dome evenly.
Or you can buy a cake leveler which does the job marginally better (I do use this to torte my cakes though – aka cut them in half horizontally).
Either option leaves you with a crap ton of cake crumbs all over everything. This also means wasted cake, and boo to that. Ok, I know you can always eat the scraps, but STILL.
A much better alternative is to not have to level the cake at all by having it come out perfectly flat and stackable. I have a couple of tricks I use to ensure I get flat cakes. They work for me every time!
Now, before we even get to level cakes, you want to make sure that your layers are the same height. You can eyeball this in your pans, or you can be anal (like me) and actually weigh the pans to ensure an even distribution of batter.
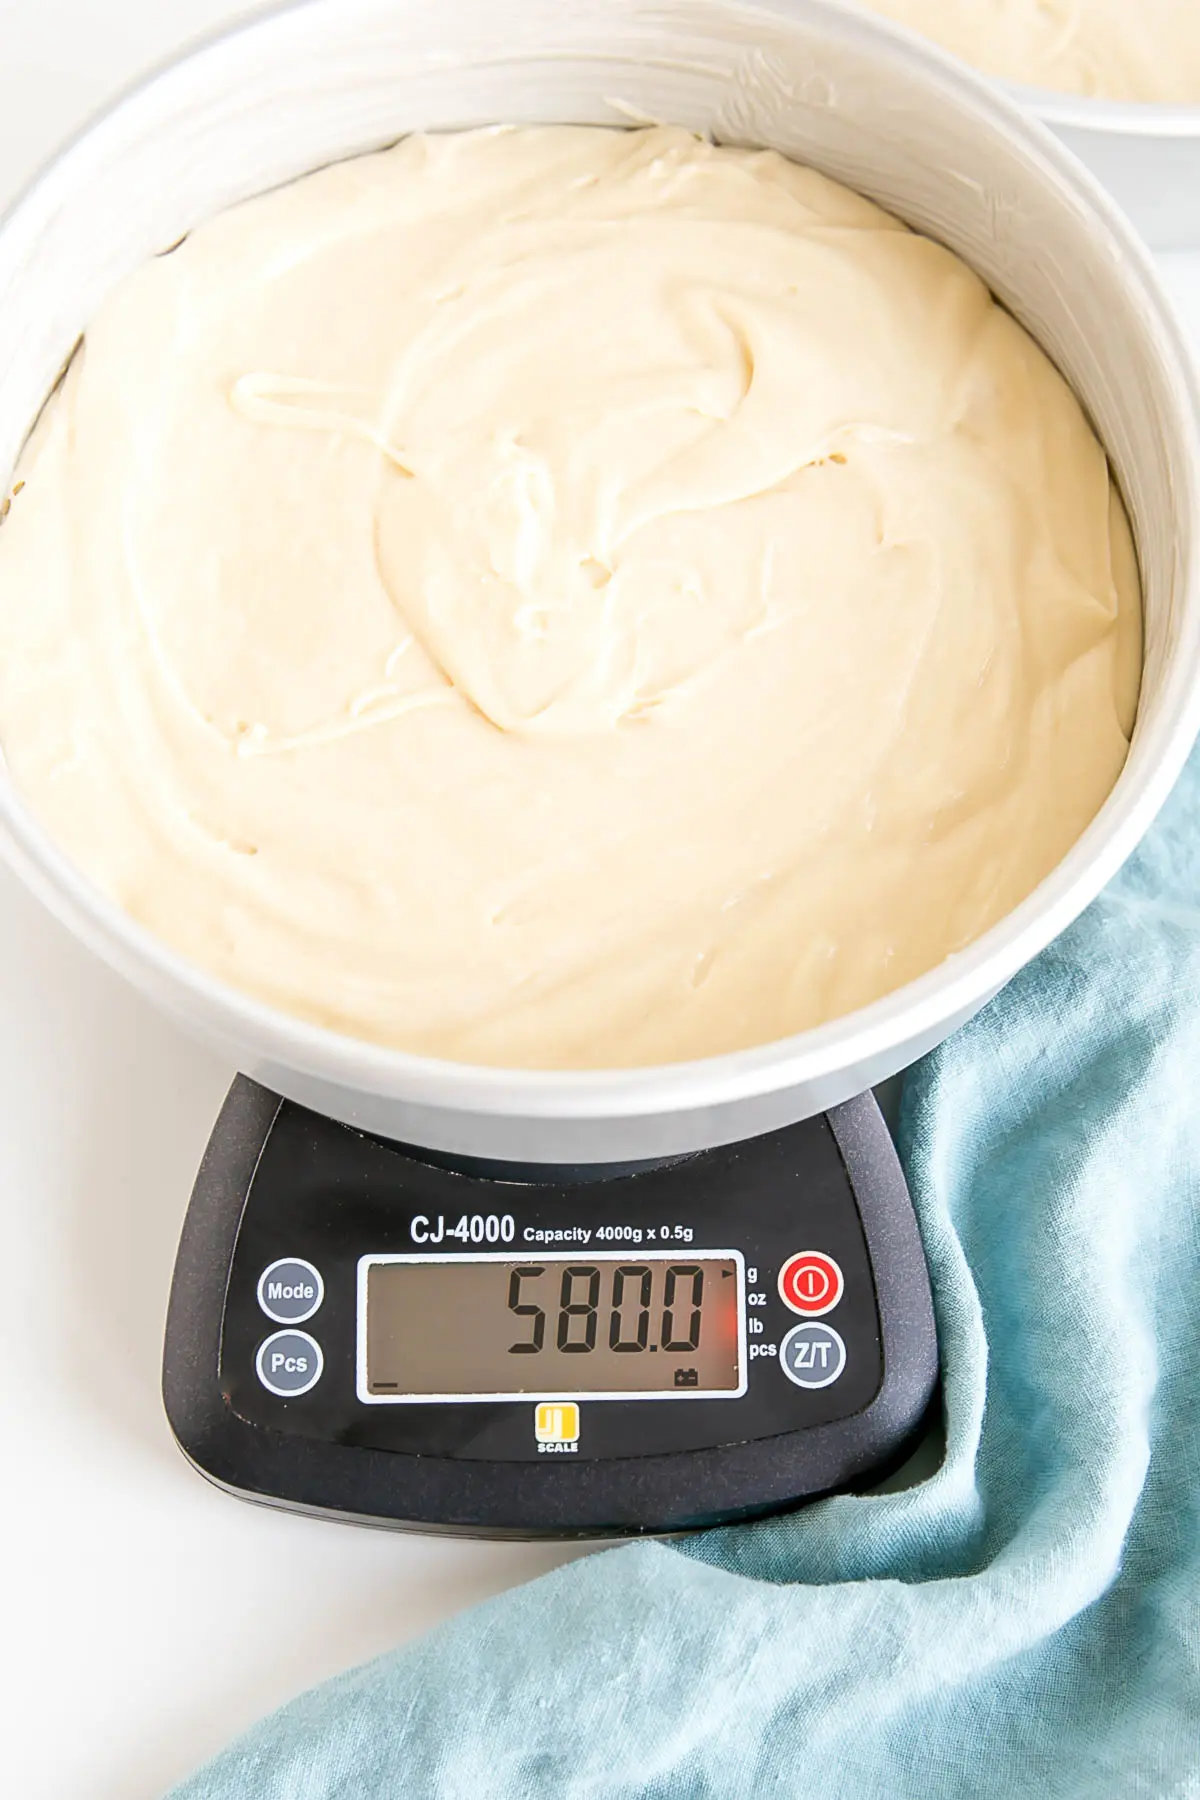
I fully embrace my craziness. I use this kitchen scale and I LOVE it.
Now… onto Flat Cakes!
HOW TO BAKE FLAT CAKES
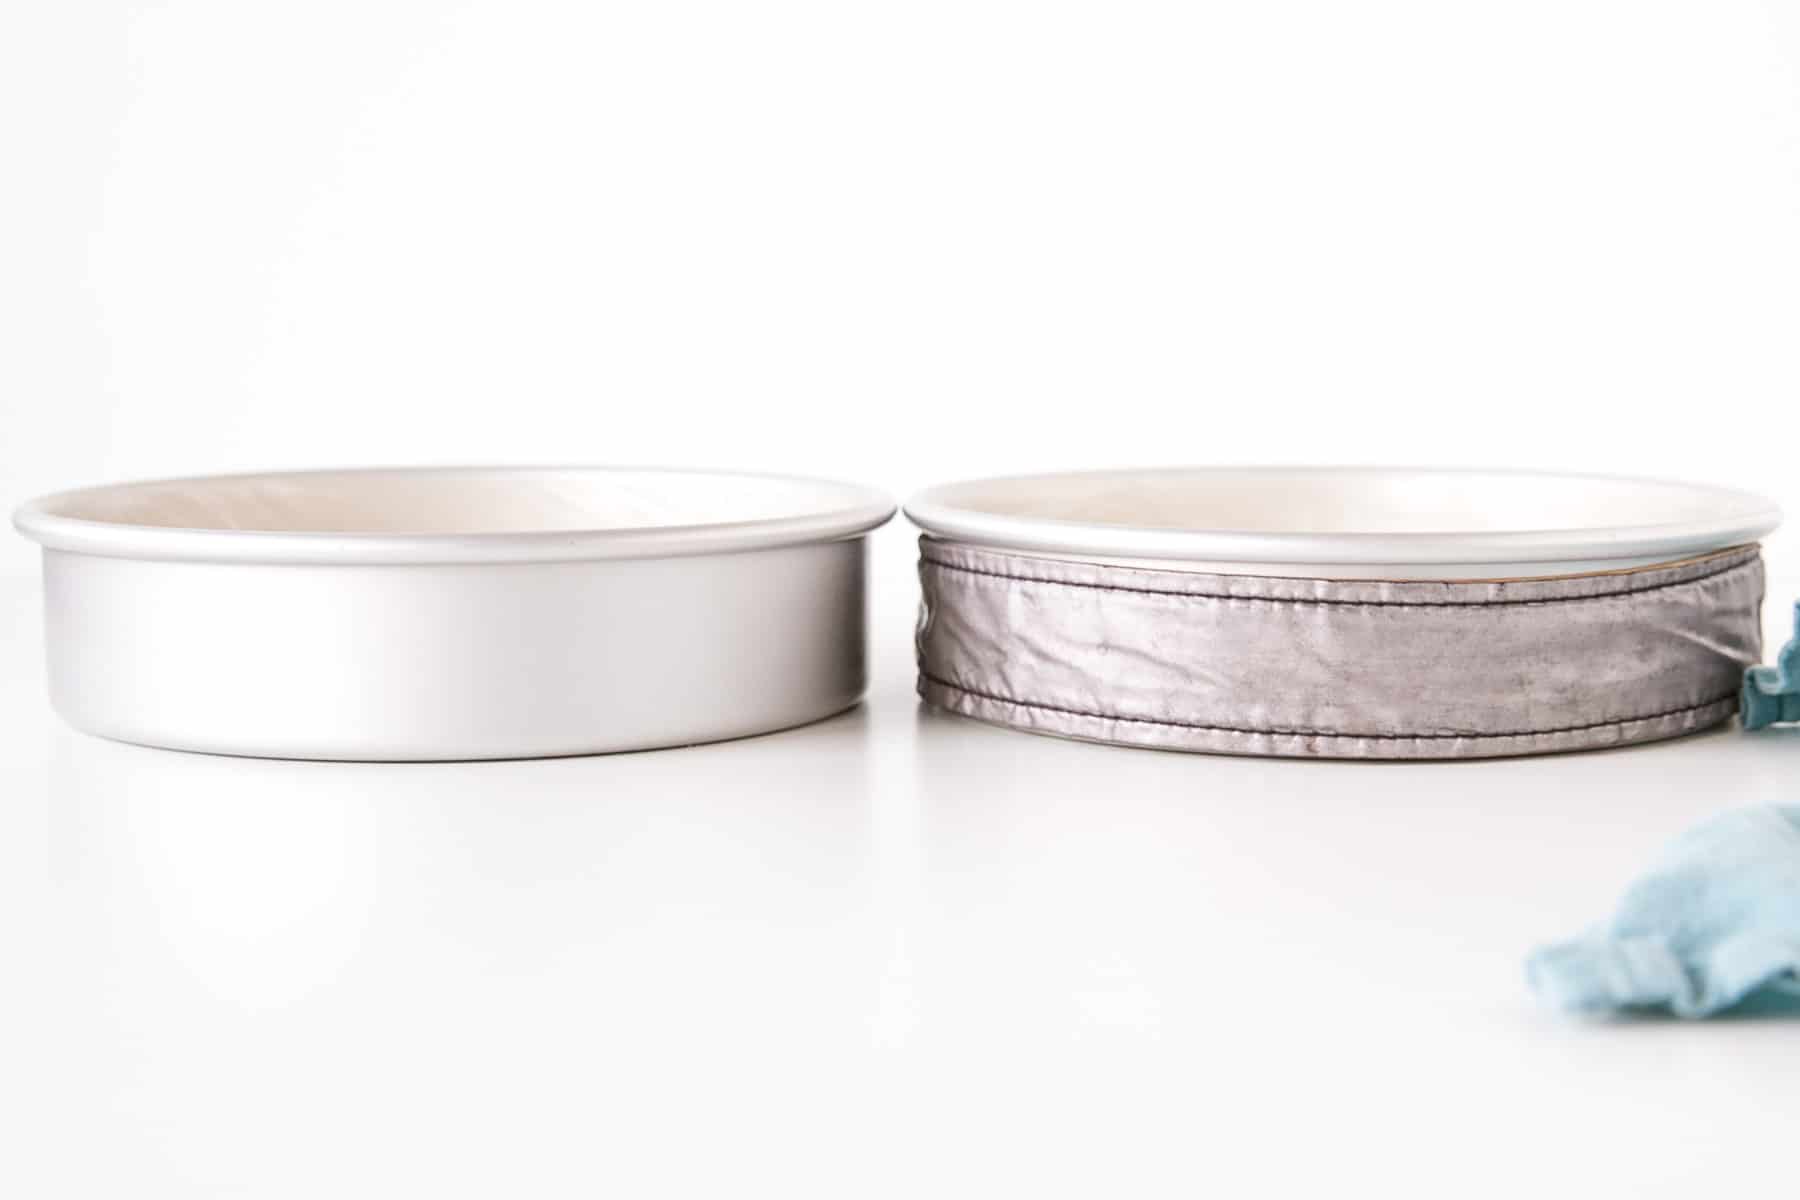
Baking flat cakes comes down to one simple thing: using cake strips around your pans.
This is my go-to method. All you have to do is dampen them and wrap them around the bottom of your cake pans. Perfectly flat cakes every time!
How do cake strips work?
The cake strips insulate the outside of the pan and the moisture in the strips keeps the sides of the pan cooler so your cake bakes up more evenly. Without the strips, the outsides of the cakes cook and set faster causing the middle of the cake to dome.
I soak my strips in a bowl while I’m prepping my cake batter and then gently squeeze out the excess water before I wrap them around the pans. It’s important that they’re not sopping wet or they could cause the cake to become soggy.
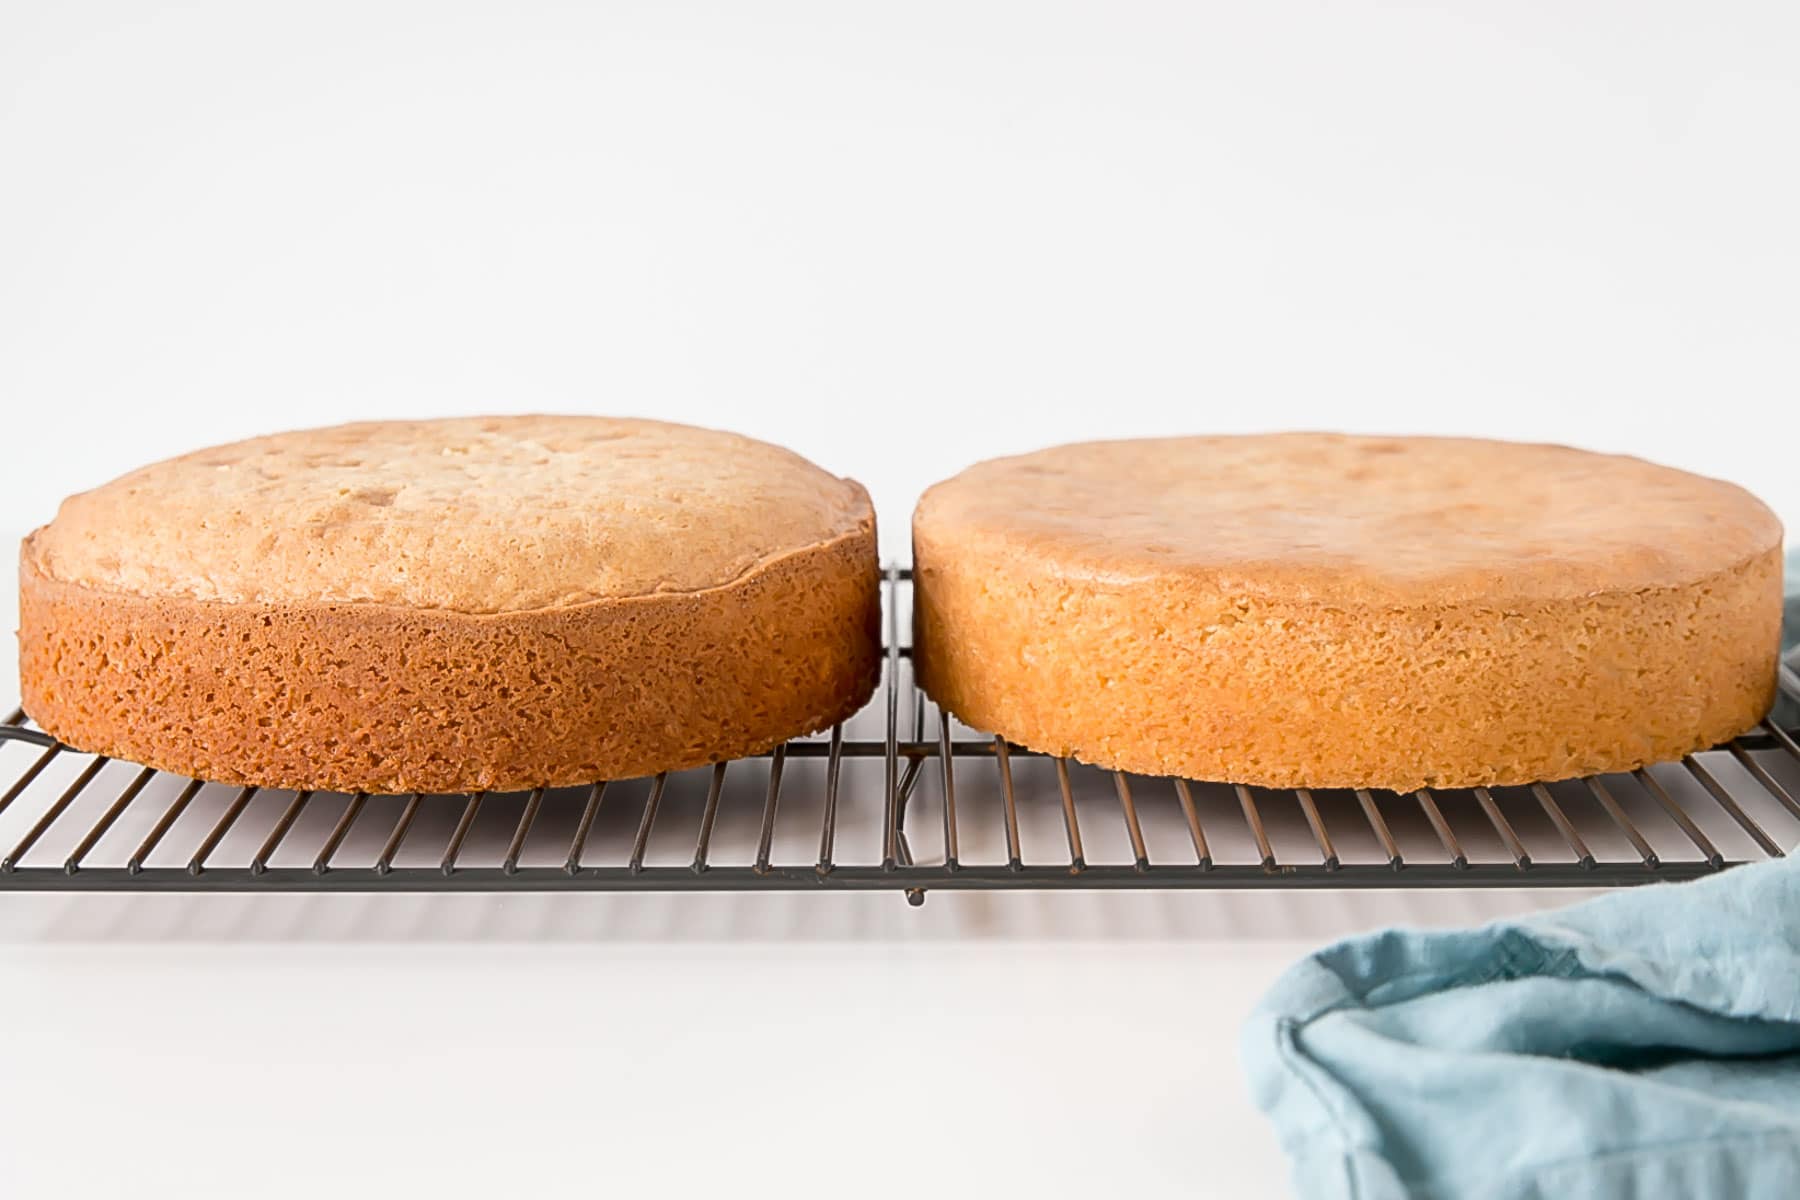
Here’s a side-by-side shot of the cakes right out of the oven, only one using a cake strip.
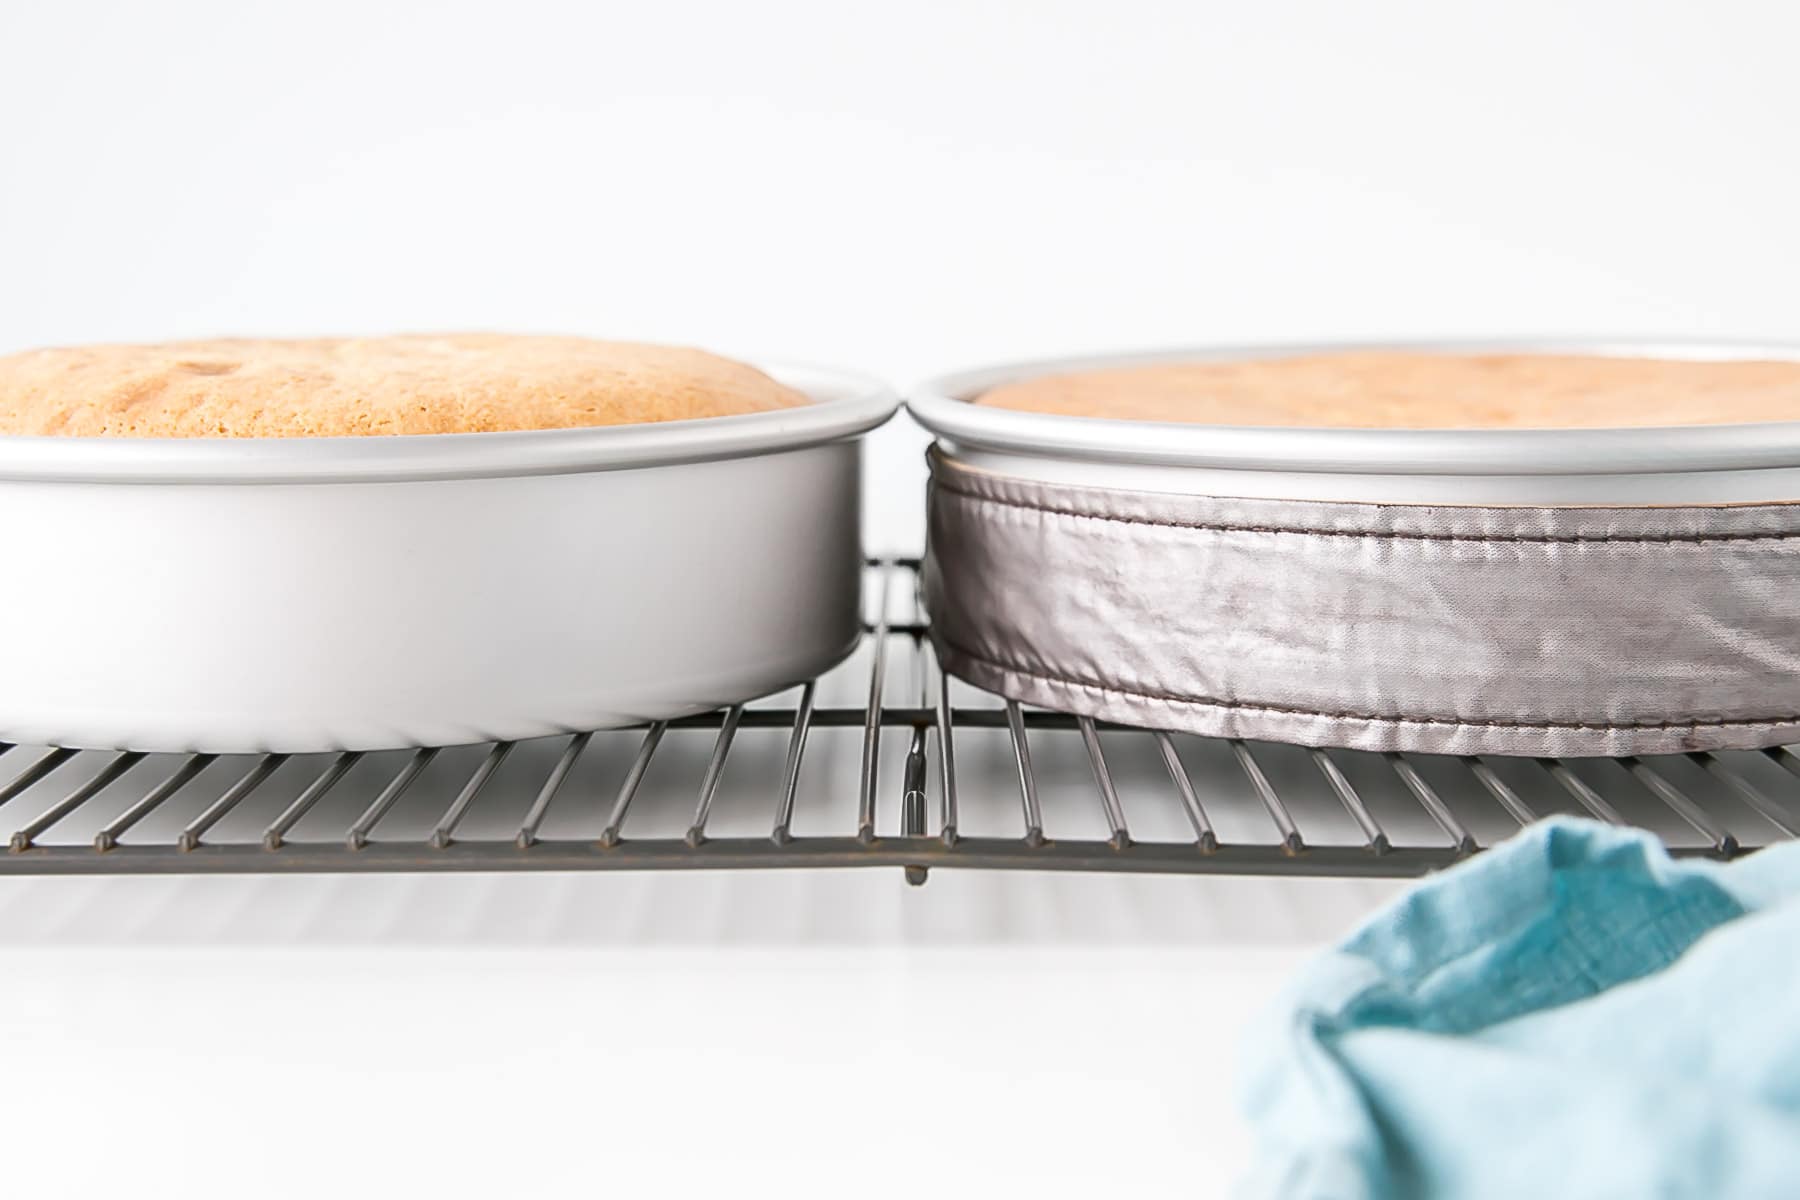
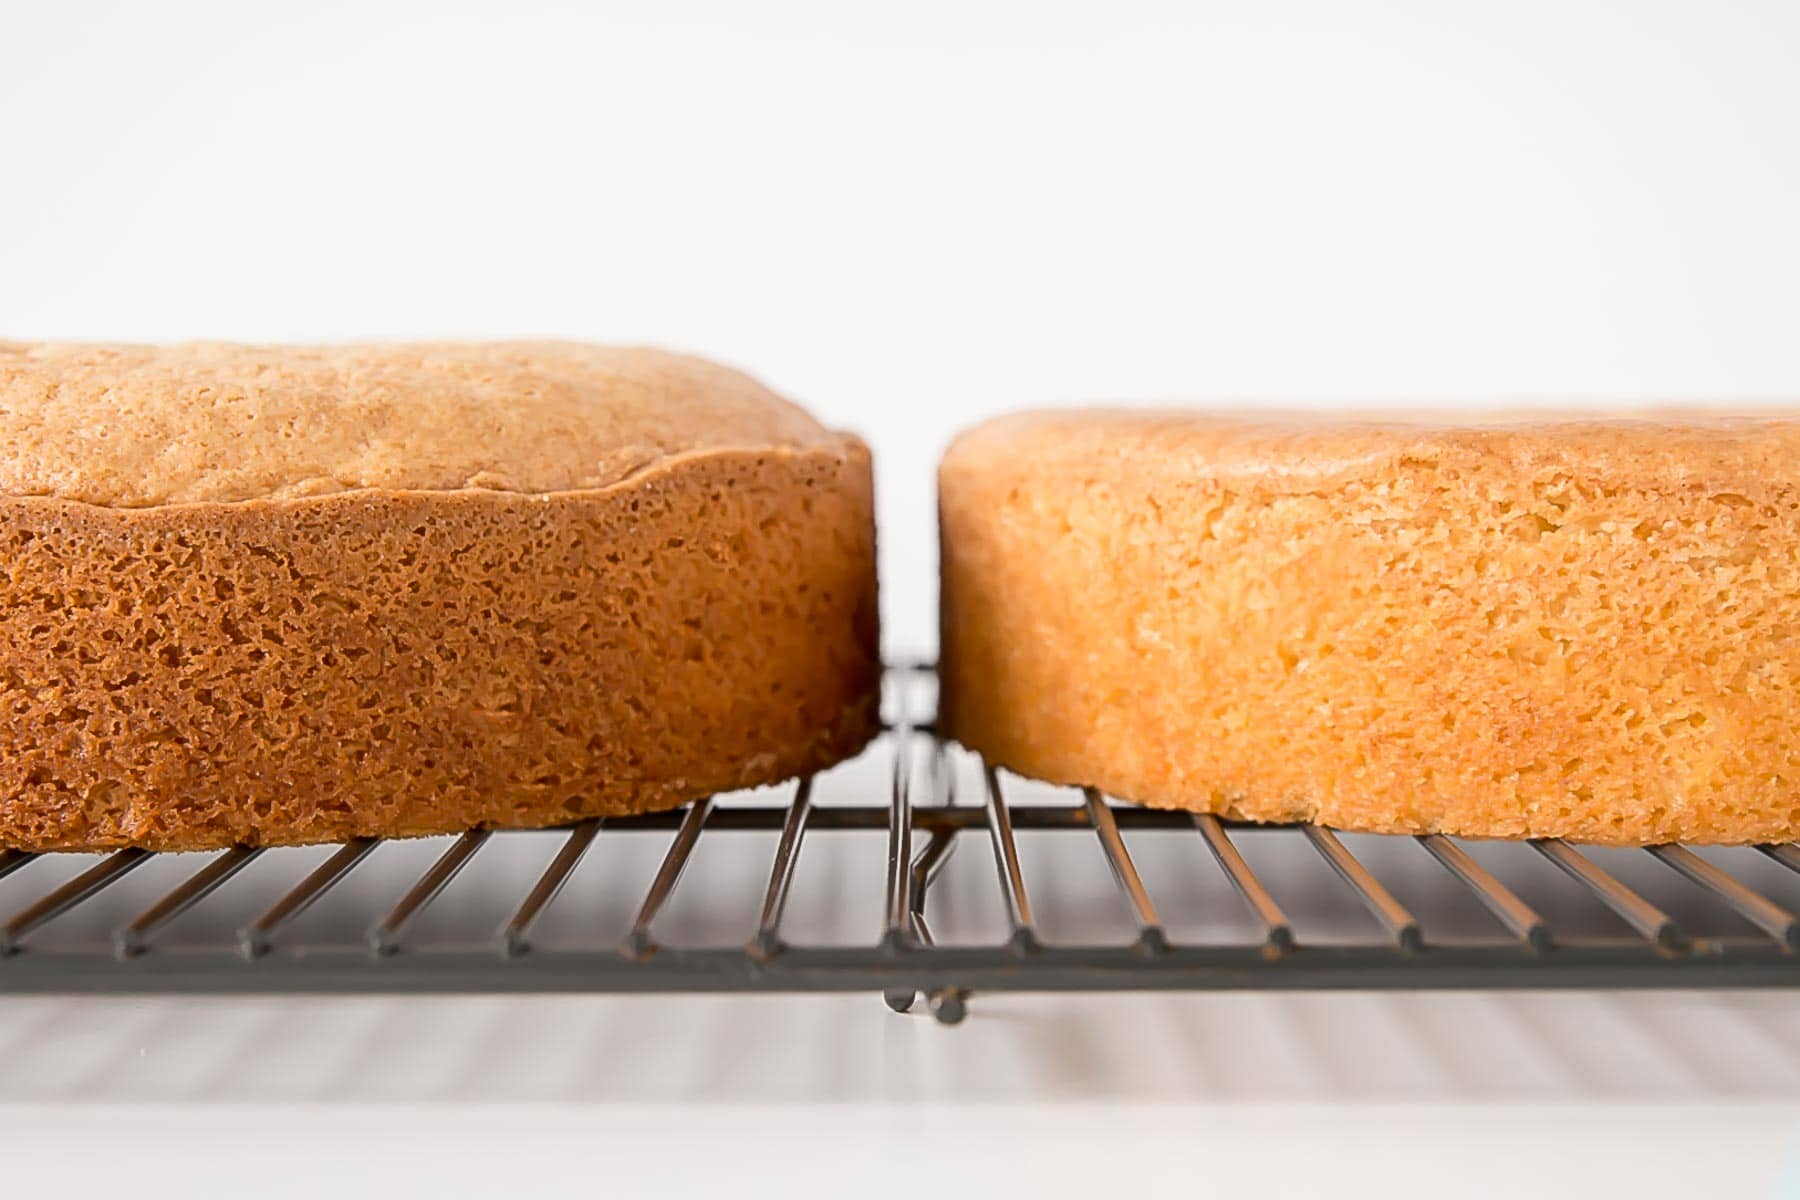
You can see how nice and flat the cake on the right is. Not only is the one in the left domed it’s also a bit darker on the sides.
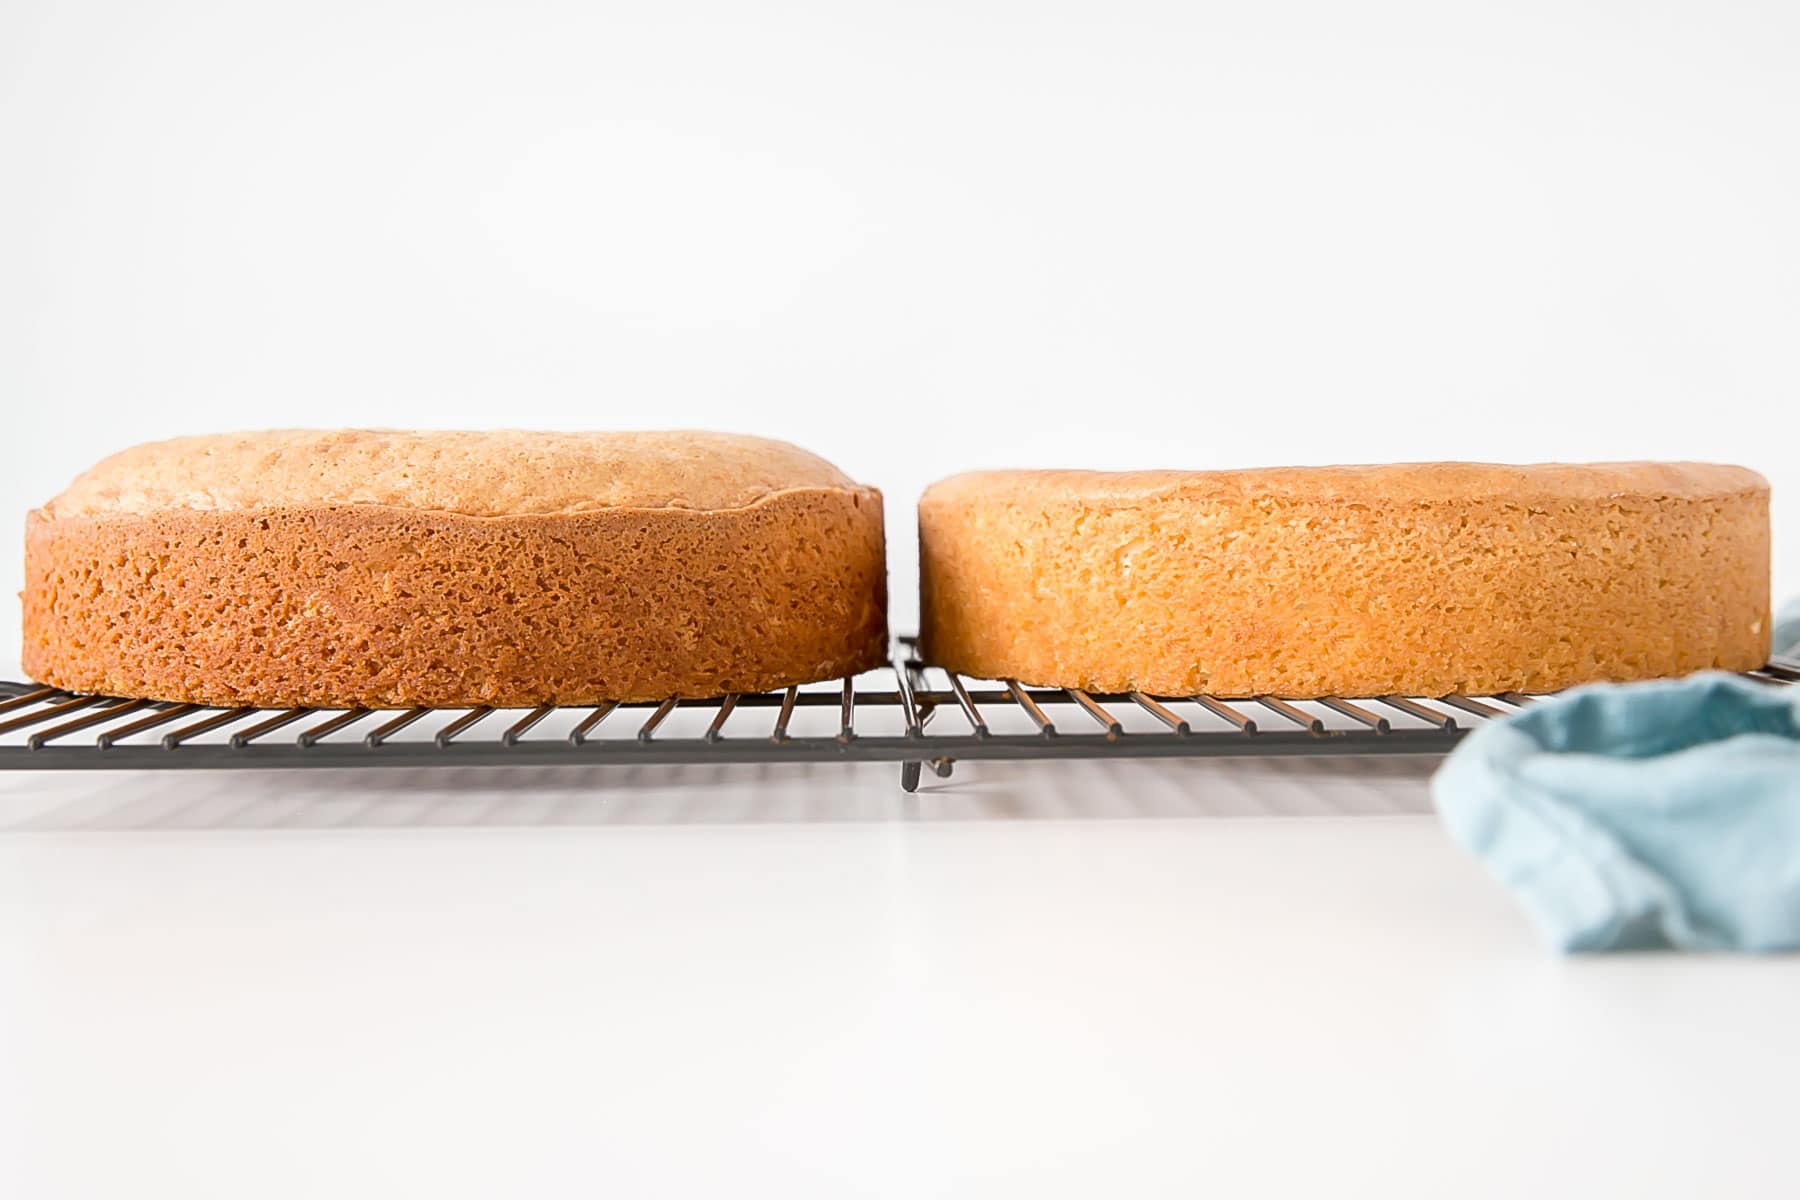
The one on the right is cooked more evenly throughout. I use these cake strips on all of my cakes and they help a LOT.
It’s important to note that using these strips will cause the cake to bake a bit slower and you’ll likely need to increase the baking time on a recipe. The baking times for my recipes all assume that baking strips are used.
Baking times vary as it is because every oven is different, so it’s important to use them only as a guideline and to know your oven.
If you only do one thing, use these strips!
I have the older model Wilton brand strips that I got at Michael’s 10+ years ago. These are ok, but pinning them on is a bit of a pain.
I found these Regency ones online that have velcro which seems like a much better option so if you’re in the market for some, I would get those!
DIY Cake Strips
If you don’t want to shell out the money for these you can easily make your own at home!
Hot Tip!
If you’re using tea towels, make sure they are fully dampened and do not use them at oven temps over 350F. You can wrap them in tin foil to prevent browning/burning.
All you need to do is cut up and old tea towel into strips and pin them onto the cake pans. If you’re really crafty you can stitch some velcro into the strips and have your own easy-to-use version.
Tea Towel Trick
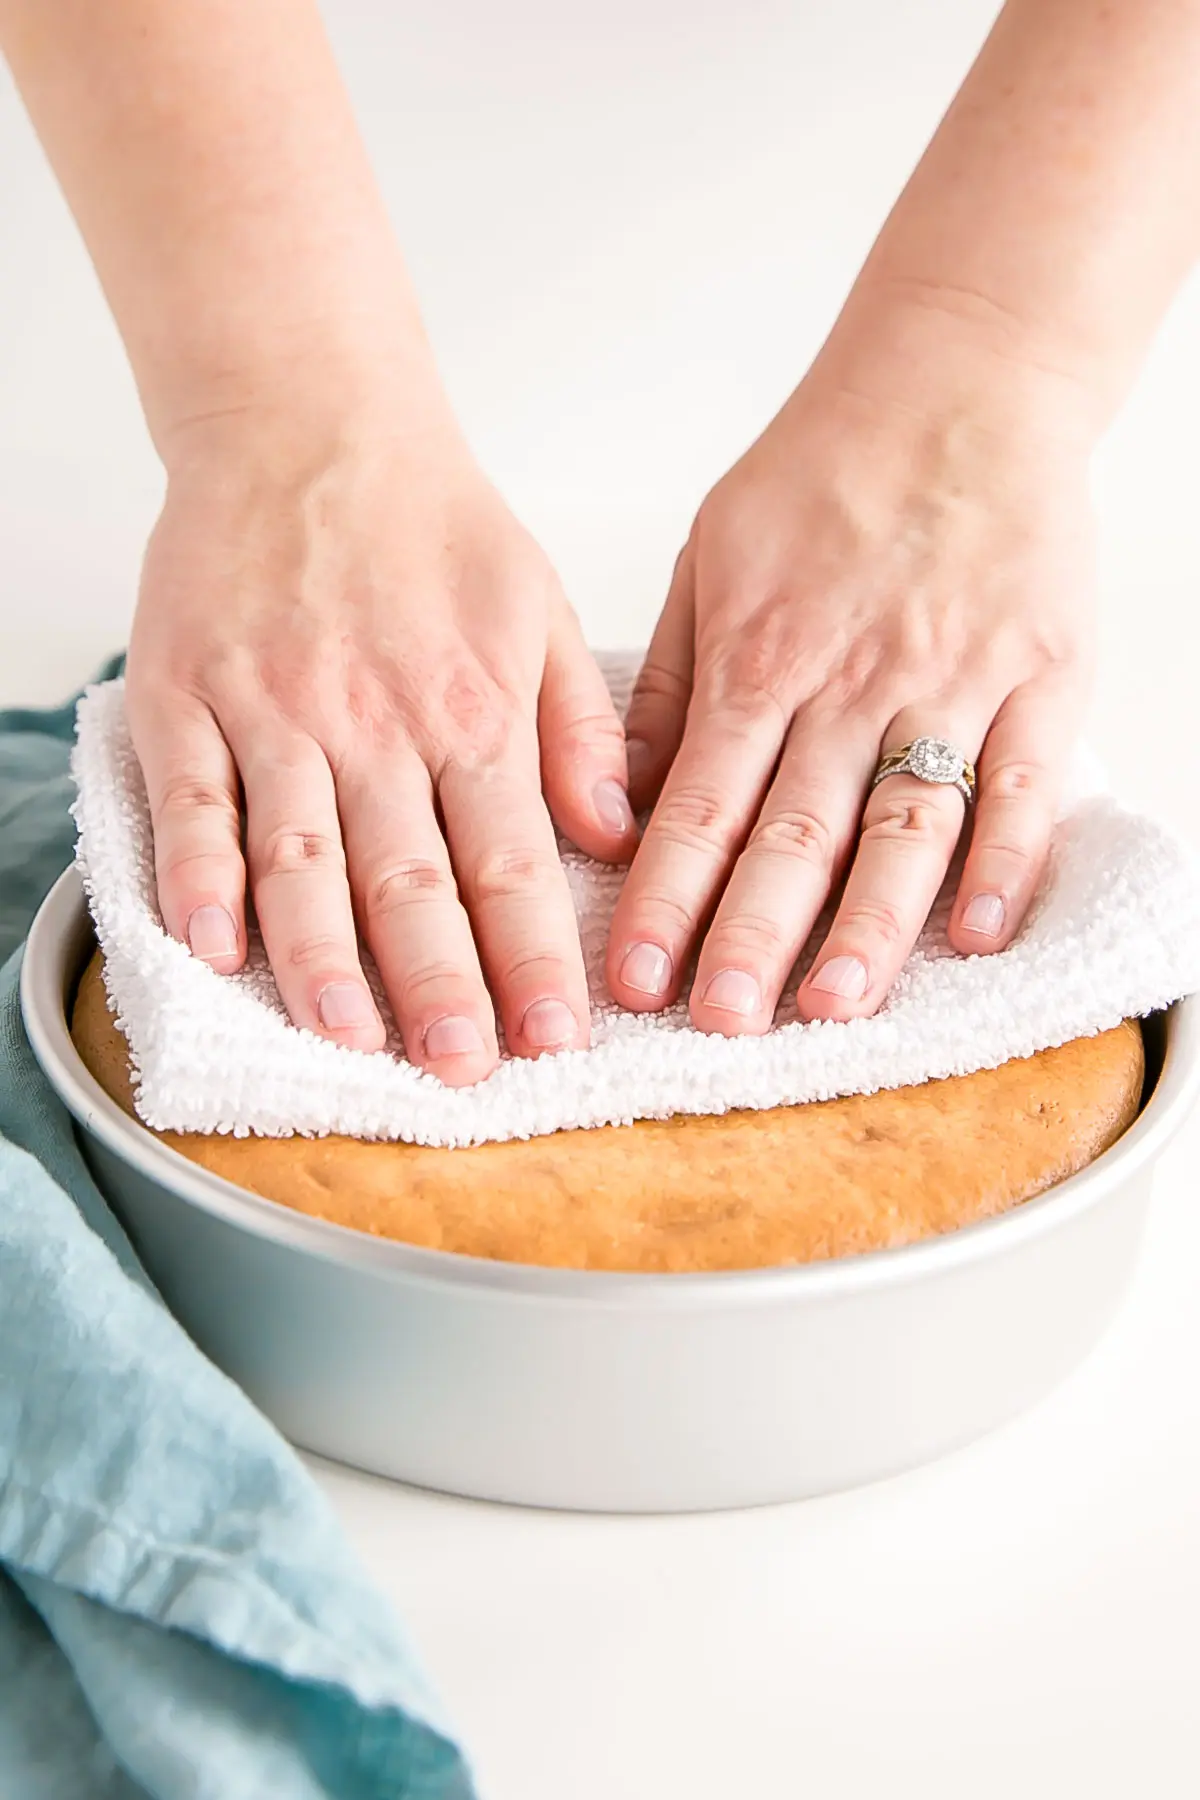
If the cakes are still a tiny bit domed after using the bake even strips, there’s another thing you can do as soon as they come out of the oven. Grab a (clean) tea towel and lightly press down on any domes.
Be careful, as the pans will be hot and there will be steam coming out as you press down on the cakes. Don’t press too hard or your cake will cave in!
Please Note
The method above only works on small domes and only straight out of the oven.
Since I always use the cake strips, my domes are never really that high to begin with, but the tea towel technique helps with that last little bit.
I don’t know how well it would work on a cake with a large dome. By the time I was done taking pictures, the domed cake was starting to cool, so pressing down on it didn’t help too much.
I hope you found these tips helpful. Cake strips really are one of my very favorite tools/hacks in the baking kitchen. They make my life easier so I hope you give them a try!
Quick links to help you bake Flat Cake Layers:
- The secret to getting flat cake layers: Evenbake Strips
- My very favorite kitchen scale: Jennings Kitchen Scale
- The best aluminum cake pans: Fat Daddios
- If you need to level your cakes or cut them in half: Cake Leveler
How to Bake Flat Cakes
Ingredients
Vanilla Cake:
- 2 1/4 cups all-purpose flour
- 2 1/4 tsp baking powder
- 3/4 tsp salt
- 3/4 cup unsalted butter room temperature
- 1 1/2 cup granulated sugar
- 3 large eggs room temperature
- 1 1/2 tsp vanilla extract
- 1 cup buttermilk or whole milk, room temperature
Vanilla Buttercream:
- 6 cups powdered sugar sifted
- 2 cups unsalted butter room temperature
- 2 tsp vanilla extract or flavoring of your choice
- 4 Tbsp heavy whipping cream
Instructions
Vanilla Cake:
- Preheat oven to 350F. Grease and flour two 8" cake rounds and line with parchment.
- In a medium bowl, whisk flour, baking powder, and salt until well combined. Set aside.
- Using a stand mixer fitted with a paddle attachment, cream butter and sugar on med-high until pale and fluffy (approx 3mins). Reduce speed and add eggs one at a time fully incorporating after each addition. Add vanilla.
- Alternate adding flour mixture and buttermilk, beginning and ending with flour (3 additions of flour and 2 of milk). Fully incorporating after each addition.
- Distribute batter evenly between the two pans. Place damp baking strips around the bottoms of the cake pans.
- Bake for 30-35mins or until a toothpick inserted into the center comes out mostly clean.
- Place cakes on a wire rack to cool for 10mins then turn out onto wire rack to cool completely.
Vanilla Buttercream:
- Prepare a stand mixer with a whisk attachment. Whip butter until creamy.
- Reduce speed to low and add in icing sugar 1 cup at a time until well blended. Increase speed to med and beat for 3 minutes.
- Add vanilla and 2 Tbsp cream and continue to whip on medium for 1 minute. Add more cream as needed until desired consistency is reached.
- Whip until the frosting is smooth and silky.
Assembly:
- Place one layer of cake on a cake stand or serving plate. Top with approximately 1 cup of buttercream. Repeat with remaining layer and crumb coat the cake. Chill for 20mins.
- Frost the top and sides of the cake and smooth with a bench scraper.
- Decorate as desired.
Notes
Originally published Aug 2014. Updated with new content April 2020.



Shelah says
Cake strips for 13″ by 9″ pan?
Olivia says
Hi Shelah! You may have to use two together or make your own.
Mary G says
I spent all kinds of money on these baking strips and they kept catching on fire. I would even soak them for 15 minutes before baking and that is when the last set caught on fire and burnt to the point I had to throw them away. I was one heart beat away from getting the kitchen extinguisher out from under the sink and letting loose!
Olivia says
Hi Mary! It sounds like you got a defective set. It might be a good idea to return them for a refund and/or contact the manufacturer to let them know.
Lidia S says
I have been using this recipe to bake flat cakes and it is guaranteed to bring the same result every single time. It never lets you down.
Olivia says
Hi Lidia! So happy to hear it works well for you 🙂
Jill Welch says
This worked so well for me, thanks Liv! I used an old bath towel to cut strips from, as in my family, “tea towels” are thin dish towels and I didn’t think they would work as well (or hold water as long) as a turkish-type towel. I just used a straight pin to fasten mine, which worked fine.
Olivia says
Hi Jill! That’s so great! I’m so happy it worked well for you 🙂
Ruth says
Hi! I’ve been baking cakes for years but they’ve always had a dome…I went looking for a solution online and found your blog post so bought a pair of these cake strips and tried them. They were very successful in giving a level bake but I found that my sponge was very delicate when I took it out, it nearly fell to pieces when I took it out of the tin. Have you had this happen? I tested it in a couple of spots when it came out and the prick was clean every time and it wasn’t over cooked either…
Olivia says
Hi Ruth! The only times I’ve had that happen was when I was recipe testing and something was off — usually too much fat. The cake strips can make the sides a little crumbly sometimes as they don’t cook as fast but it shouldn’t cause the whole cake to fall apart like that.
PegP says
I bought a set of the cake strips so I could have flat cakes. I’ve used them once and went back to cutting the tops off. The strips didn’t work at all.
Olivia says
Hi PegP! The strips work really well if used correctly and bake perfectly flat cakes. Did you soak them enough? Were they tight around the pans?
Cheryl Hansen says
I read your post. I’m very intrigued with the strip idea, but won’t they catch fire ? Sounds scary.
Olivia says
Hi Cheryl! The store-bought ones are designed to be in the oven but you must soak them first. I recommend those over making your own from tea towels if you’re concerned. I hope you give it a try. It’s a game changer!
Nicole says
love this cake recipe and your swiss meringue recipes. I use them with all my cakes! they are so light and fluffy as I dislike the heaviness of some icings.
Can I marble this with your homemade vanilla cake batter? I have never marbled cake before, but a coworker requested it.
Olivia says
Hi Nicole! You can easily add cocoa powder to a portion of the cake batter to marble it. It would be delicious!
Faith says
This is one of the best cakes lessons ai have had.Good job and keep up.Well detailed and understandable.Love your work,from Nairobi -Kenya
Olivia says
Thanks so much Faith! I’m glad you loved it 🙂
Jenny says
Looking for a Orange & poppyseed cake recipe for a 21st birthday cake ……hoping this will be suitable to decorate up
Olivia says
Hi Jenny! Give this one a try 🙂 https://livforcake.com/orange-poppy-seed-cake-mascarpone-frosting/
MJ says
Wow!!! I can’t believe I have only found this now…I made the stripes with old rags and it worked beautifully!!
Thank you so much!!
Olivia says
Awesome! So glad you tried it 😀
Amy Dumanowsky says
I have a 6×3 pan. Using the strips I cooked it at 350 for 37 minutes. Looked done so I took it out to let it cool. I came back and the middle sunk in and it wasn’t cooked all the way. How much longer should I have cooked it?
Olivia says
Hi Amy! Did you make a full recipe but only one 6″ pan? That would be a very tall cake and would take a long time to bake. How long is hard to say as ovens vary. Here are my tips for testing if a cake is done:
1. Peek through the oven window. To see if the cakes are a nice golden brown (doesn’t really work for chocolate cakes).
2. Nudge the oven. Gently nudge your oven (assuming it’s free-standing and not built-in). If there is any jiggle in the center of the cakes, leave the oven door closed and bake for a few minutes longer.
3. Nudge the pans. Open the oven and gently nudge the pans. If there is any jiggle in the center of the cakes, close the oven door and bake for a few minutes longer.
4. Poke the cake. Gently poke the top of the cake with your finger. If the cake is firm and springs back, it’s ready for the next step.
5. Toothpick test. Insert a toothpick into the middle of the cake. When there are a few crumbs on the toothpick, the cake is ready. You want crumbs on there because the cake keeps cooking when you take it out of the oven.
Kathy Patten says
Hi! I haven’t tried your recipes yet, but was hoping you could answer a question. I’m trying to bake a layer cake from scratch, and all 4 have not raised. The ingredients are similar to yours, but they are all only about 1 inch high on the sides and a little taller in the middle. My baking powder is fresh and I used room temperature dairy ingredients. I’m so disappointed 😢.
Thank you for any help you can give.
Kathy
Olivia says
Hi Kathy! Did you use the same pan size that the recipe called for? If you want to send me the recipe I can try to help but it’s hard if it’s not one I wrote and tested myself.
Savannah says
Love that this tip was shared! I was drooling over your Black Forest cake recipe and noticed a link to this tip and wondered what it would be- I was so very pleasantly surprised! My mom actually designed Velcro-backed cake strips manyyyyy years ago that she handmade and used for her home-based cake business & also gifted to me and my grandma. Cake strips are definitely a must-have for all cake baking and I feel that not enough people know about them! I use them for basically every cake that I make and sometimes for certain breads and other desserts. So, so helpful!
Olivia says
Hi Savannah! They are so great right?? Love not having to level cakes 🙂
Dawn Hagy says
Is there a reason you prefer baking powder over baking soda? Is that one reason your cakes bake flatter?
Olivia says
Hi Dawn! It’s just what I like to use. I find baking soda can sometimes give off a bit of a metallic taste.
Annie says
I keep making cakes that sink in the middle. My baking powder/soda isn’t out of date, I’m not opening my oven mid-bake, I don’t over-mix the batter, etc. I am going to buy an oven thermometer to make sure my oven temp isn’t way off. Are there any other culprits you think could contribute to this?
I love your recipes!
Olivia says
Hi Annie! Are you at high elevation by chance? Sinking in the oven is usually due to either too much raising agent or opening the oven before the cakes are set. If that’s not it then elevation could be a factor. If so, here are some tips:
You will need to make some adjustments and it might take some experimentation on your part. I’ve never baked in high altitude, but here are some tips: https://www.kingarthurflour.com/learn/high-altitude-baking.html
Here are some general guidelines if you’re at 3000ft:
• Increase the oven temperature by 15-25F
• Decrease baking time by 5-10mins.
• Decrease sugar by 1 Tbsp per cup
• Decrease baking powder by 1/8 tsp per cup
• Increase liquid by 1-2 Tbsp per cup
• Add 1 Tbsp of flour
If you’re higher up than 3000ft, you will need to increase/decrease the ingredients incrementally. Again, it will require some experimentation. There are some great resources for high altitude baking out there.
Mark says
I love this cake, icing a little tricky but if you follow your direction it works out great. I do have a question.
How do I increase this receipt to a three layer cake in 9 inch pans?
Your website is awesome!!!!
Thanks
Olivia says
Hi Mark! I’m so glad you love this one 🙂 Converting pan sizes is always tricky. Here are some sites I use as a guideline:
http://www.joyofbaking.com/PanSizes.html
https://www.cookipedia.co.uk/recipes_wiki/Cake_tin_conversion_charts
Based on that I would double the recipe for three 9″ pans. You can change the Servings to 24 to get the amounts.
Karen says
Hi,
Thanks so much for this great looking recipe. I plan to make it for Christmas and am not an experienced baker. I am ordering the 6” pans. Should I get 2 or 3” high? Also, do you recommend the type where the bottom can be removed or not?
Thanks so much!
Ksrrn
Olivia says
Hi Karen! All of mine are 2″ tall, but 3″ is totally fine too and gives you a bit more options if you want to bake taller cakes in the future. Mine don’t have removable bottoms. While that can make it easier to remove the cakes from the pans, I worry they wouldn’t work great for some thinner batters (my chocolate cake). I would stick with the regular ones. Make sure you prep your pans well (I use cake release: https://livforcake.com/homemade-cake-release/) and then line the bottoms with parchment. And if you’d like an even easier recipe you can check out my Almost Scratch Cake: https://livforcake.com/almost-scratch-cake/ Let me know how it turns out!
Mandy says
Please help! The top edge on the sides of my sponge cakes always always shrink away from the tin a bit so the sides look smaller towards the top than the bottom. This makes them a weird shape at the sides. Would strips help this? I can’t trim the sides as they are nit iced cakes. I am baking for a local café so this is rather embarrassing (I’m supposed to know what I’m doing 😬)
Olivia says
Hi Mandy! That is usually caused by either overmixing or overbaking I believe. The strips will definitely help bake the cake more evenly but make sure to not overmix/overbake too.
David Lawrence says
I have been doing this trick for more than 40 years. My wife cut up old terry bath towels and made double thick lengths that worked with my various cake pans. I would wet them and run the strip through two of my fingers to get the heavy water out of them. Wrap the strip around the pan and fasten with a binder clip or similar device and bake. The wet wrap keeps the pan edge cool until the cake achieves it’s full rise I haven’t cut a rounded cake top off in decades.
Olivia says
So great to not have to trim the tops, right? Thanks for the DIY tips David!